Okta using OIDC
Follow the steps below to configure single sign-on (SSO) for Claris Studio with Okta using OpenID Connect (OIDC). To establish trust between your identify provider and a Claris Studio team, you’ll need to:
-
Add an OIDC application.
-
Enter the application details.
-
Enter the client secrets in Claris Studio.
Open the Claris Studio setup page
-
Sign in to your Claris Studio team.
-
Click the Users tab on the left, then click Configure External IdP.

-
In the Configure External Identity Provider dialog, for Protocol, choose OIDC. Keep this page open to come back to later.
Create an OIDC app integration
-
Sign in to your Okta administrator account at https://<okta-subdomain>.okta.com/admin/getting-started where <okta-subdomain> is your business’s Okta subdomain.
-
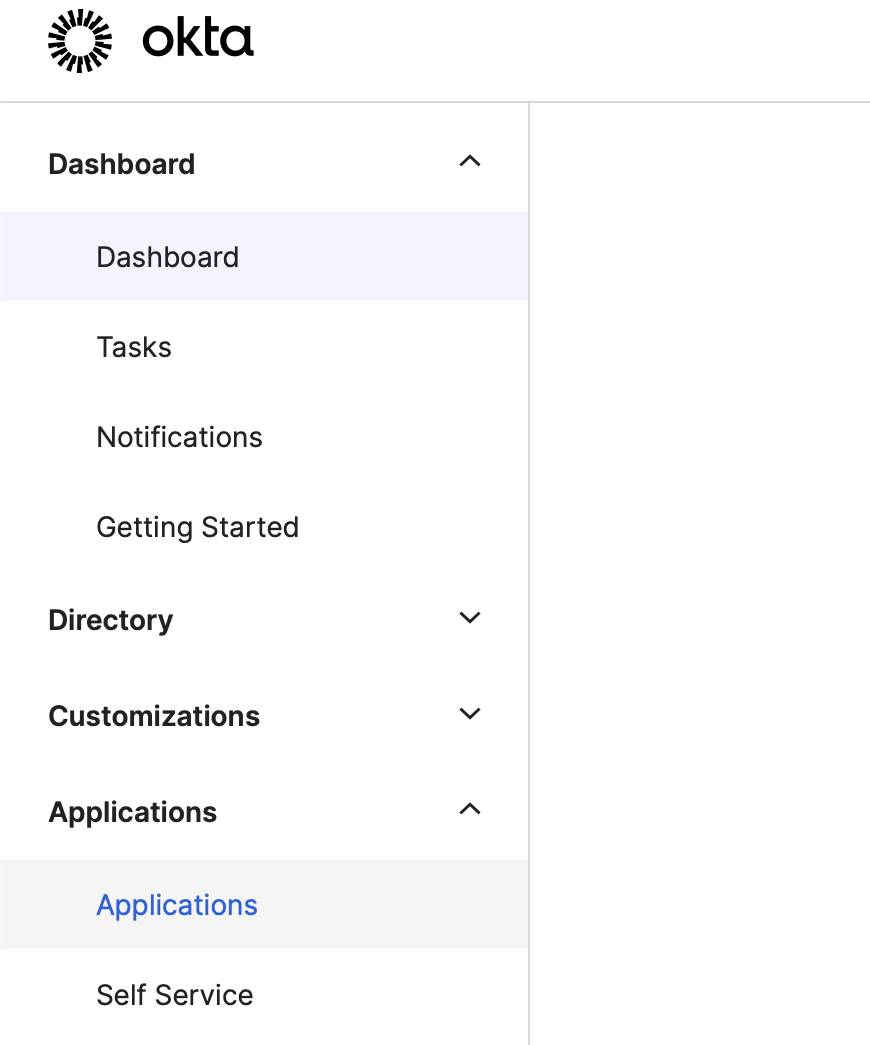
In the left sidebar, click the Applications > Applications.
-
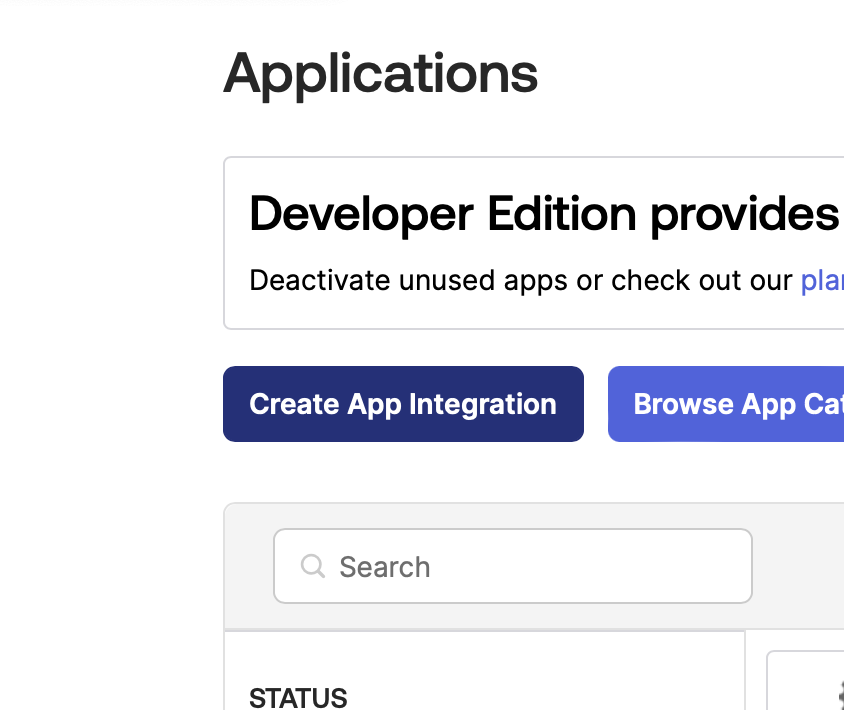
On the Applications page, click Create App Integration.
-
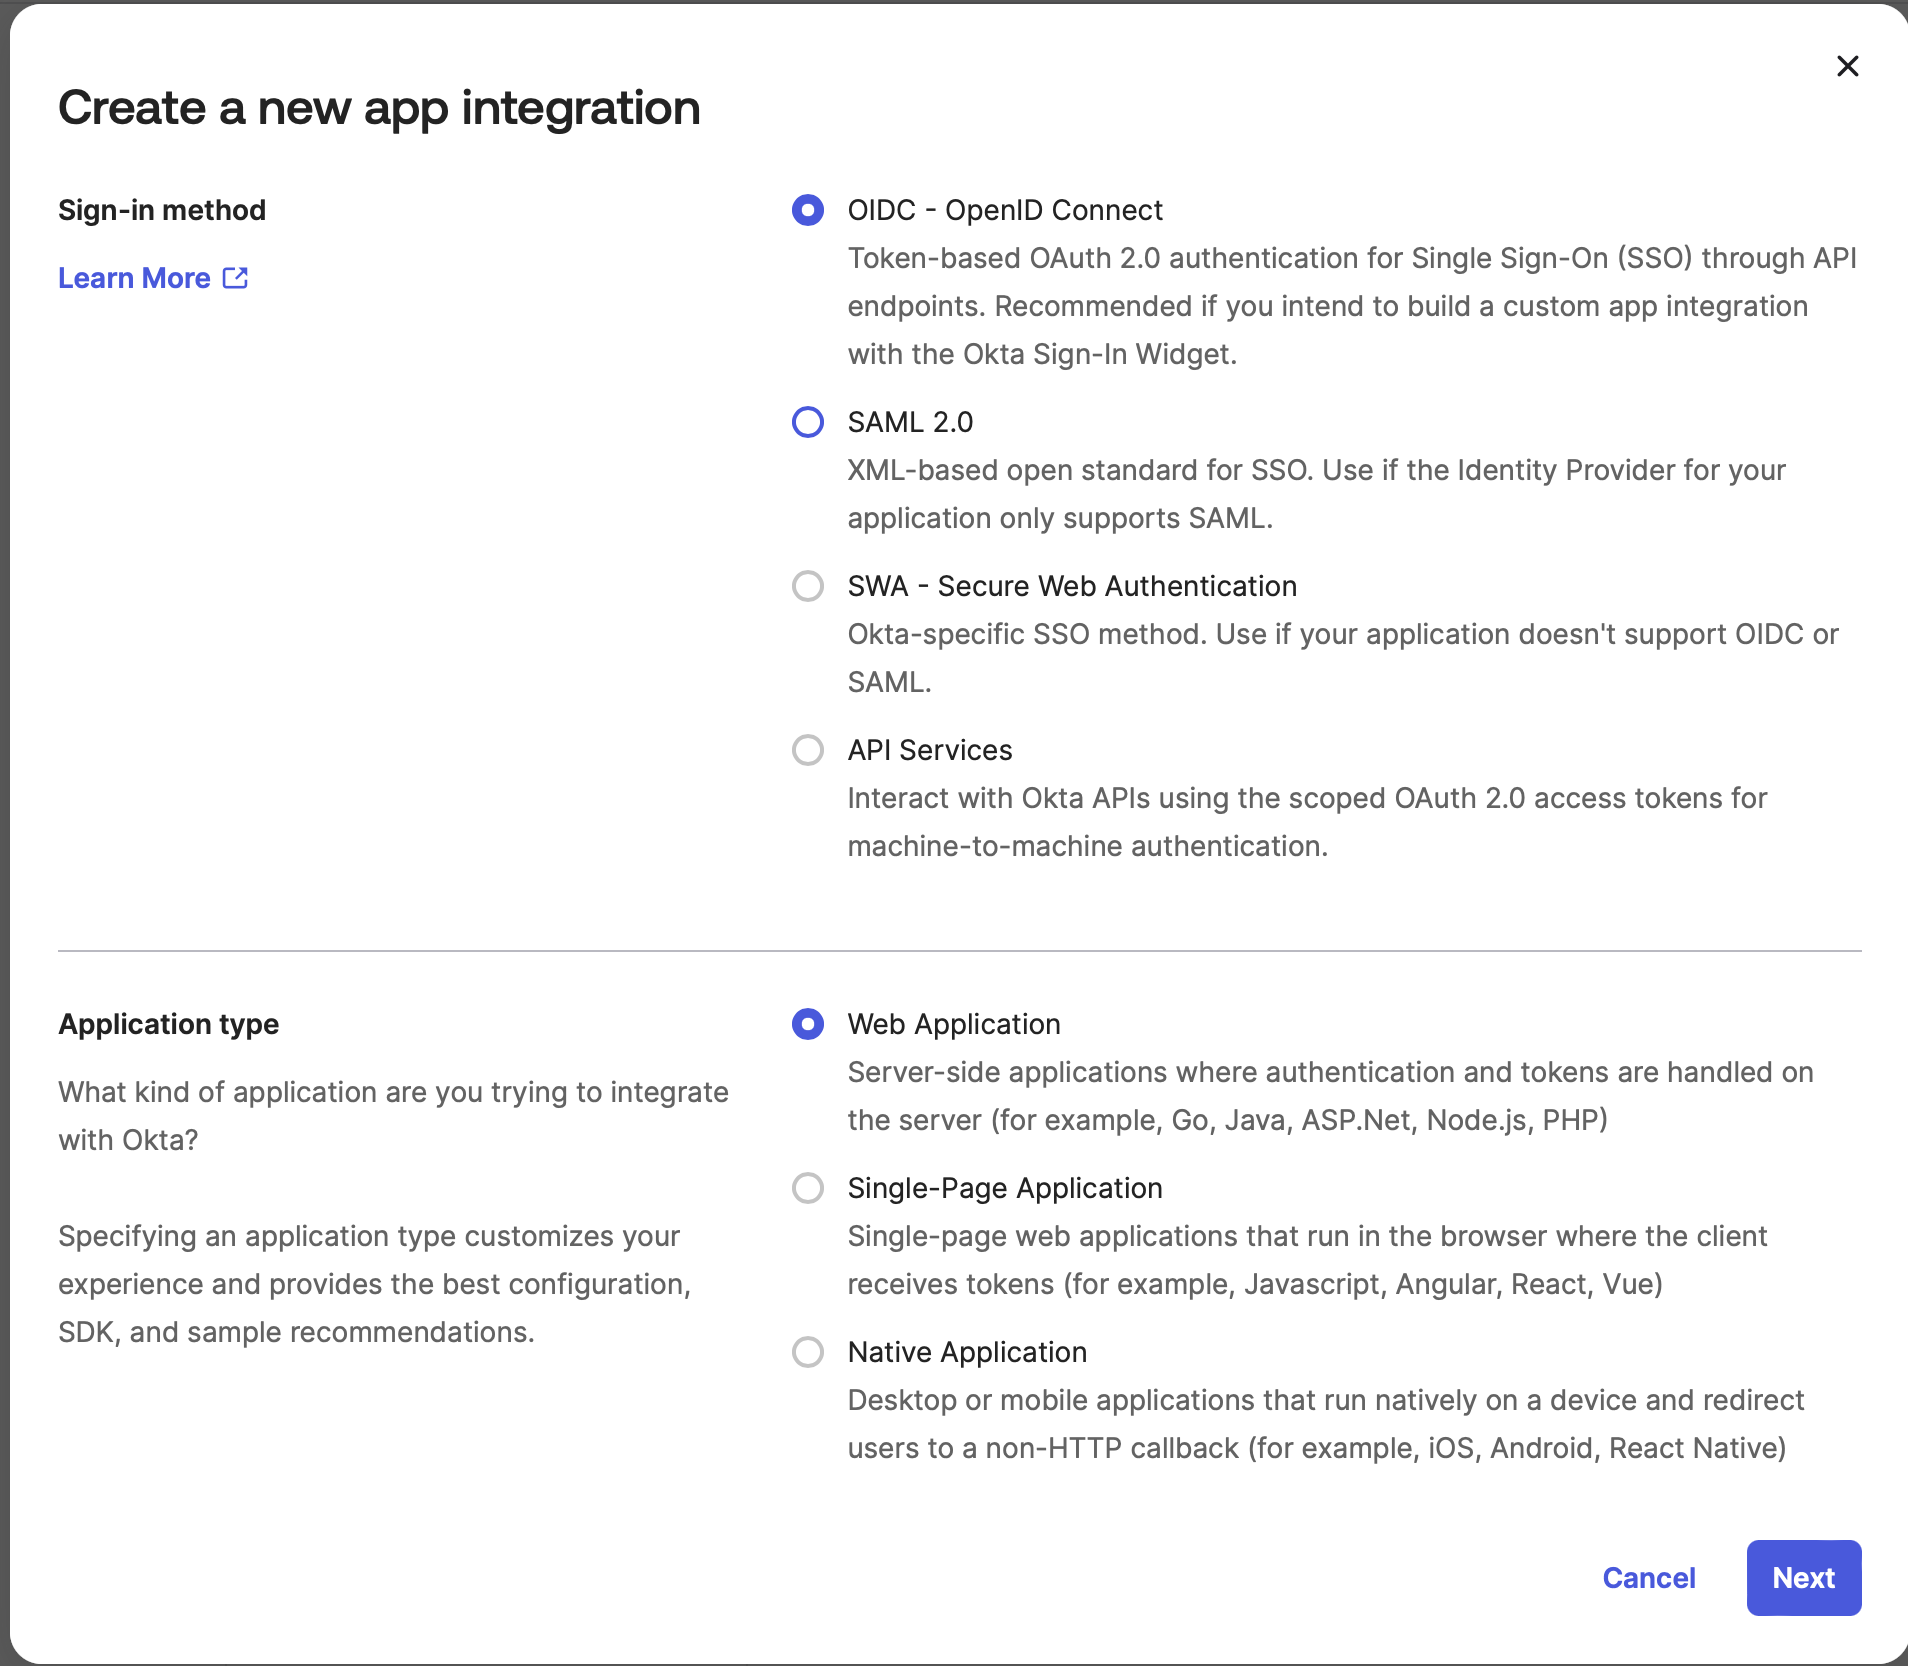
For Sign-in method, select the OIDC - OpenID Connect option. For Application type, select the Web Application option. Click Next.
Edit OIDC application information
-
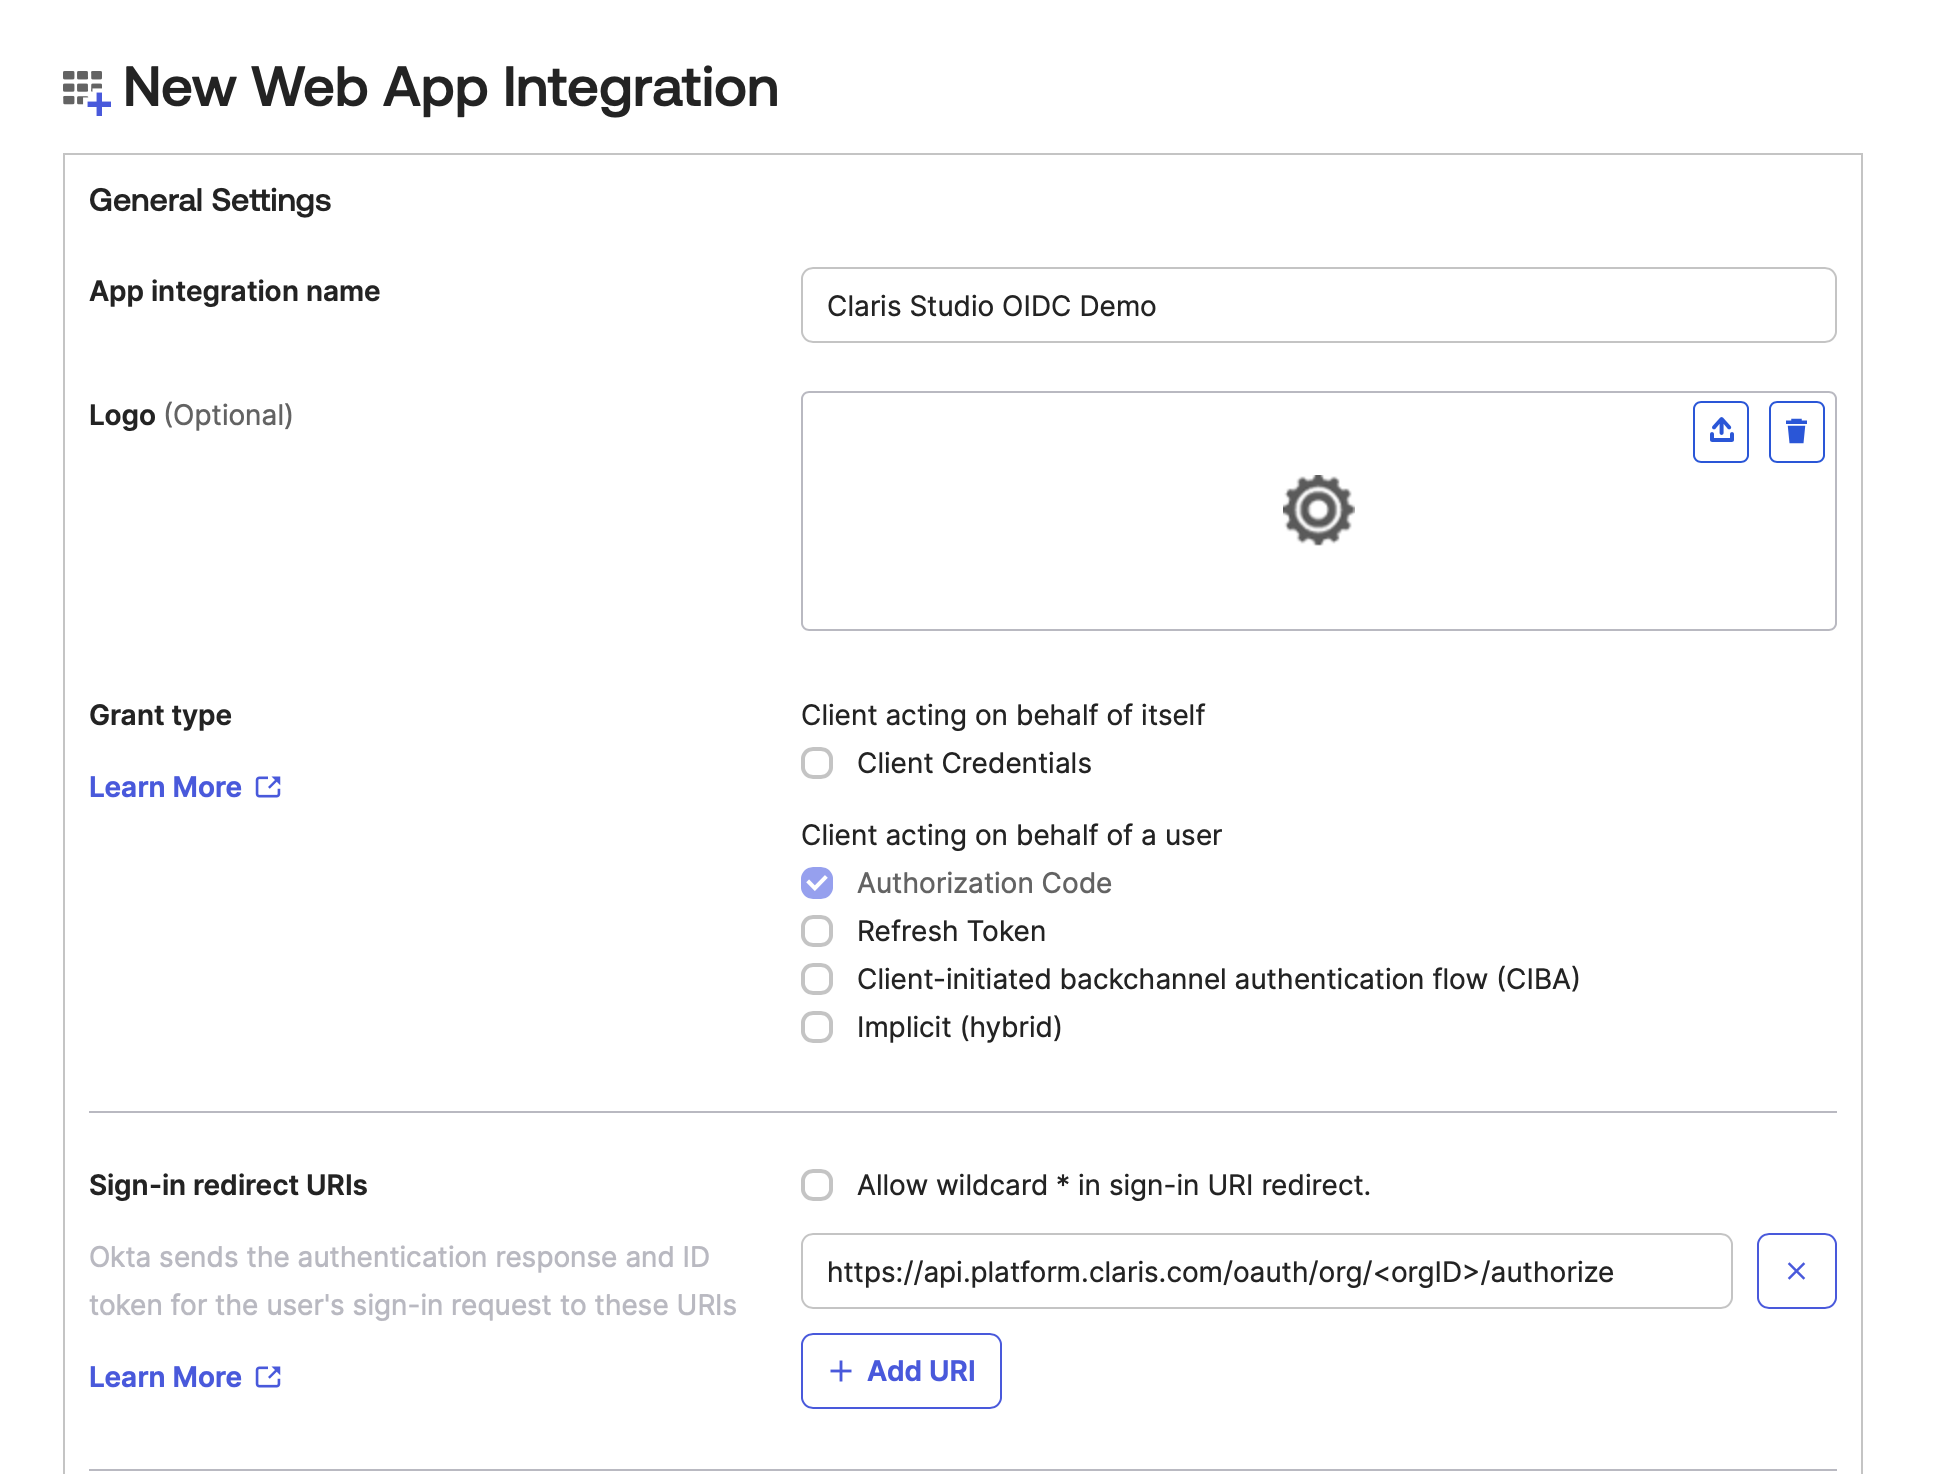
You’ll now see a form to add new data. For App integration name, enter a name that will help you distinguish this integration from any others.
-
In Claris Studio, copy Application Redirect URL (see “Open the Claris Studio setup page” earlier) and paste it in Sign-in redirect URIs.
-
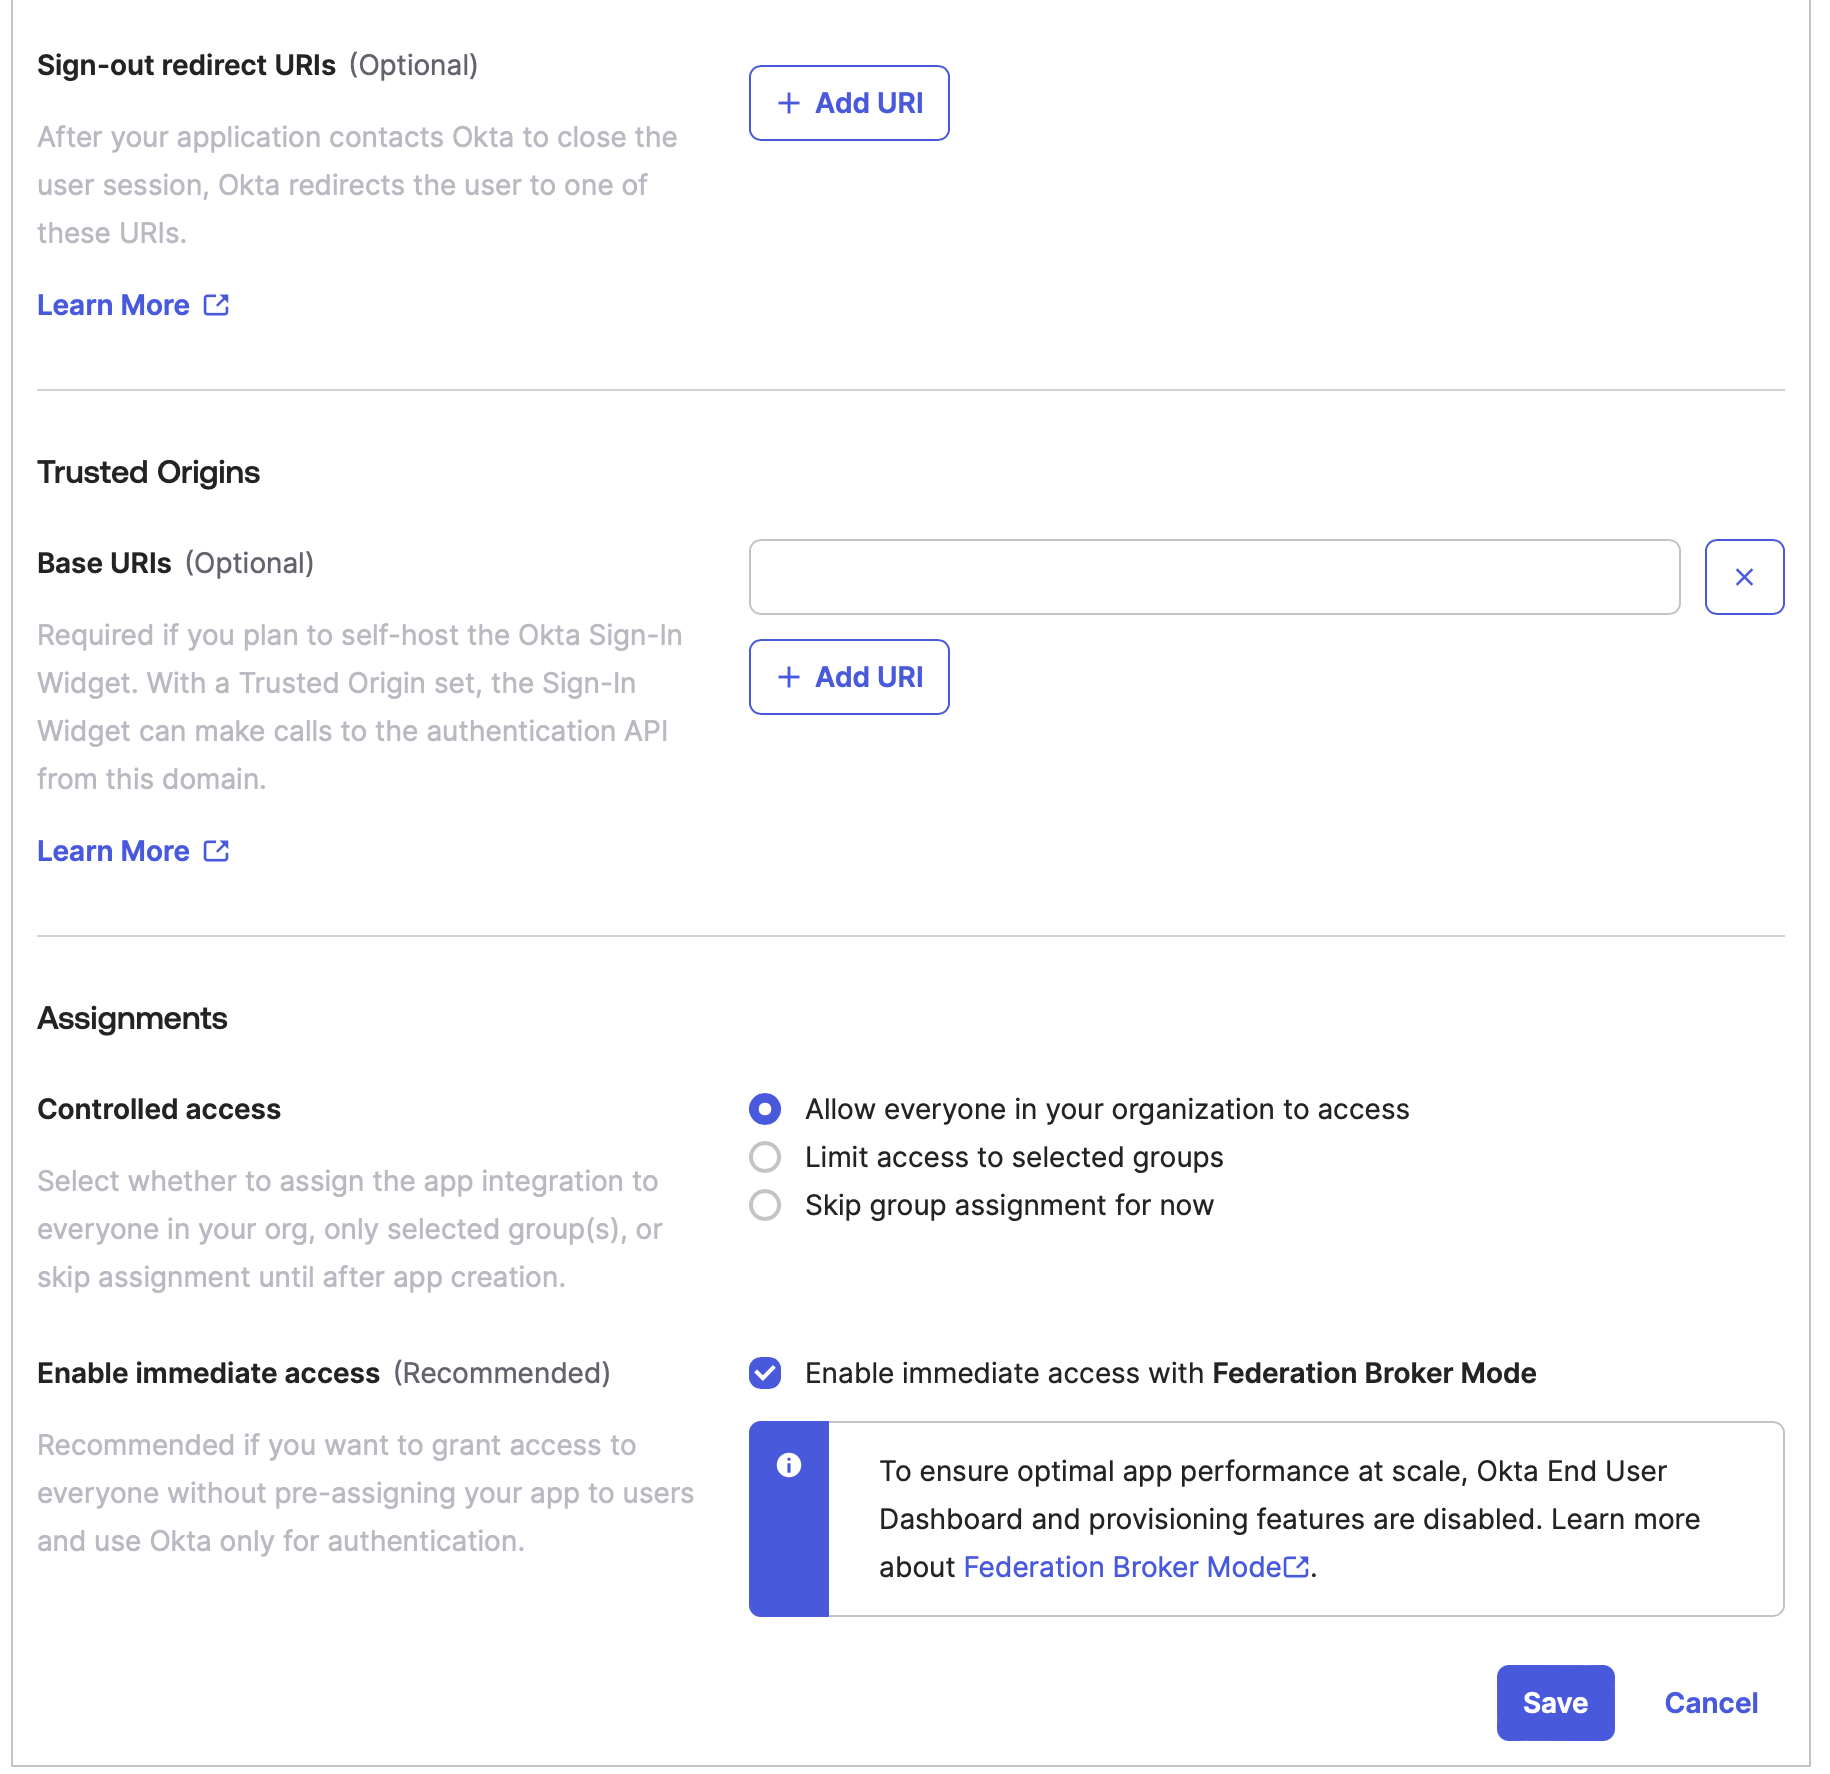
For Sign-out redirect URIs (which is optional), be sure to remove any pre-existing URIs. This section should be left empty.
-
For Controlled access, select who in your business you would like to allow to access this Claris Studio team. If you select Allow everyone in your organization to access, then also select Enable immediate access with Federation Broker Mode.
-
Click Save.
-
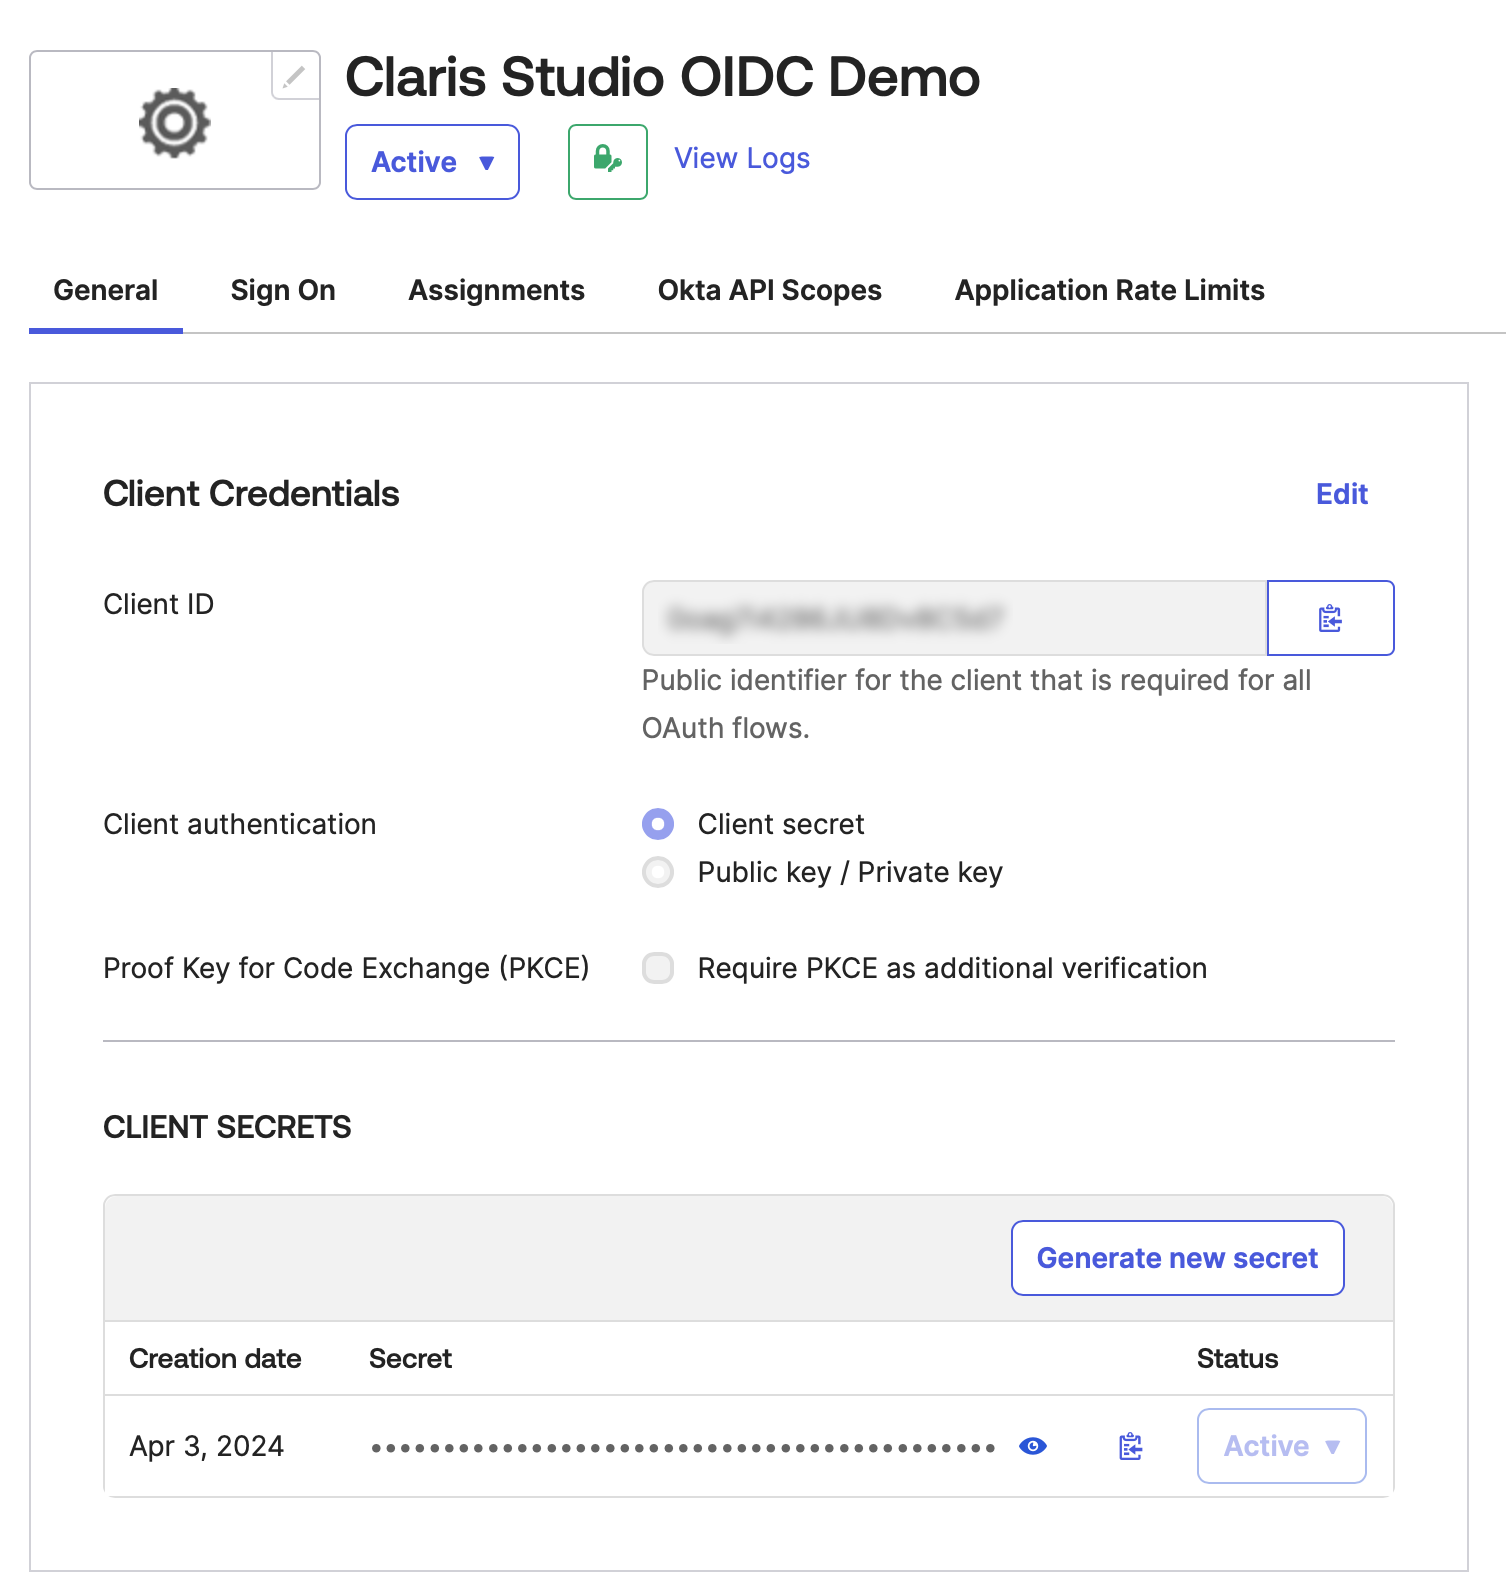
After the integration is created, go to the Client Credentials section, which has the Client ID field under it.
Copy Client ID by clicking its clipboard icon and paste it somewhere secure where you can retrieve it later.
-
Go to the Client Secrets section, which should already have a secret under it.
Like the previous step, copy the client secret by clicking its clipboard icon paste it somewhere secure where you can retrieve it later.
-
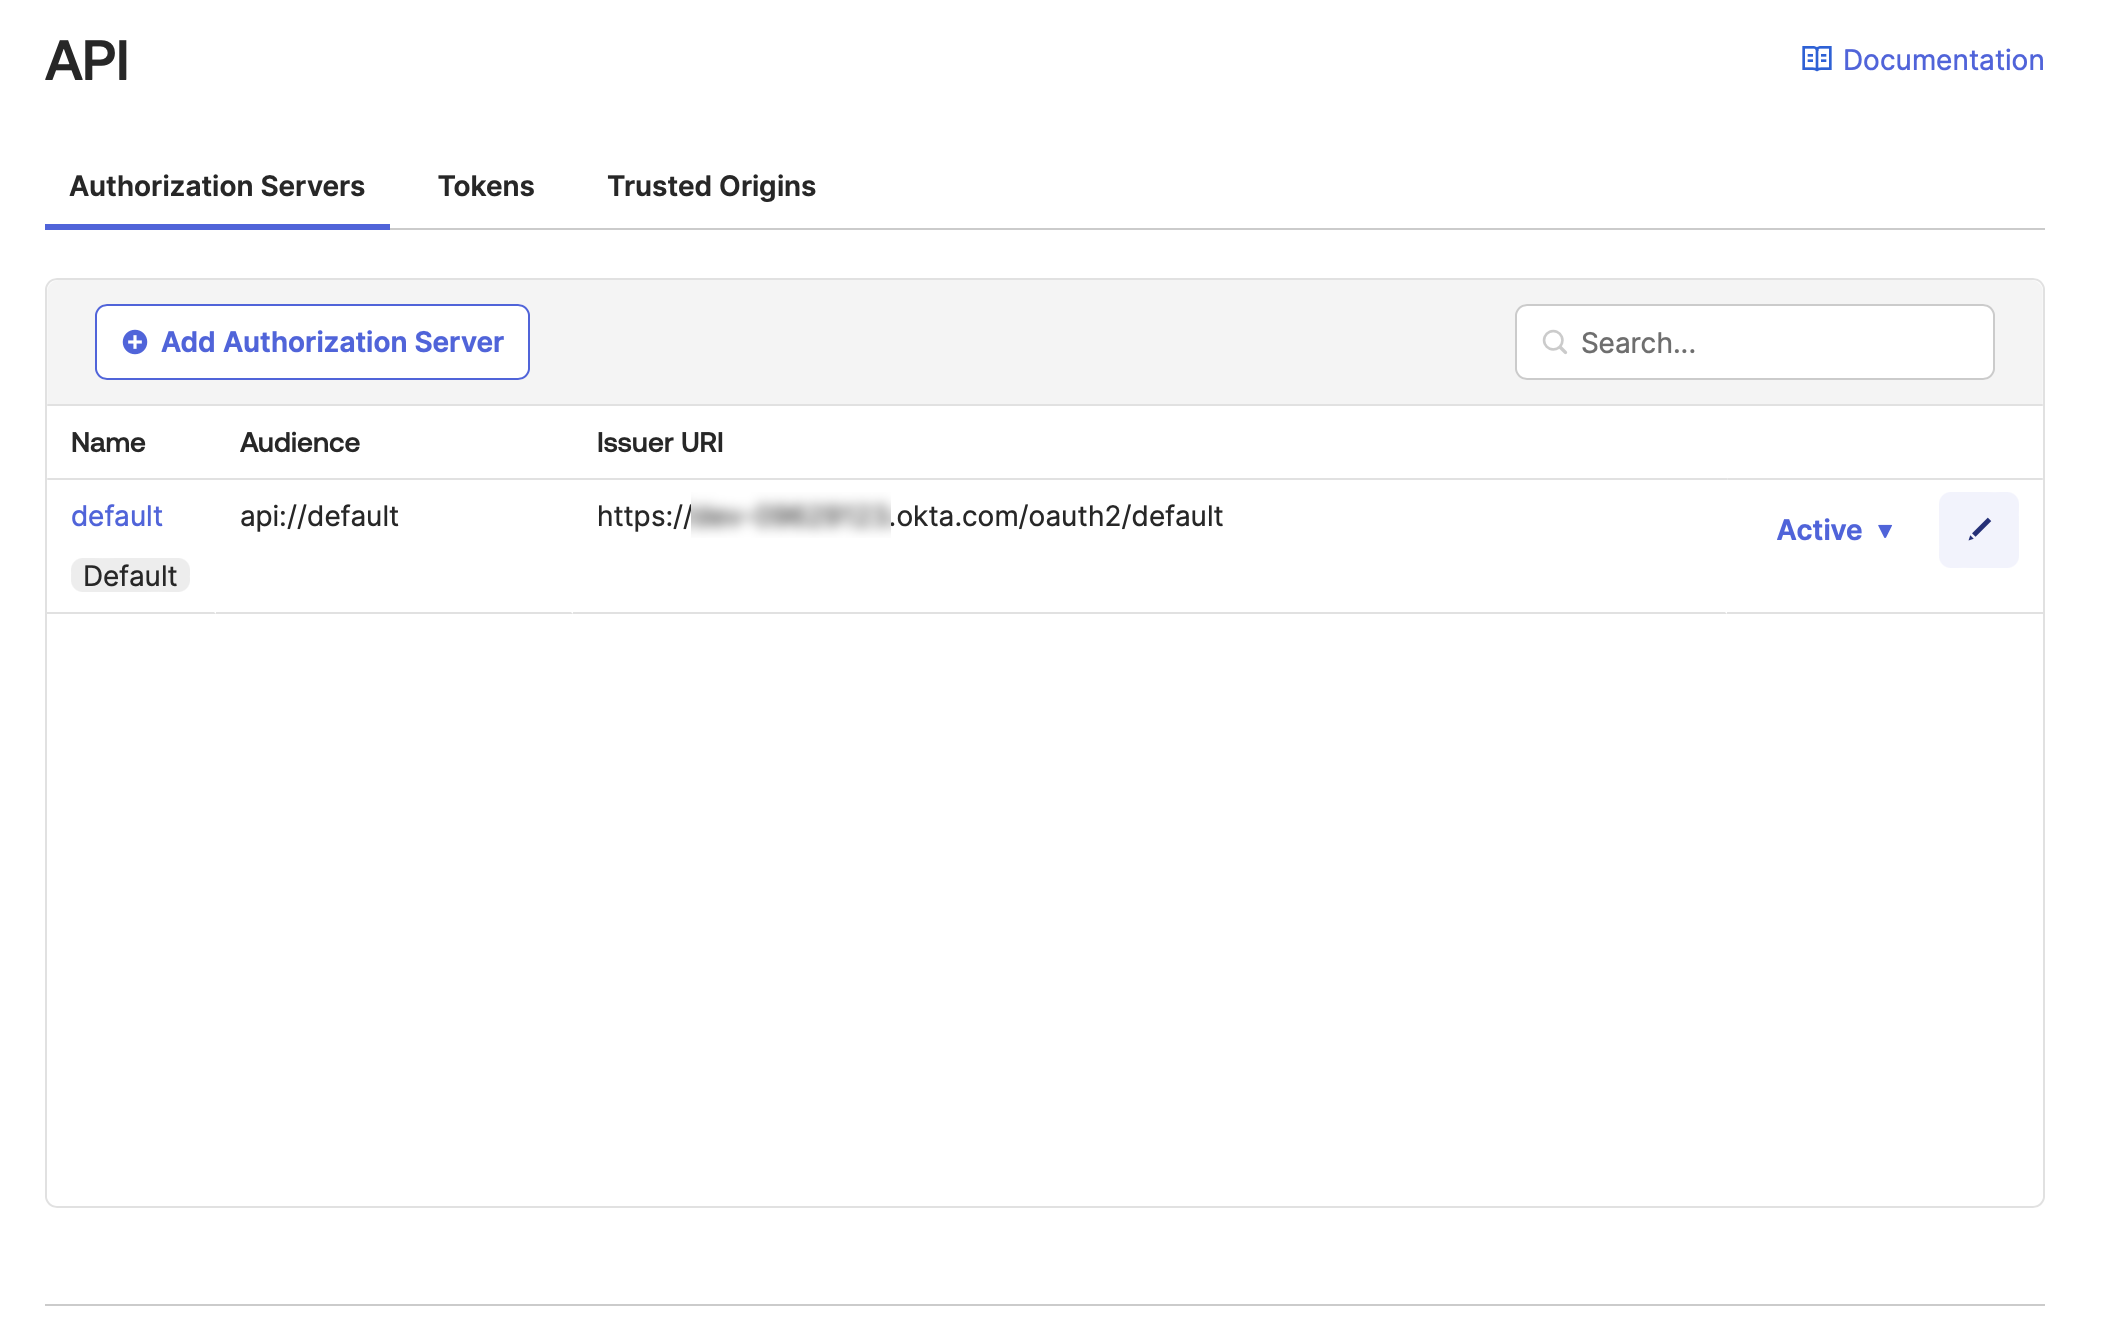
In the left sidebar, click Security > API, then click the pencil icon next to Active.

-
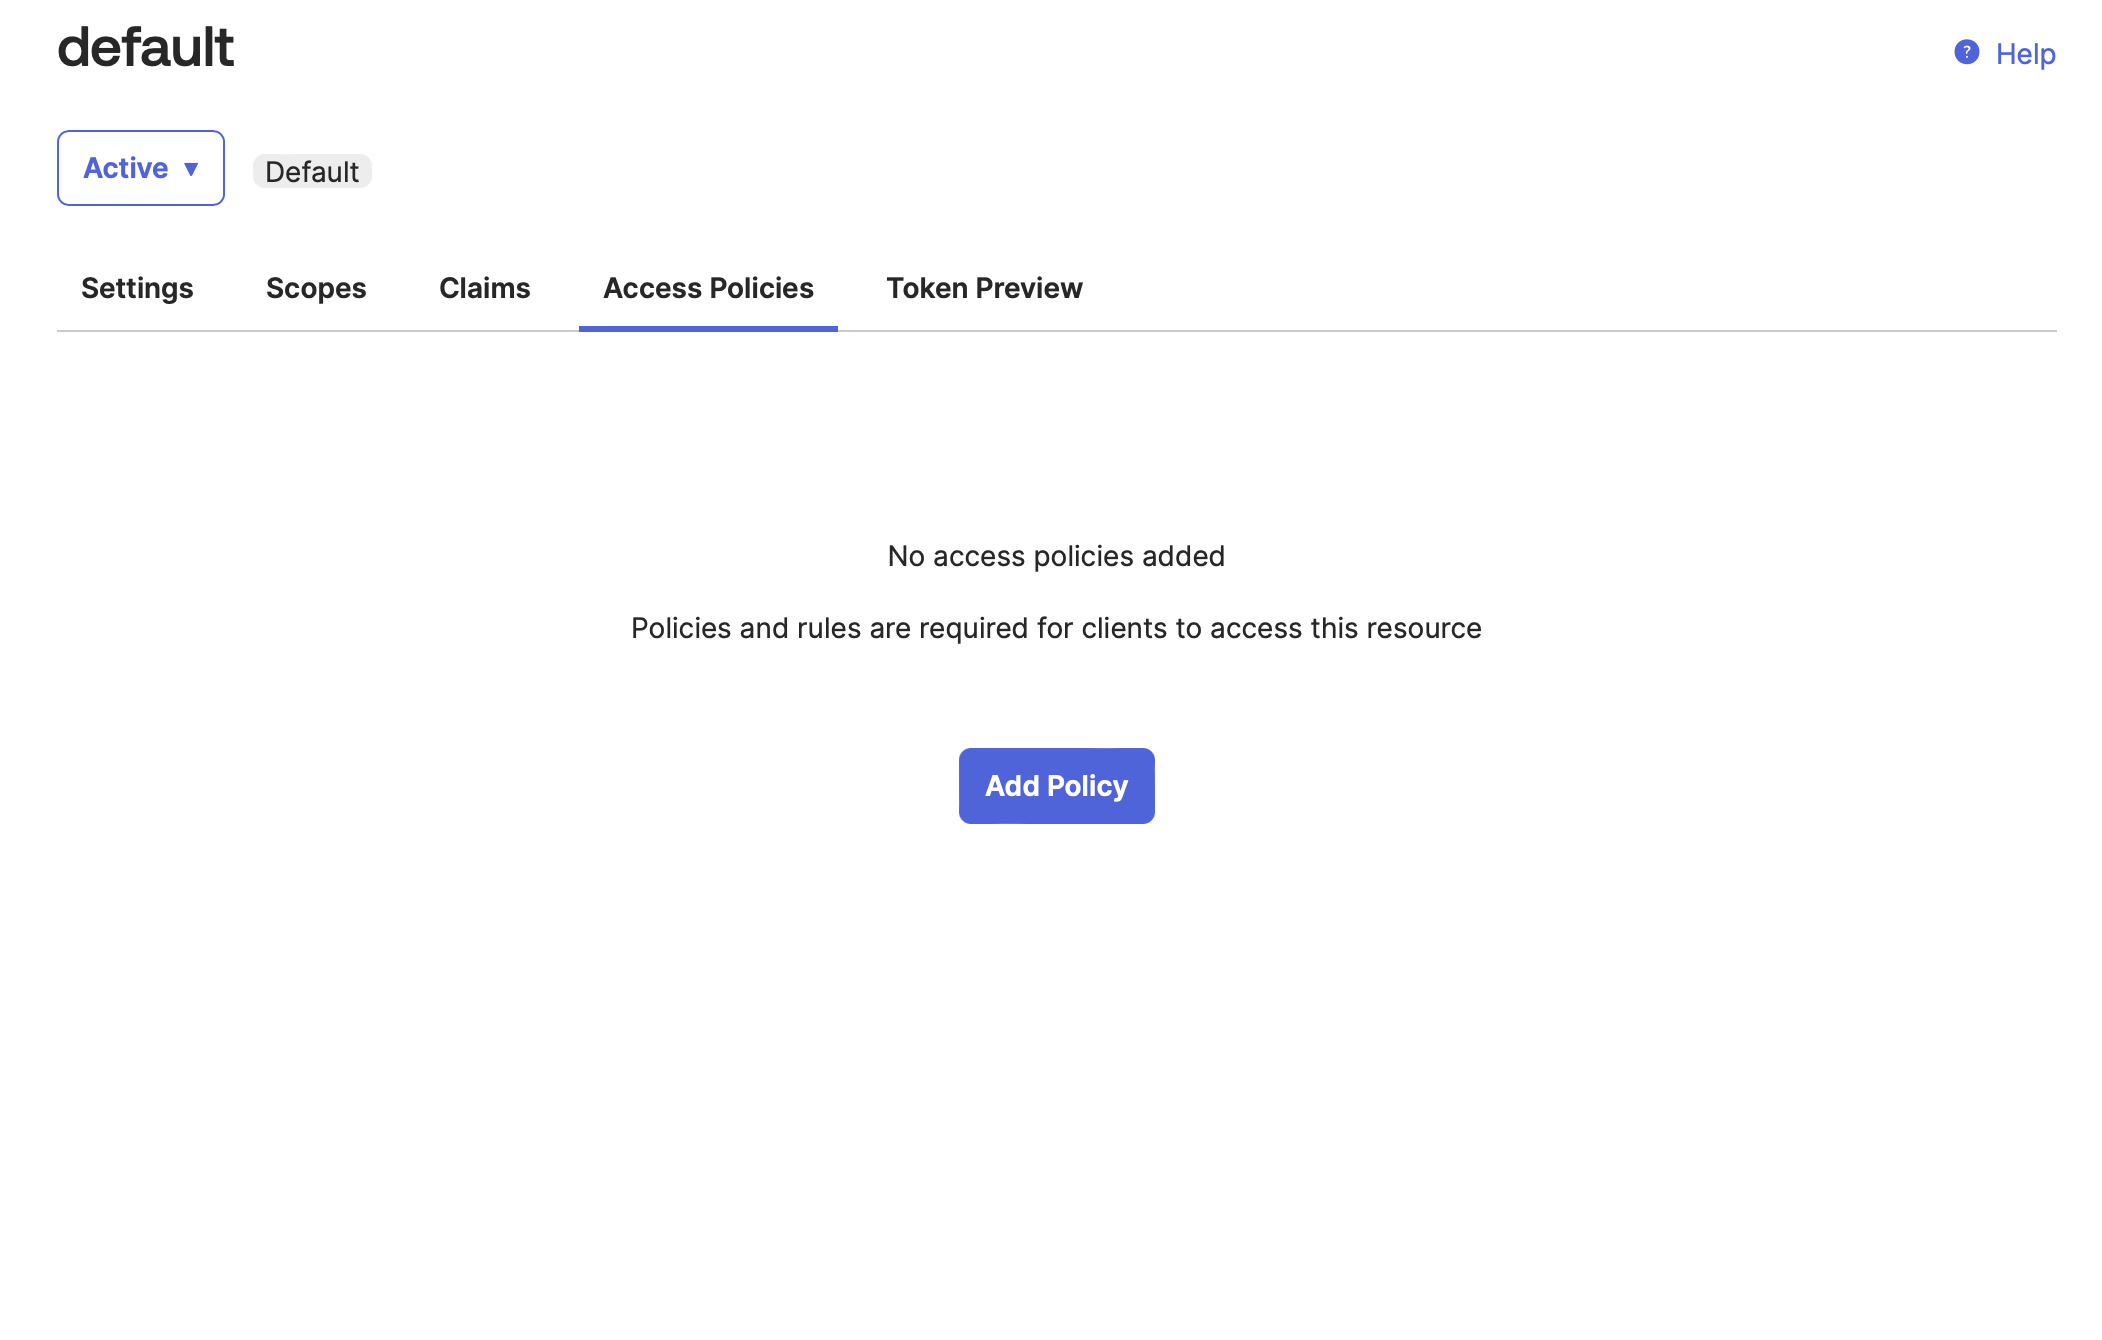
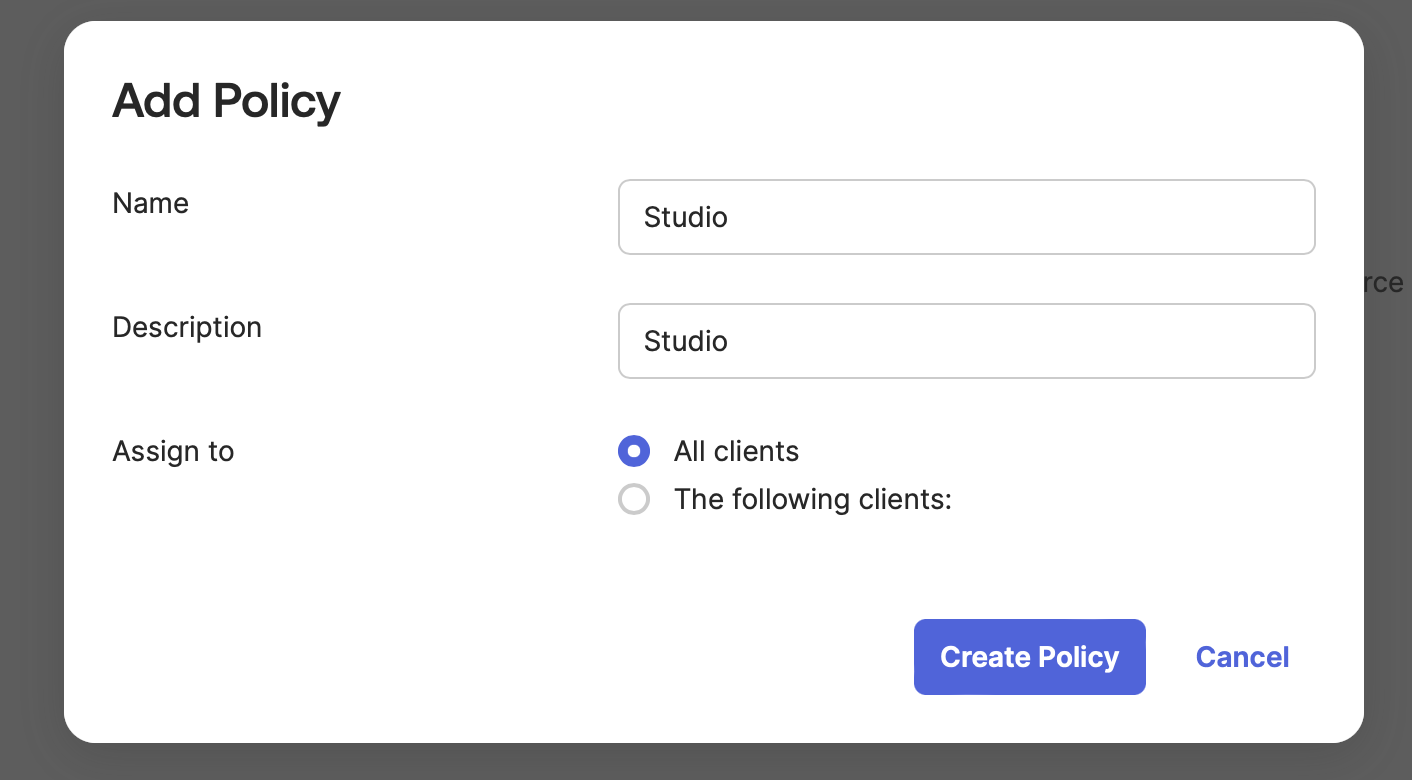
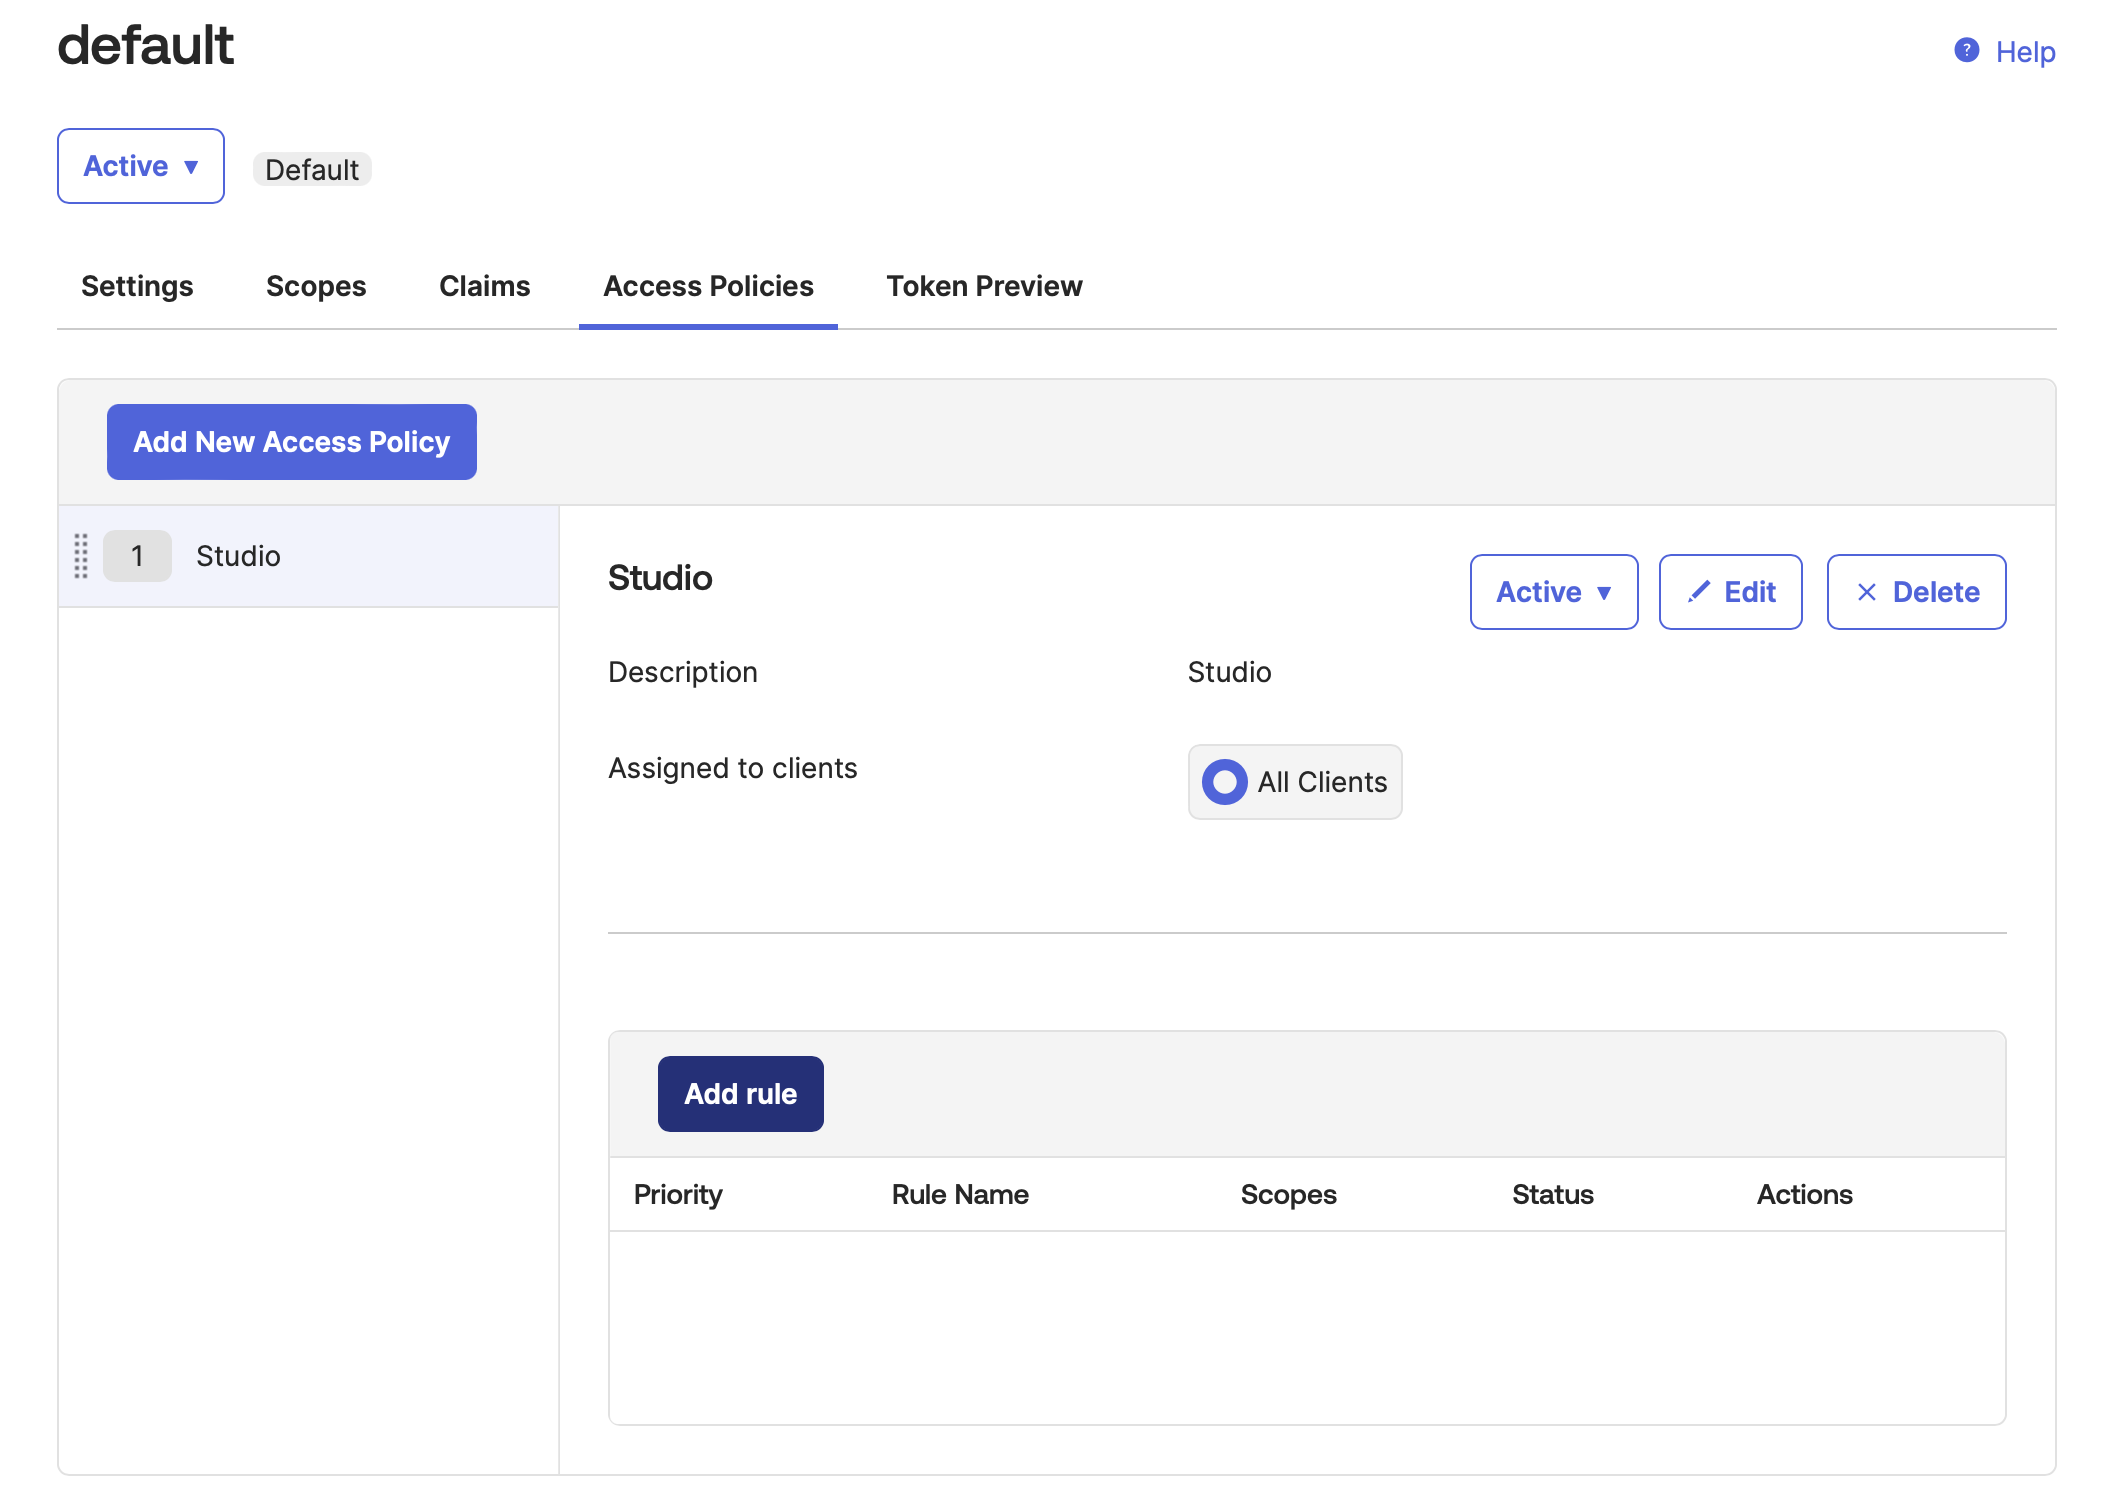
In the Access Policies tab, click Add Policy. Add any values for Name and Description, then click Create Policy.
-
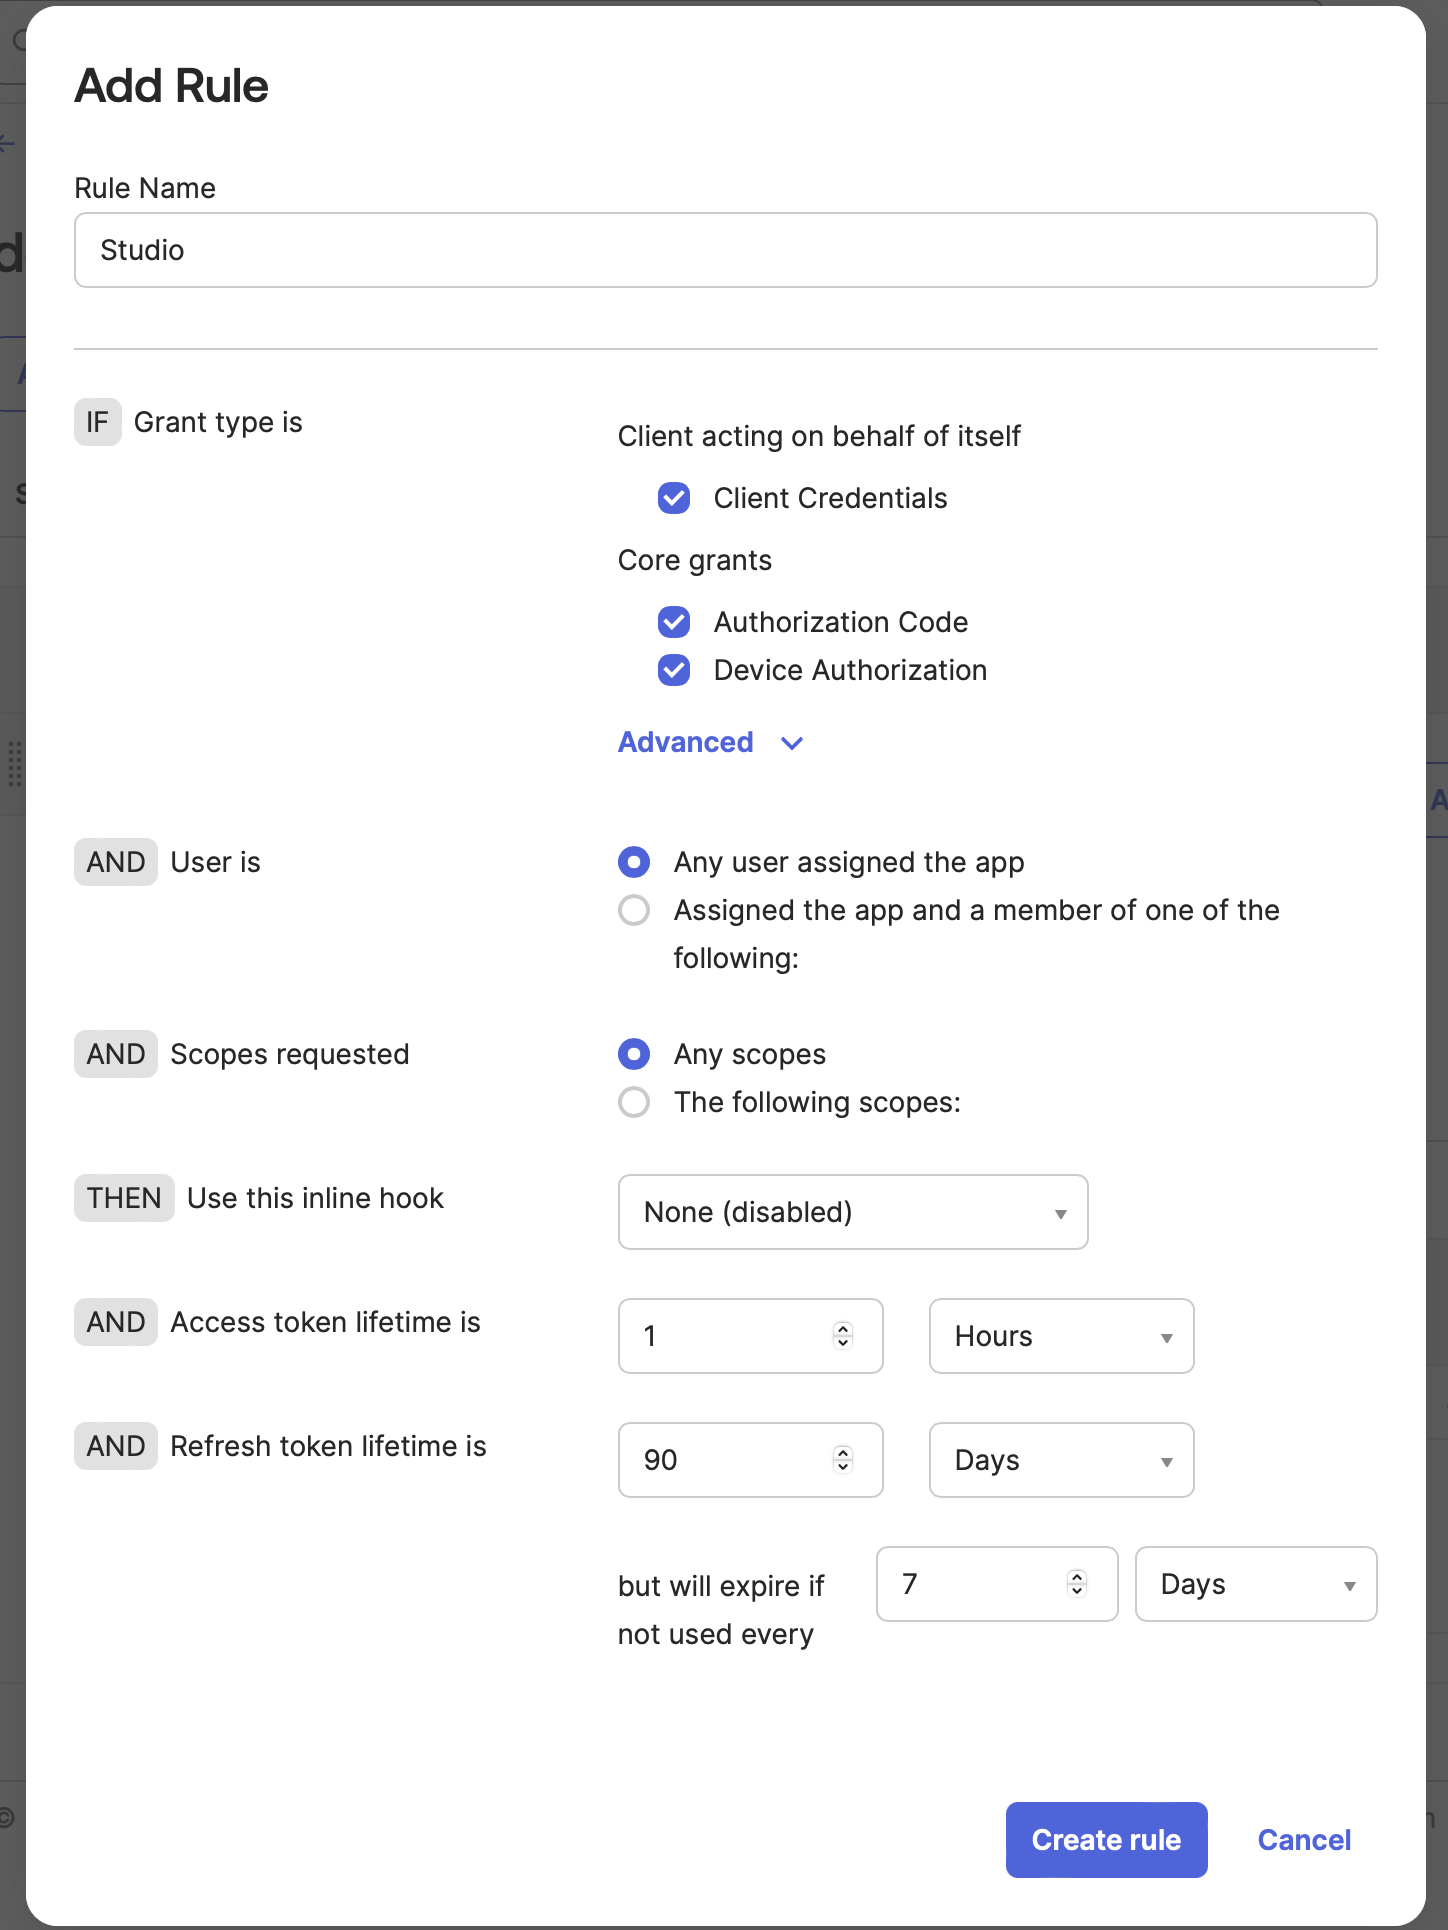
Finally, click Add rule. Add any Rule Name and leave the other options as default. Click Create rule.
Enter values into Claris Studio
- Go back to the Claris Studio page you opened earlier (see “Open the Claris Studio setup page”).
-
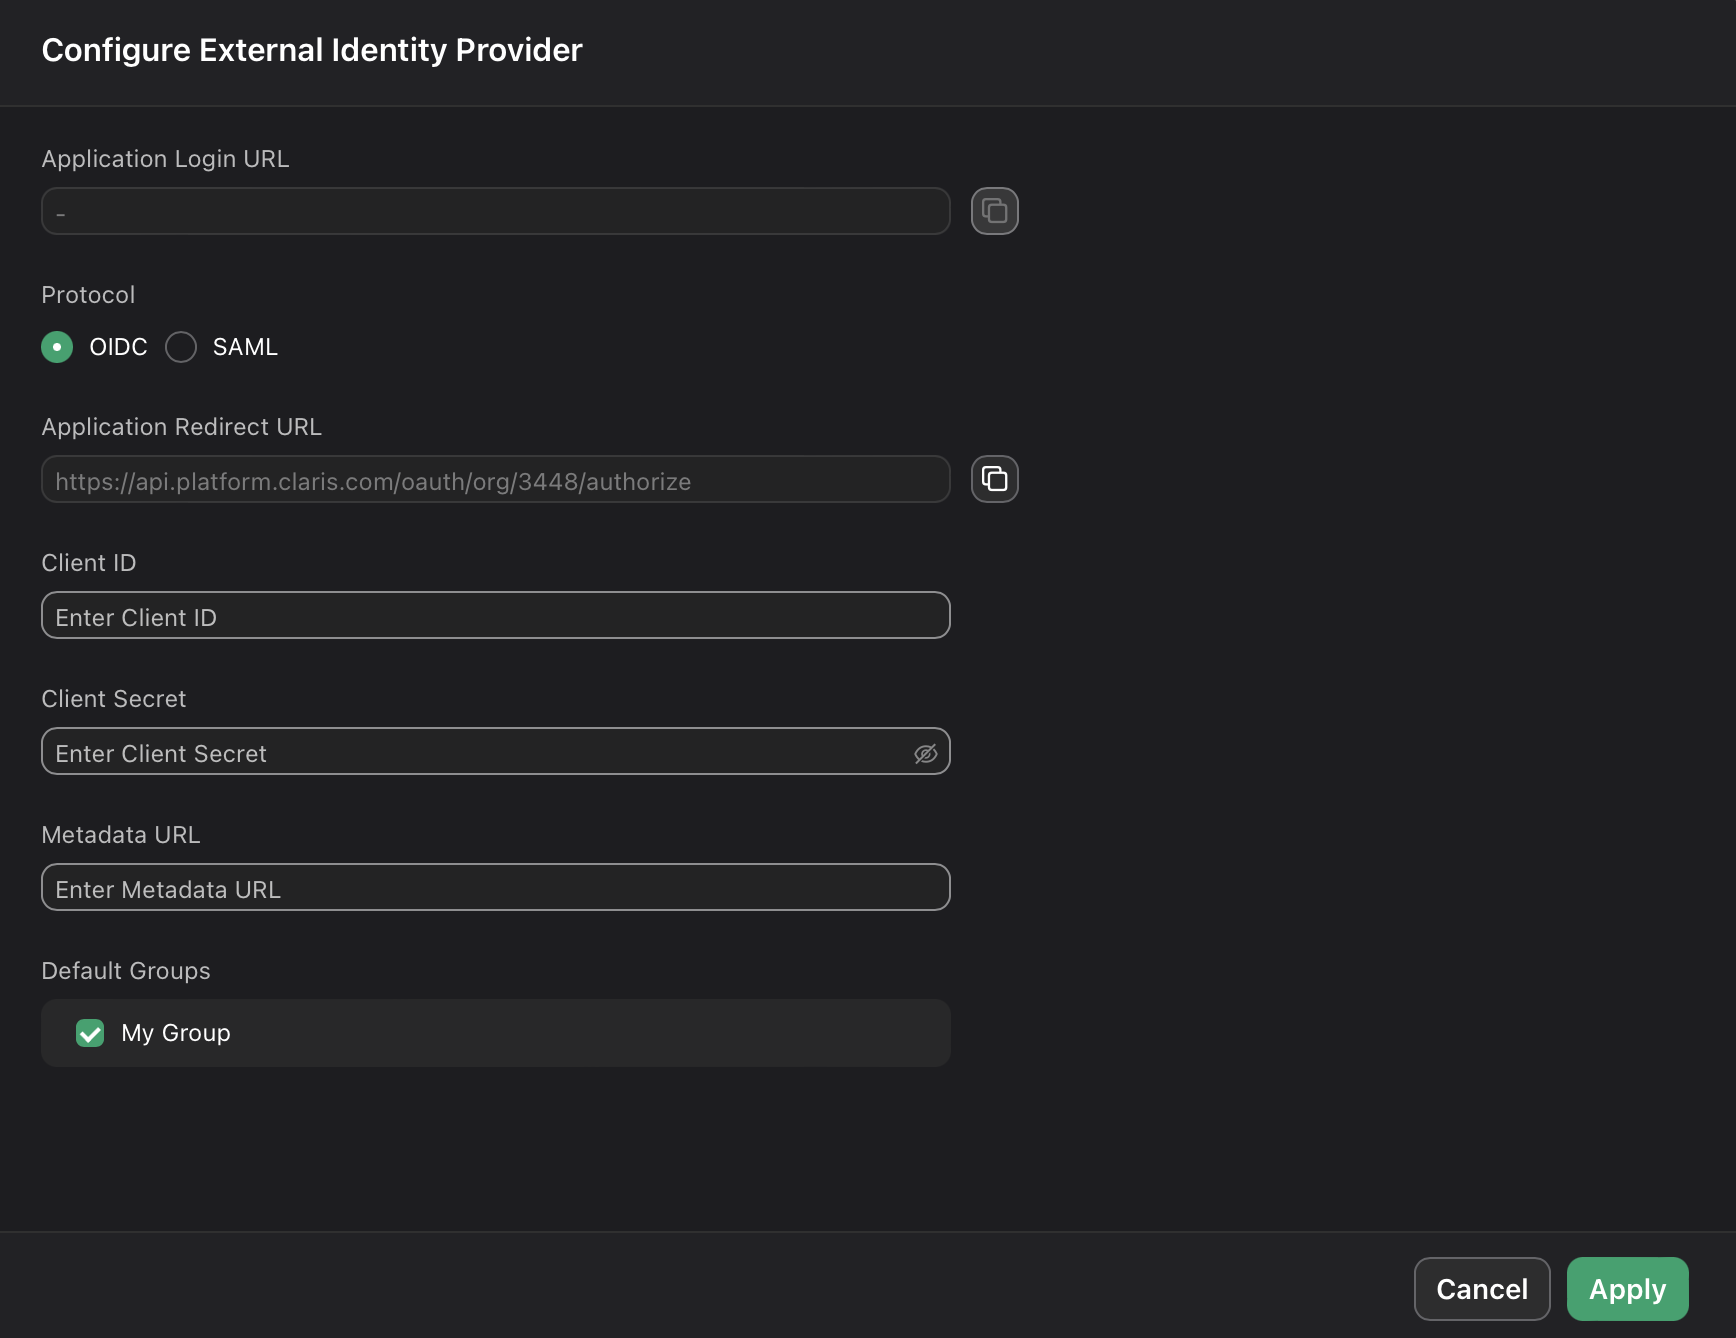
In the Configure External Identity Provider dialog, for Protocol, choose OIDC, then provide the following information:
-
Client ID: the Client ID token that you copied in “Edit OIDC application information”
-
Client Secret: the secret token that you copied in “Edit OIDC application information”
-
Metadata URL:
https://<okta-subdomain>.okta.com/oauth2/default/.well-known/openid-configurationwhere <okta-subdomain> is your business’s Okta subdomain.
-
-
Select one or more Default Groups that you want to sign in using this external IdP, then click Apply.
If you have no groups, you can create one here and add users to it later. See Work with groups for more information.
- On the Users page, copy the link labeled Application Login URL and provide it to users. Using this URL enables them to sign in to Claris Studio with their SSO credentials.