Google Workspace using SAML
Follow the steps below to configure single sign-on (SSO) for Claris Studio with Google Workspaces using Security Assertion Markup Language (SAML). To establish trust between your identity provider and a Claris Studio team (the service provider), you’ll need to:
-
Add a SAML application with specific settings for Claris Studio to Google Workspace.
-
Enter the IDMS metadata URL in Claris Studio.
Preparing for Google SAML
To follow these instructions, you'll need:
-
a Google Workspace account for your business with licenses for multiple users
-
A verified domain for this account.
You can confirm your domain is verified by signing in to the Google Workspace console and confirming that there is not a
Verify Domainwarning (as shown here). -
A super admin account for your Google Workspace's administrator console. The first user account that set up Google Workspace for your business is likely to be a super admin account.

Open the Claris Studio setup page
-
Sign in to your Claris Studio team.
-
Click the Users tab on the left, then click Configure External IdP.

-
In the Configure External Identity Provider dialog, for Protocol, choose SAML. Keep this page open to come back to later.
Create a SAML application
-
Sign in to the Google Workspace admin console using your account with super admin privileges.
-
On the home page of the admin console, go to the SAML app webpage. Then:
-
In the left sidebar, click Apps > Web and mobile apps.
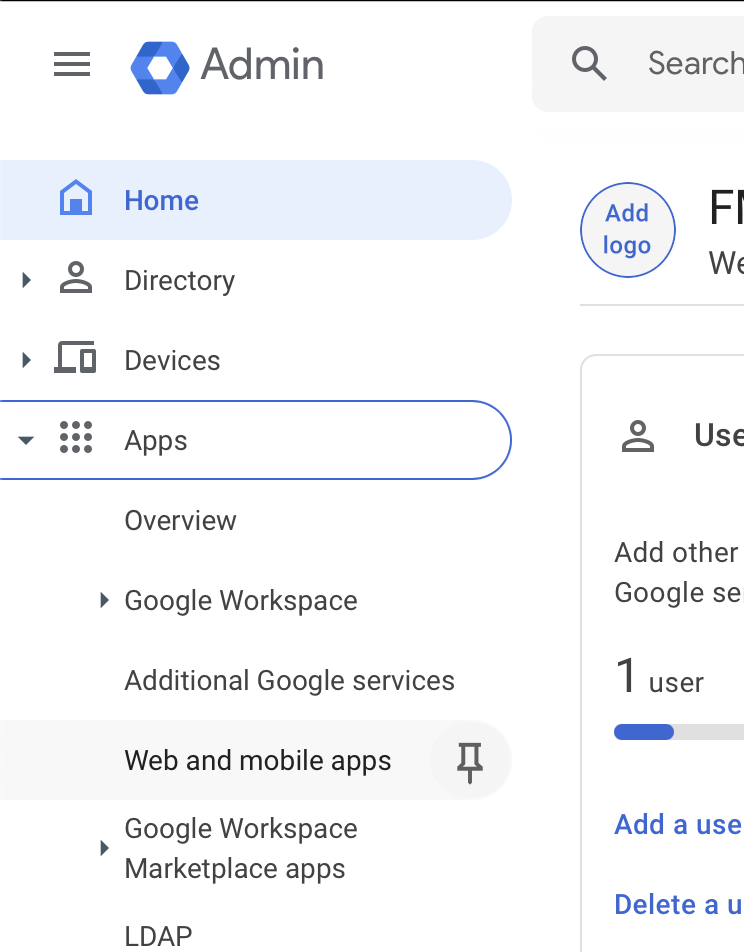
-
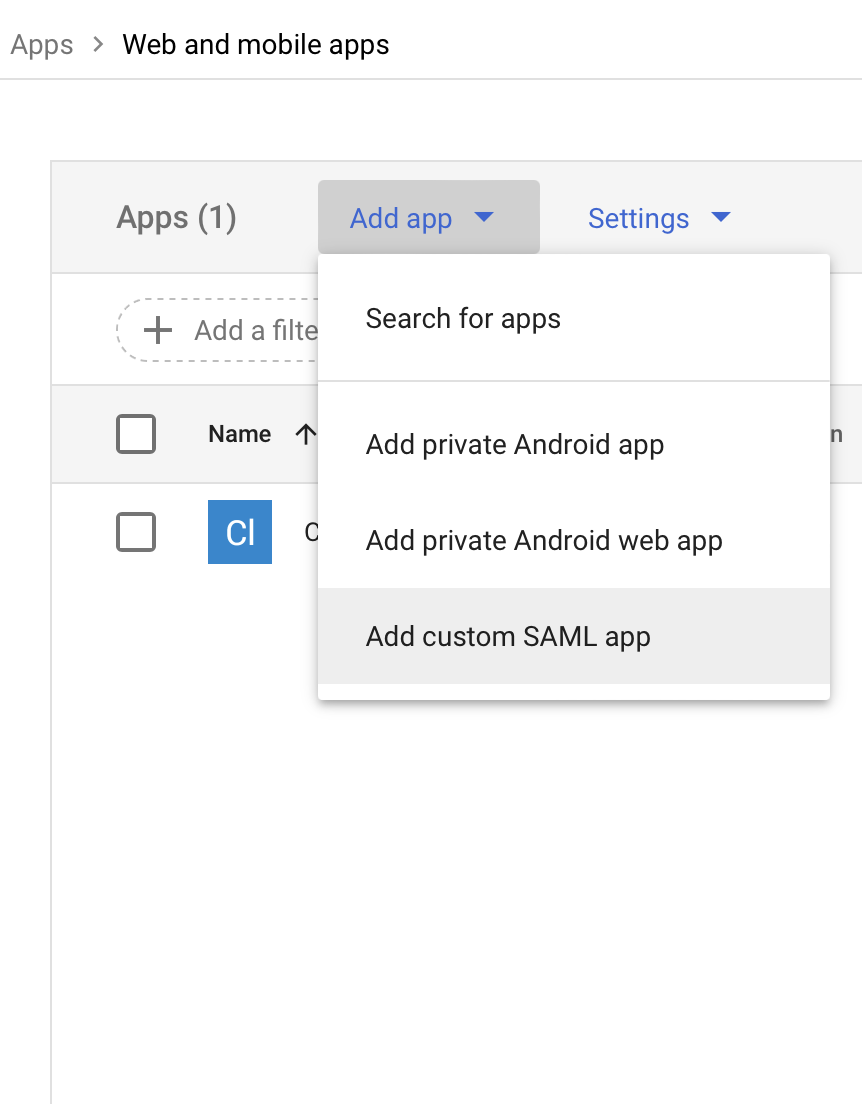
On the Web and mobile apps page, click Add app > Add custom SAML app.
-
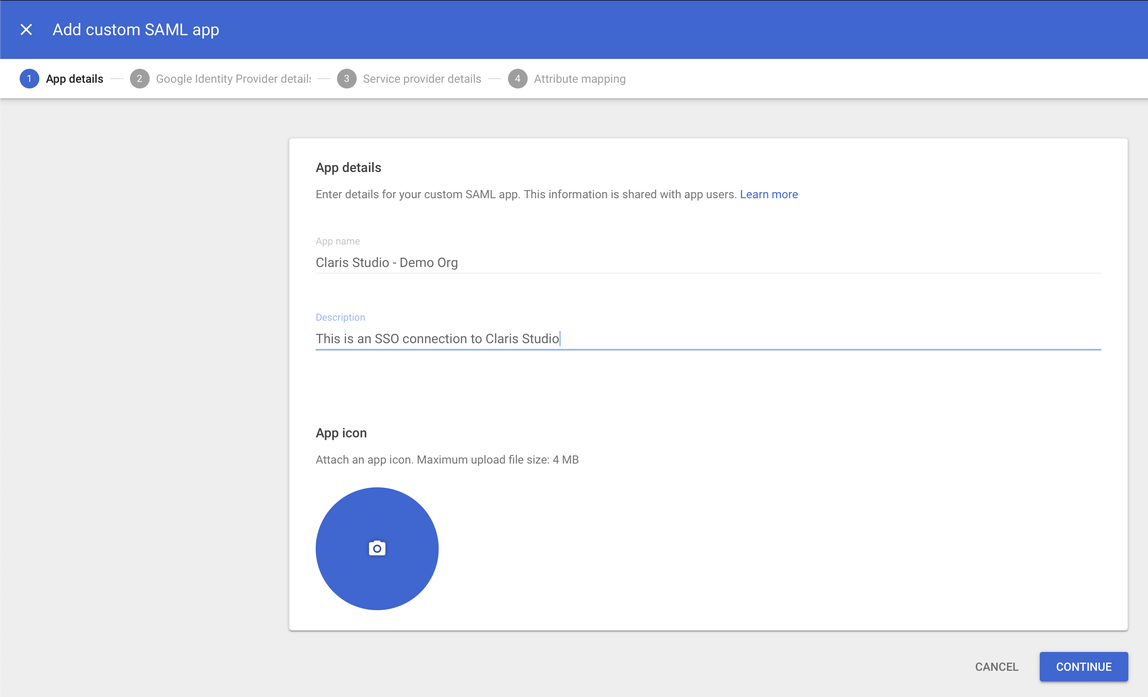
Fill in details about your SSO integration with Claris Studio that will help distinguish this it from any other integrations.
At minimum, the App name is required to proceed. When you’re done, click Continue.
-
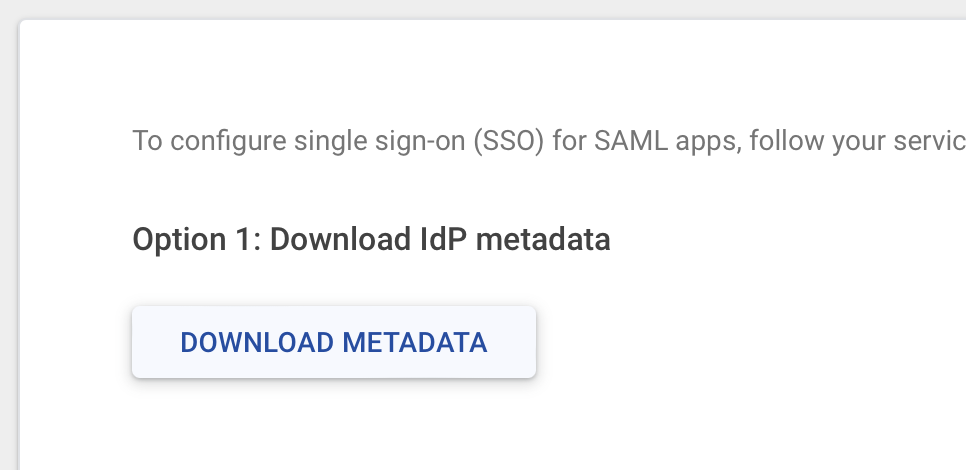
Of the two options, use Option 1: Download IdP metadata.
Click Download Metadata under this option. Keep the file in a location you can access later.
-
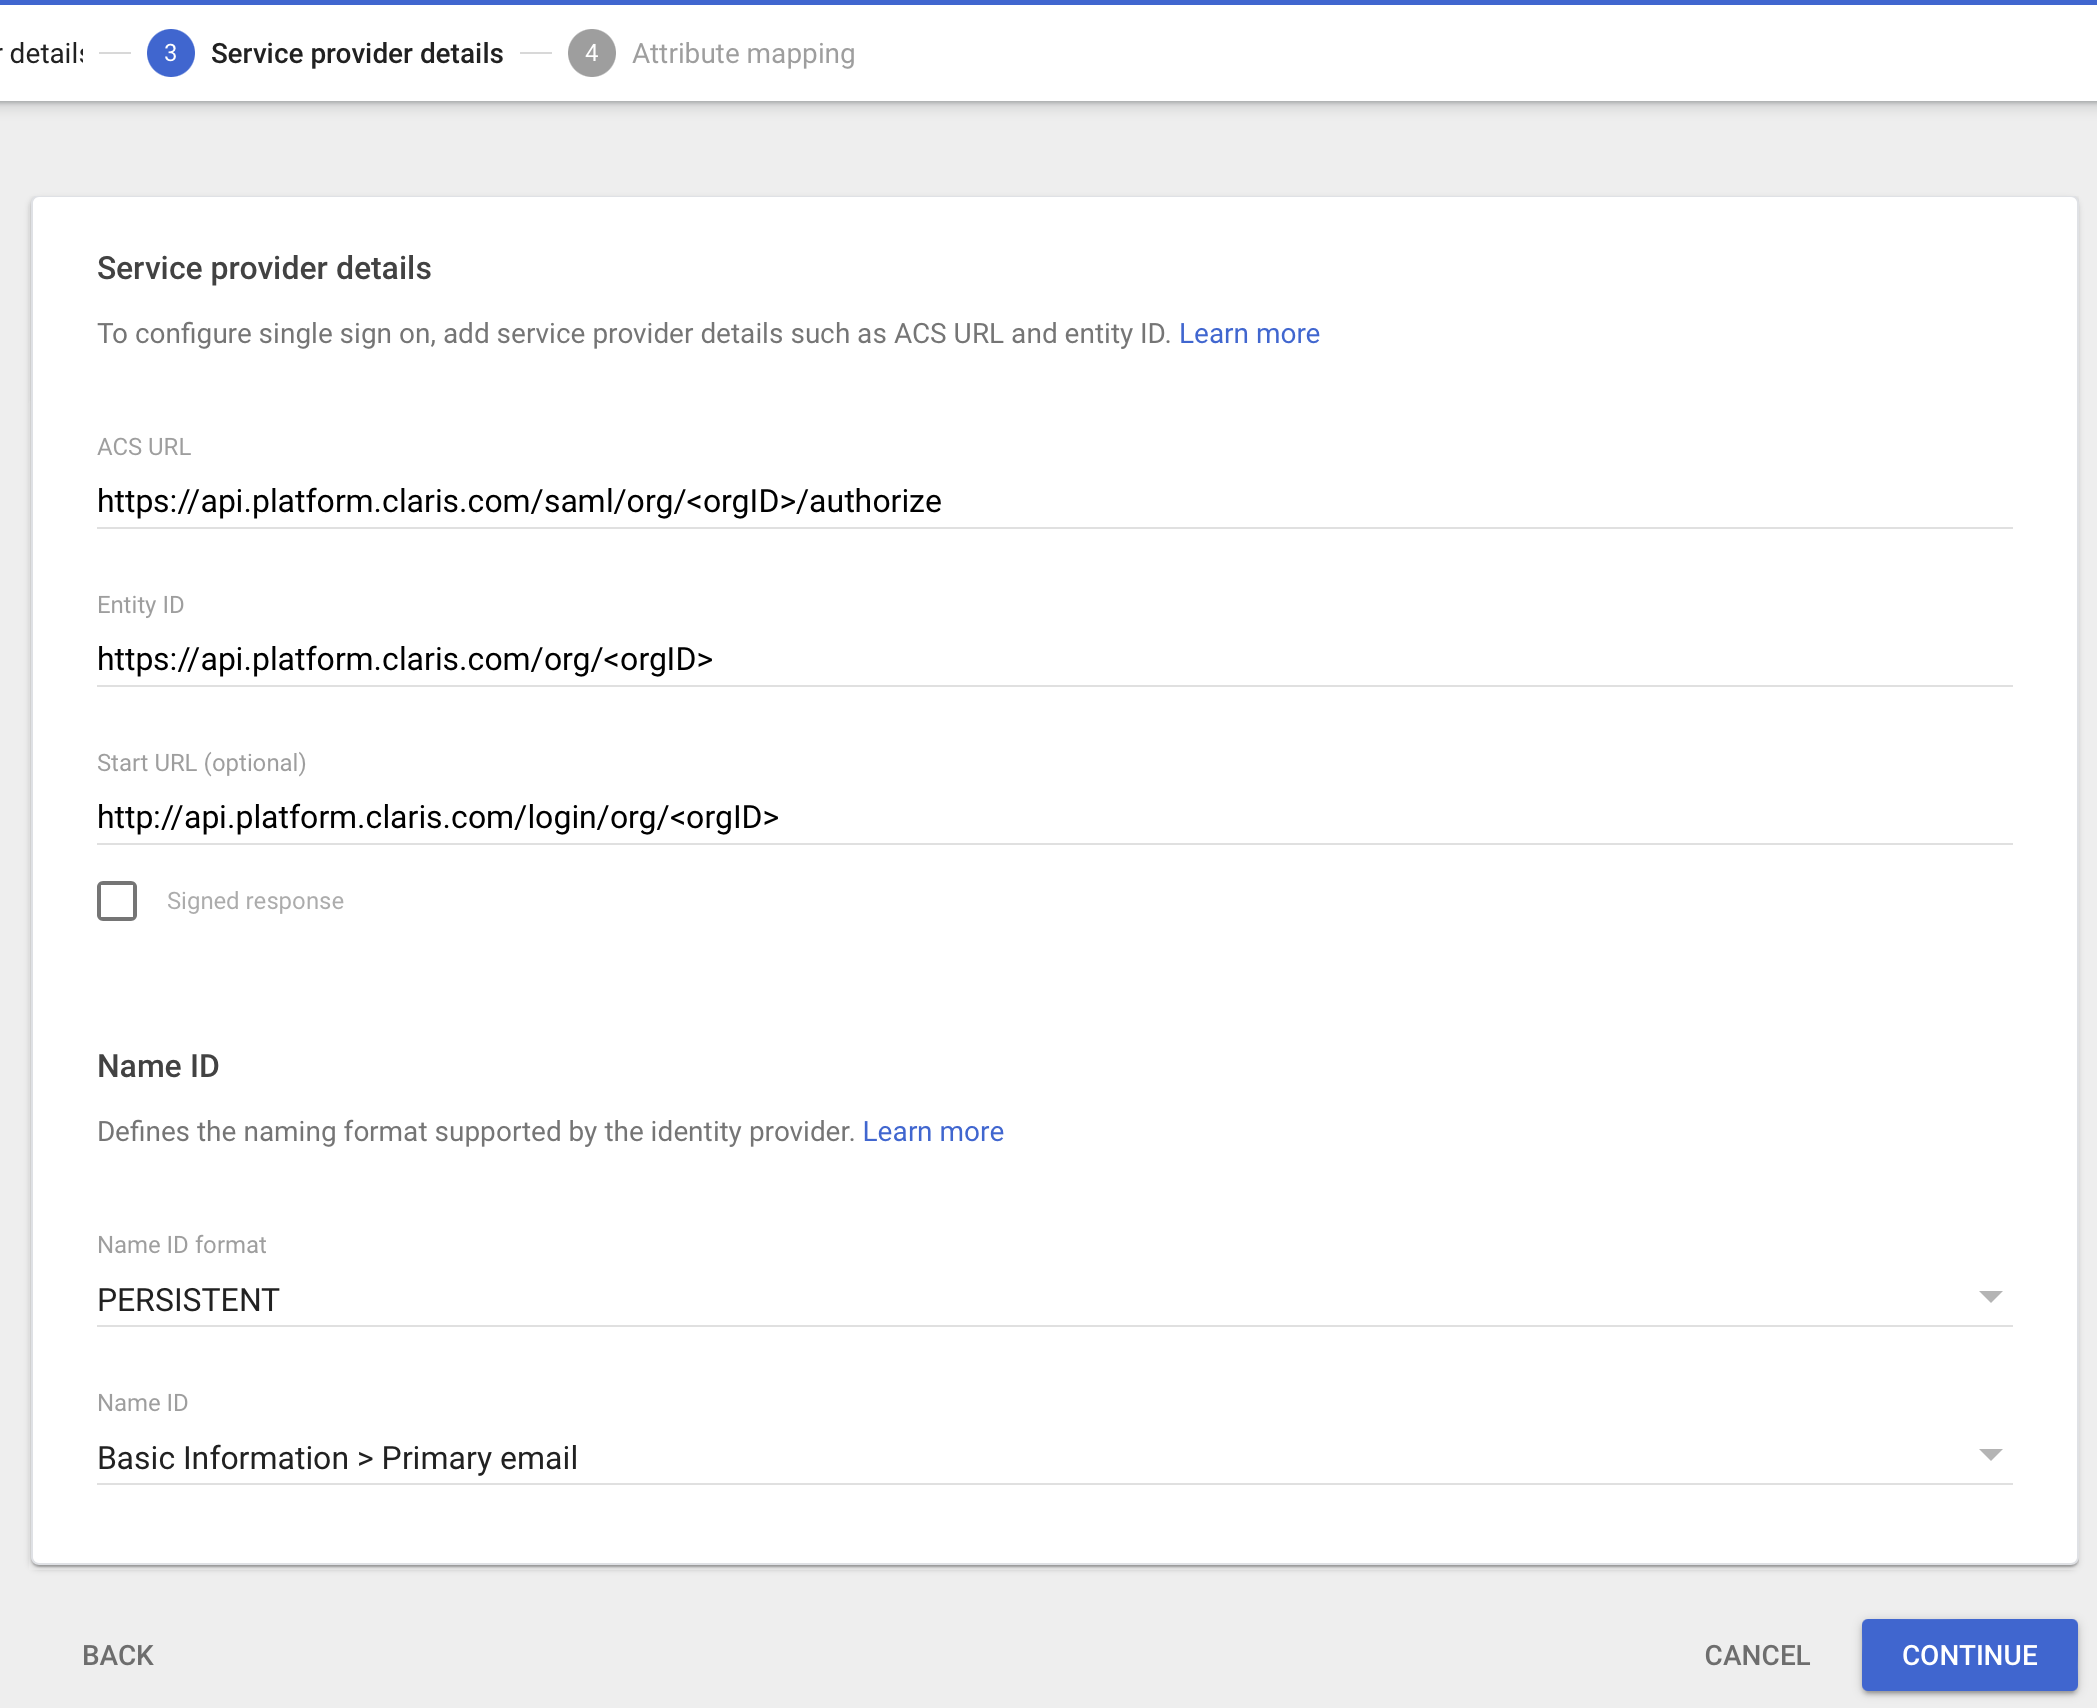
Next, enter the following details about your Claris Studio team:
-
ACS URL: In Claris Studio, copy Assertion Consumer Service URL (see “Open the Claris Studio setup page” earlier) and paste it in here.
-
Entity ID: In Claris Studio, copy Entity ID (see “Open the Claris Studio setup page” earlier) and paste it in here.
-
Start URL (optional): Leave this empty.
-
Signed response: Leave this unselected.
-
Name ID format: Choose PERSISTENT.
-
Name ID: Choose Basic information > Primary email.
-
-
The final part requires setting up attribute mappings between Google Workspace and Claris Studio. Include only the following mappings, for which you can click Add Mapping for each new mapping.
Be sure to type every attribute exactly as shown, because they are case sensitive. There's no need to include group information. Click Finish after all mappings have been added.
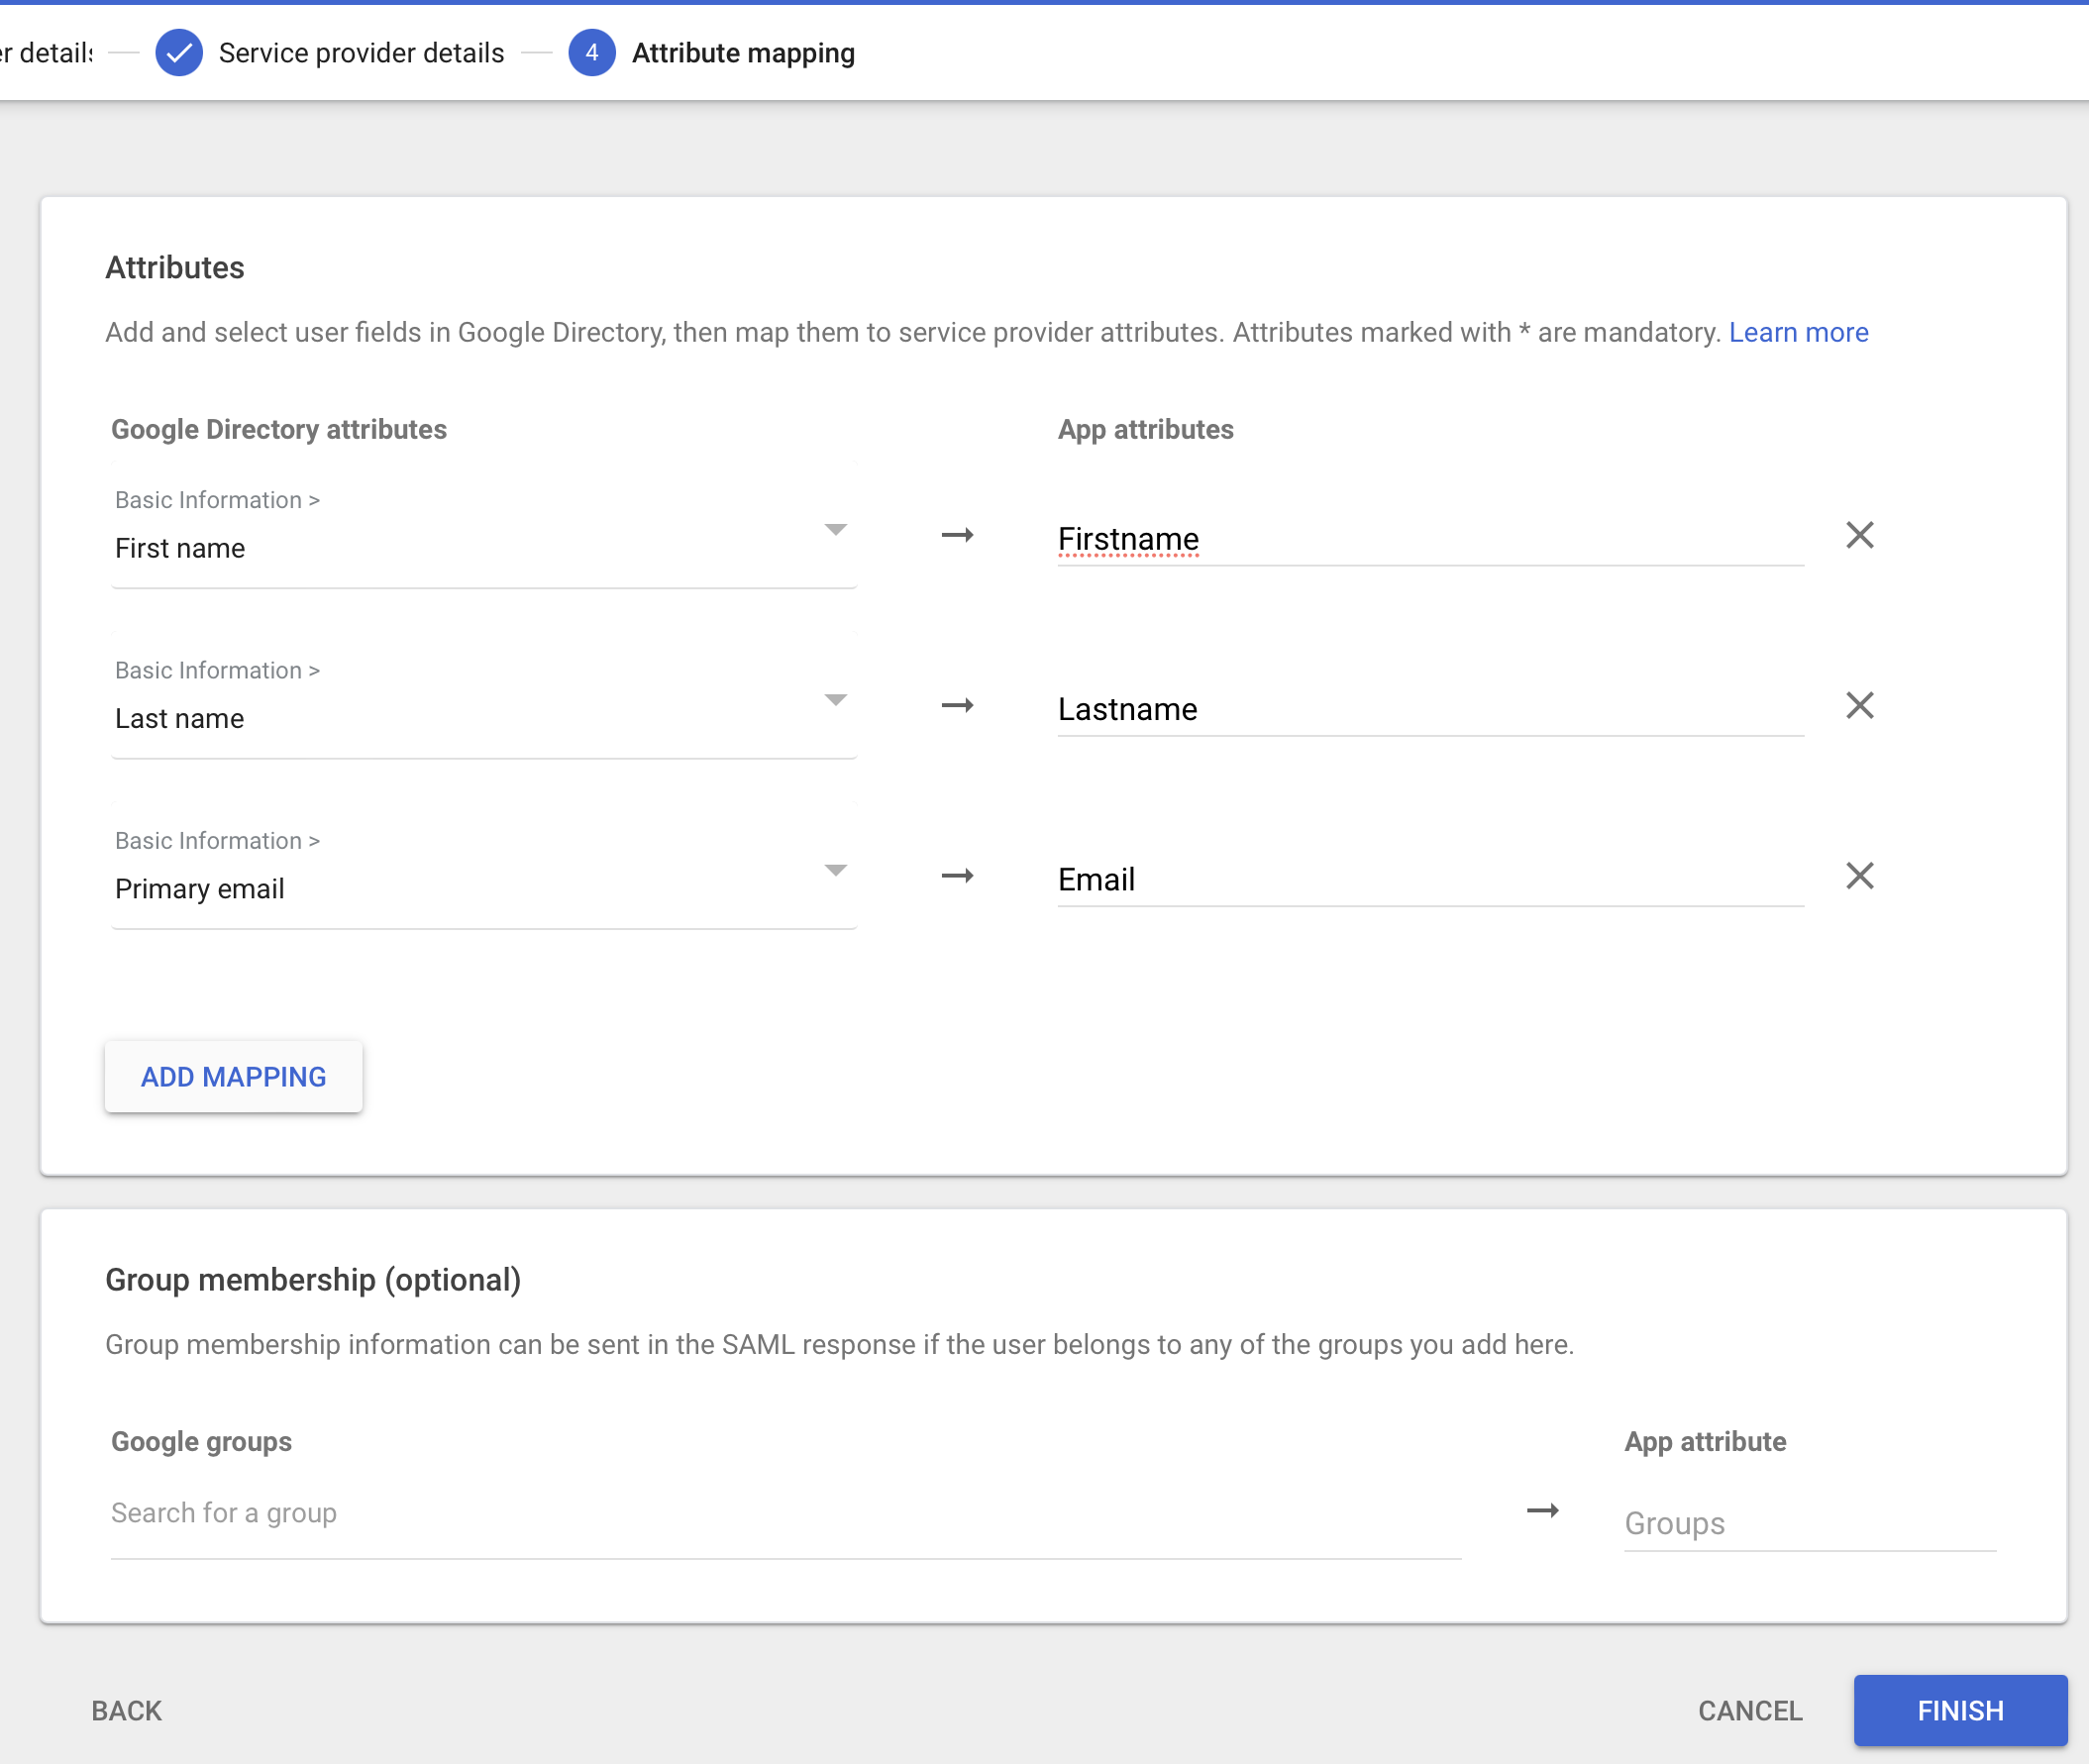
Google Directory attribute App attribute 1 Basic Information > First name "Firstname" 2 Basic Information > Last name "Lastname" 3 Basic Information > Primary email "Email" -
Google Workspace takes you back to your admin console and shows your new SAML app. To enable it for your organization, click any blank area in the User access box, then click ON for everyone, or make it available only to specific groups that need access. Click Save when you're done.


Enter values into Claris Studio
- Go back to the Claris Studio page you opened earlier (see “Open the Claris Studio setup page”).
-
In the Configure External Identity Provider dialog, for Protocol, choose SAML, then upload the IdP metadata file you downloaded earlier. For Metadata, click Select a file to upload.
-
Select one or more Default Groups that you want to sign in using this external IdP, then click Apply.
If you have no groups, you can create one here and add users to it later. See Work with groups for more information.
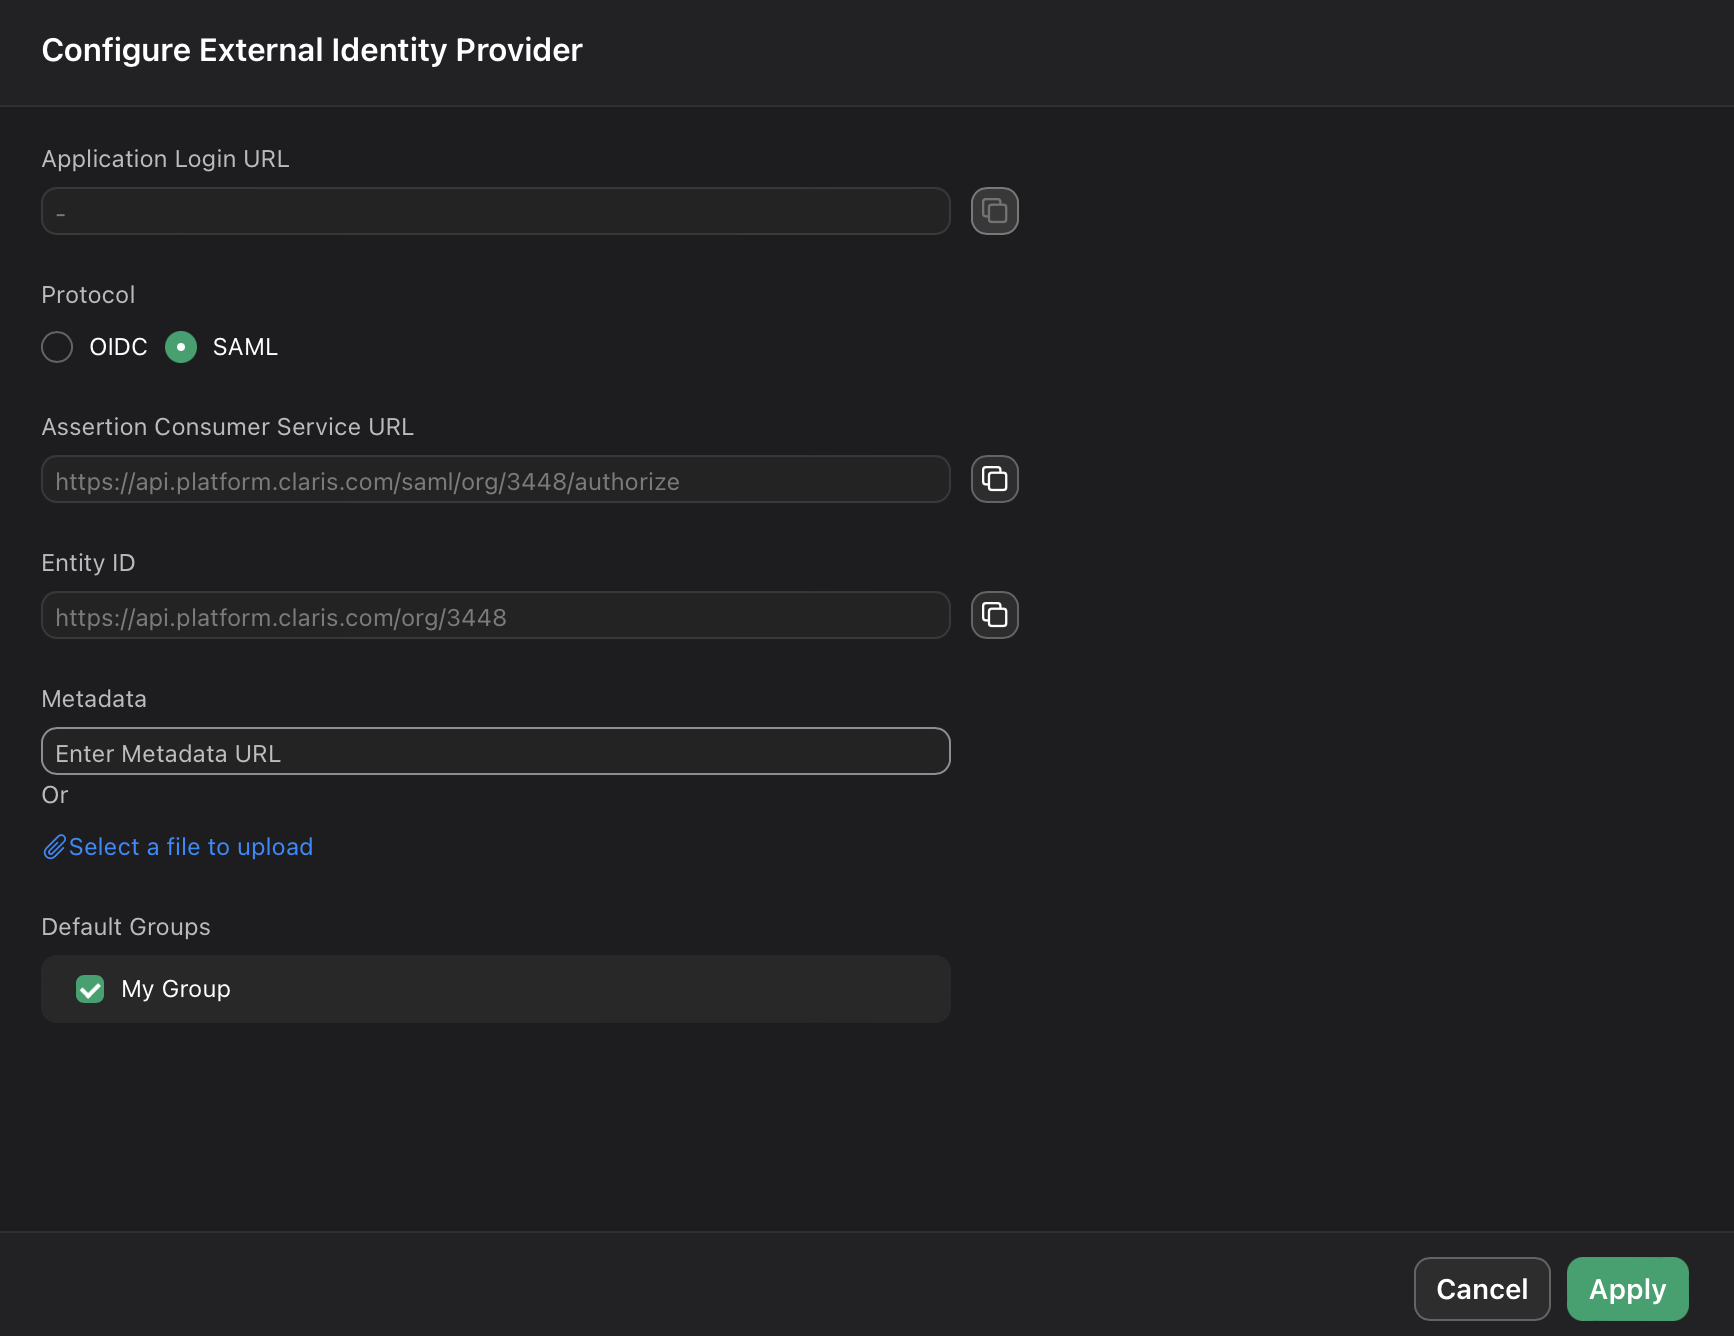
- On the Users page, copy the link labeled Application Login URL and provide it to users. Using this URL enables them to sign in to Claris Studio with their SSO credentials.