Active Directory Federation Services using SAML
Follow the steps below to configure single sign-on (SSO) for Claris Studio with your Active Directory instance’s Federation Services using Security Assertion Markup Language (SAML). To establish trust between your AD instance and your Claris Studio team, you’ll need to:
-
Create a relying party trust.
-
Add claim mappings.
-
Enter the metadata URL in Claris Studio.
Open the Claris Studio setup page
-
Sign in to your Claris Studio team.
-
Click the Users tab on the left, then click Configure External IdP.

-
In the Configure External Identity Provider dialog, for Protocol, choose SAML. Keep this page open to come back to later.
Add relying party trust
-
In your Windows Server instance, sign in with your administrator account. From the Start menu, click
Windows Administrative Toolsunder theWindows Serversection on the right.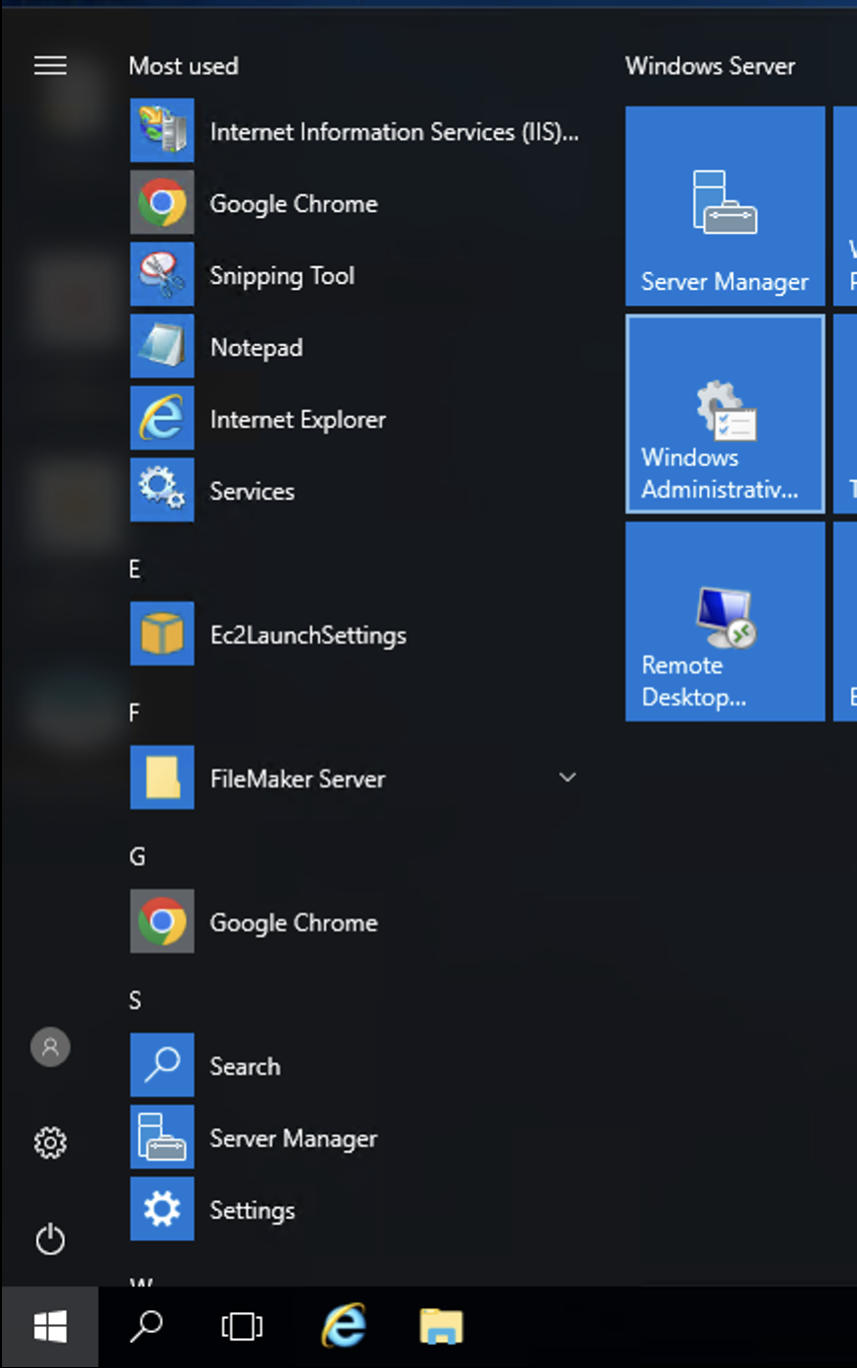
-
In the new File Explorer window, open the
AD FS Managementshortcut.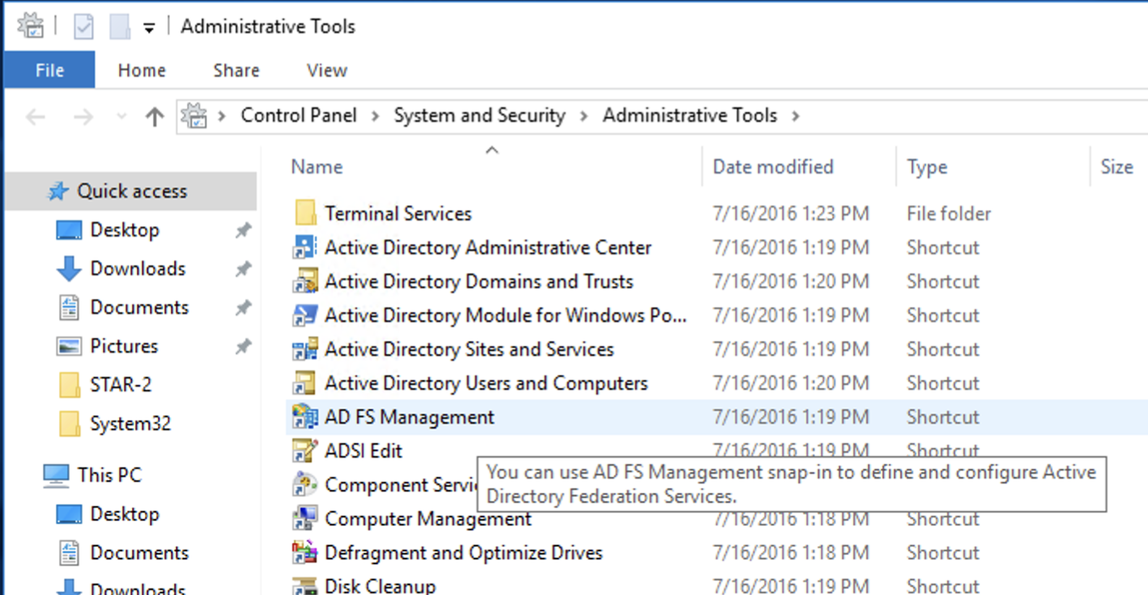
-
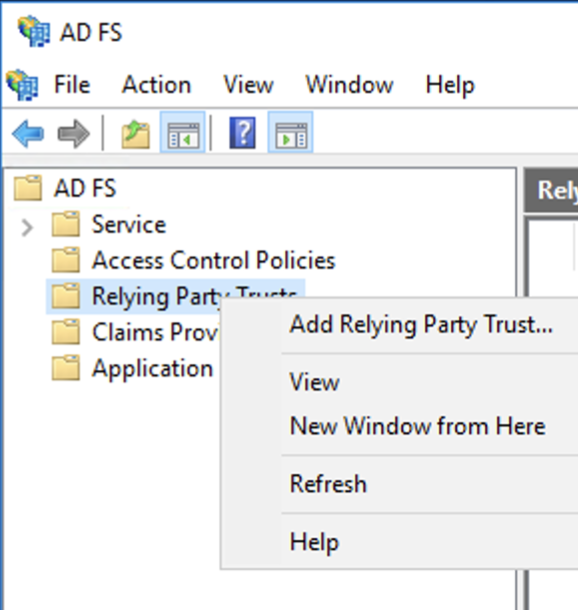
In the left sidebar of the AD FS window, right-click Relying Party Trusts > Add Relying Party Trust.
-
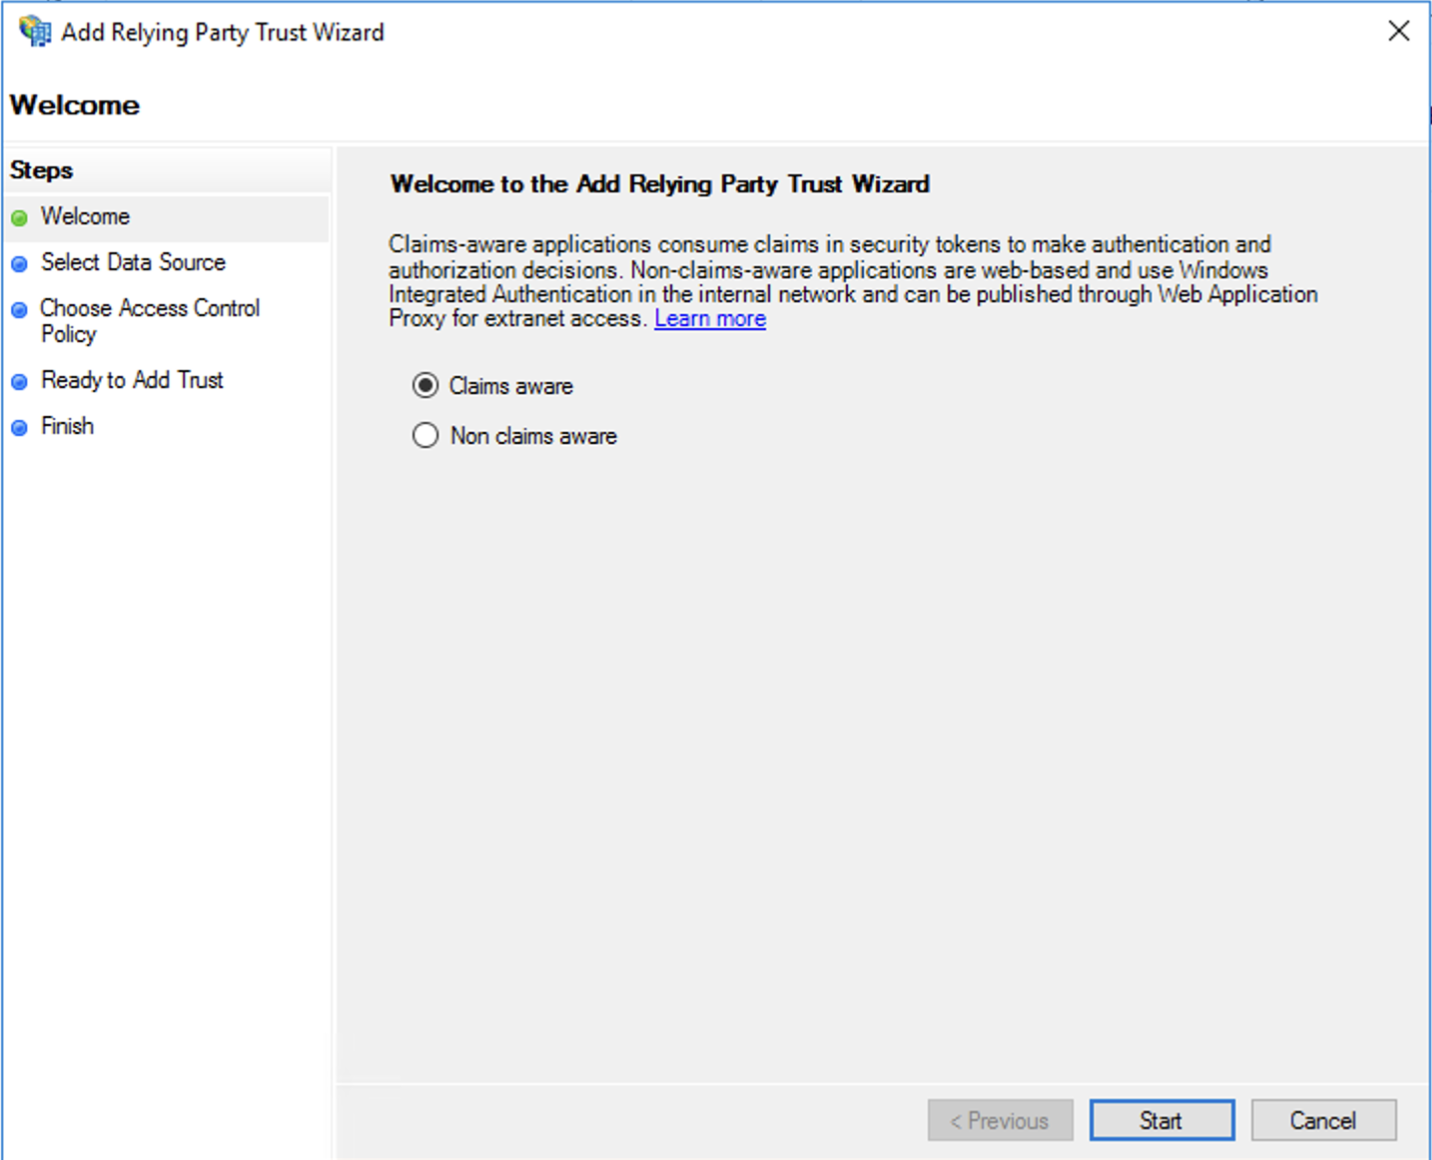
In the wizard, choose Claims aware, then click Start.
-
Choose Enter data about the relying party manually, then click Next.
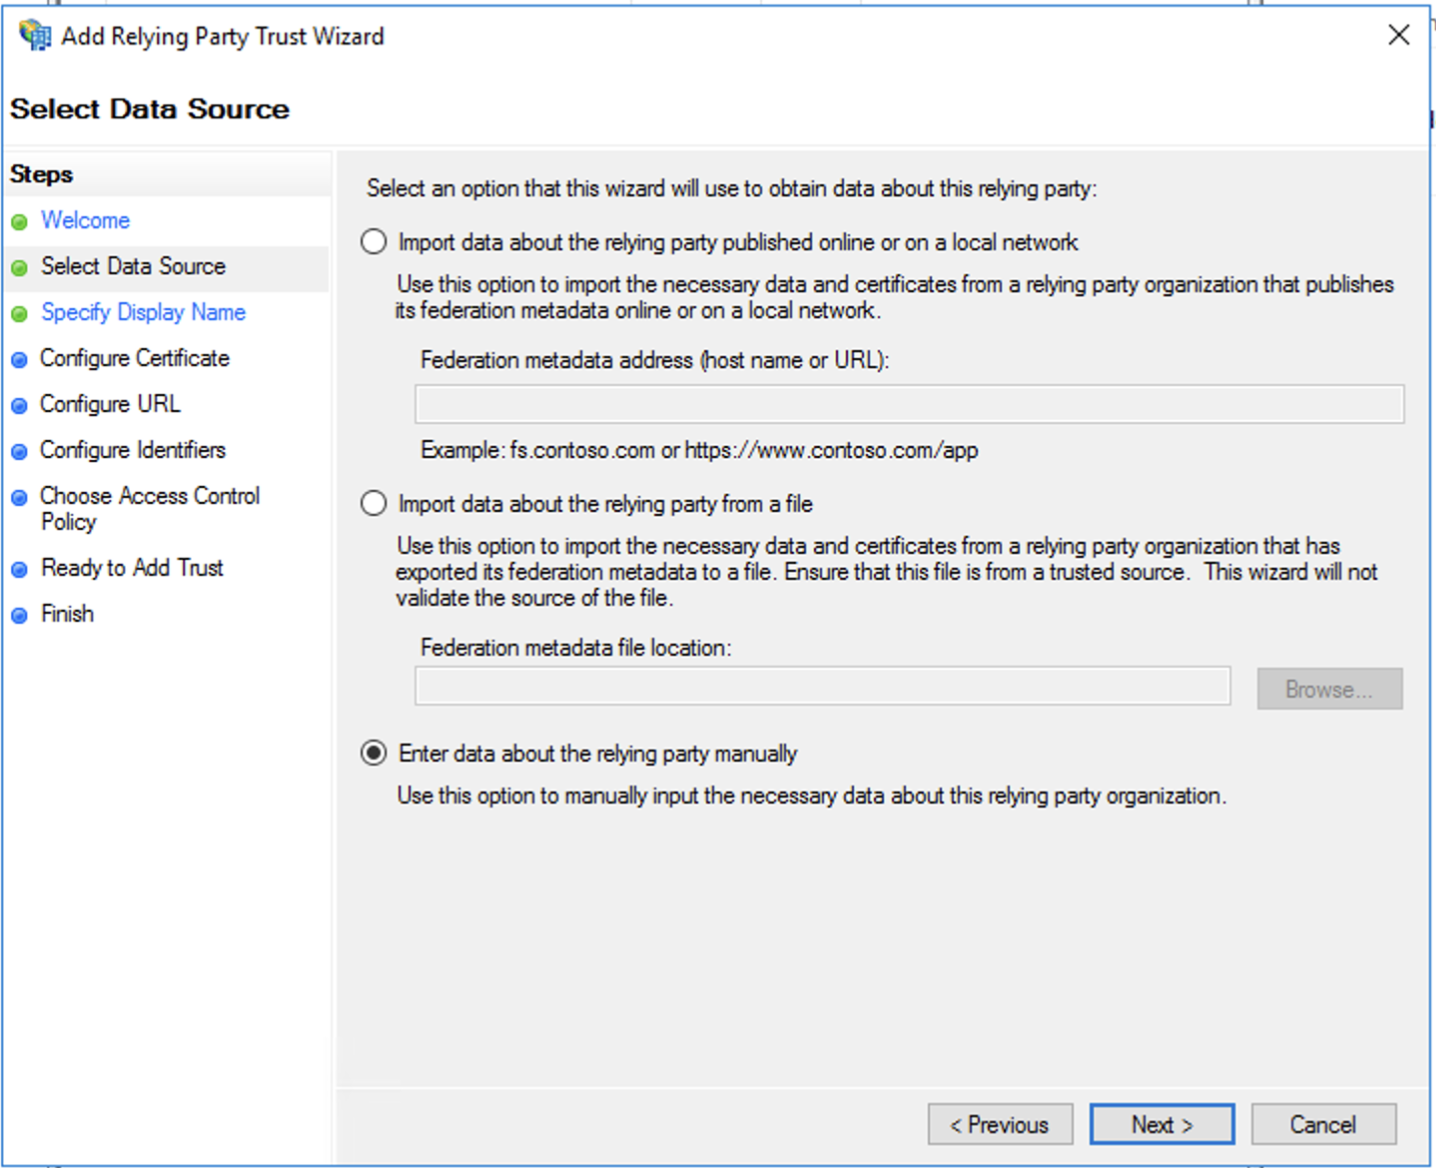
-
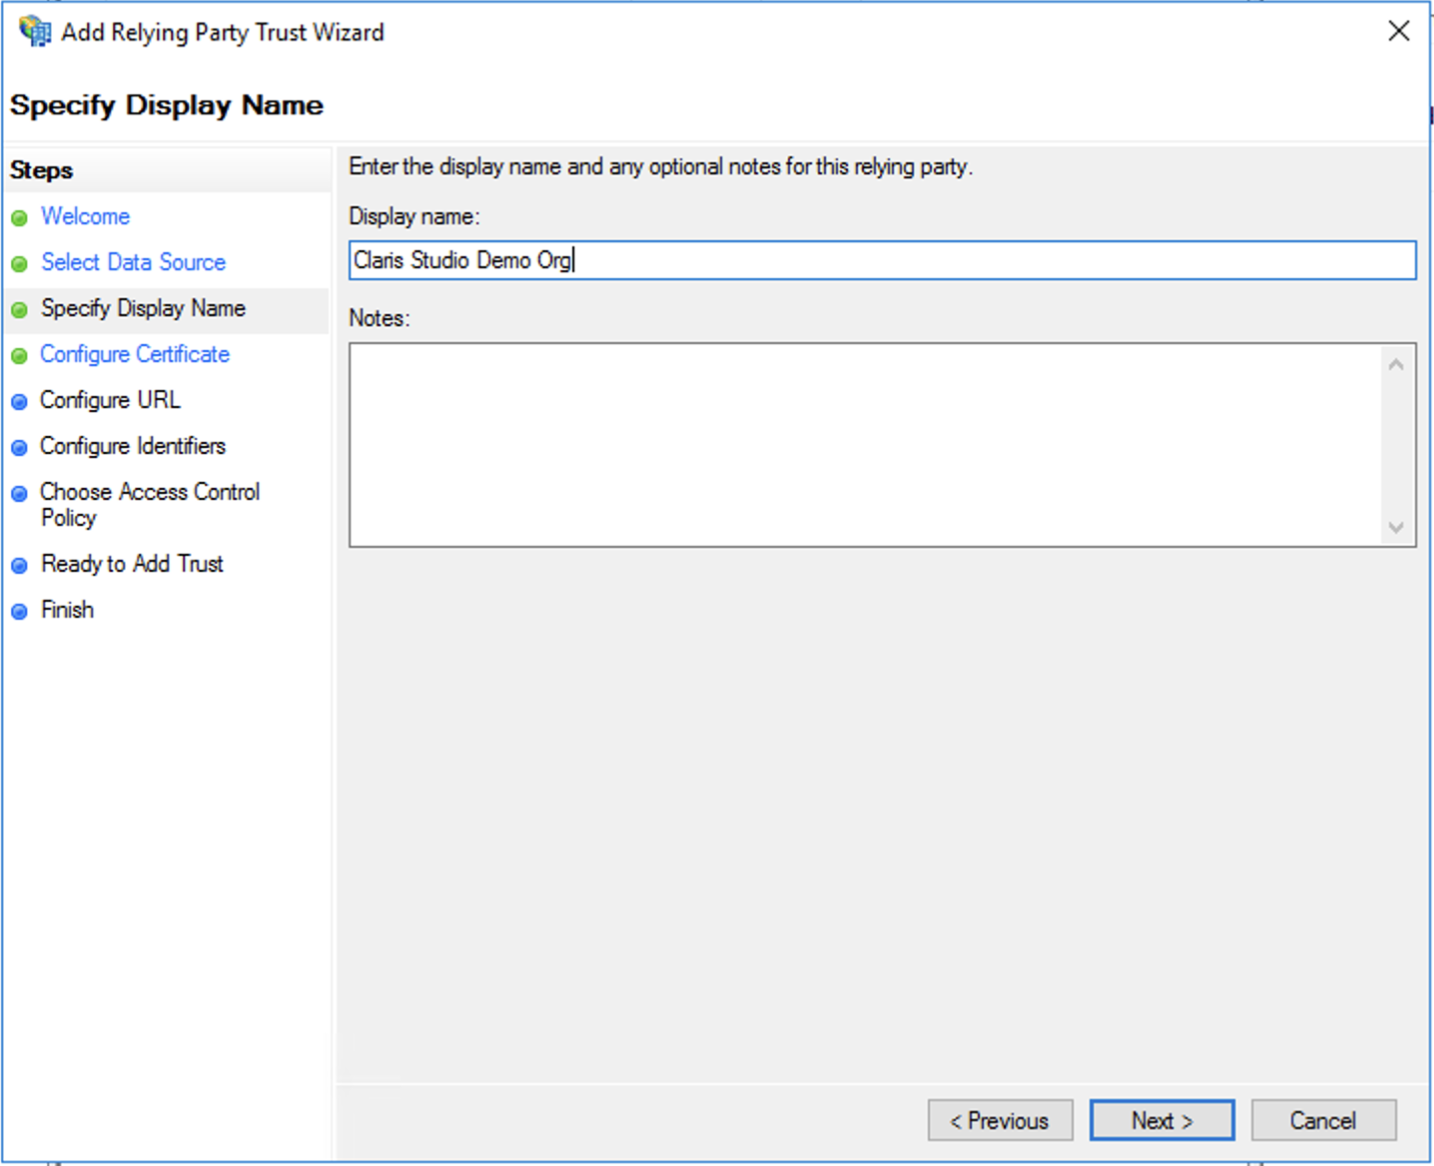
Give your new integration a name for Display name and add any Notes that help you distinguish this integration for your Claris Studio team from any other integrations. Click Next.
-
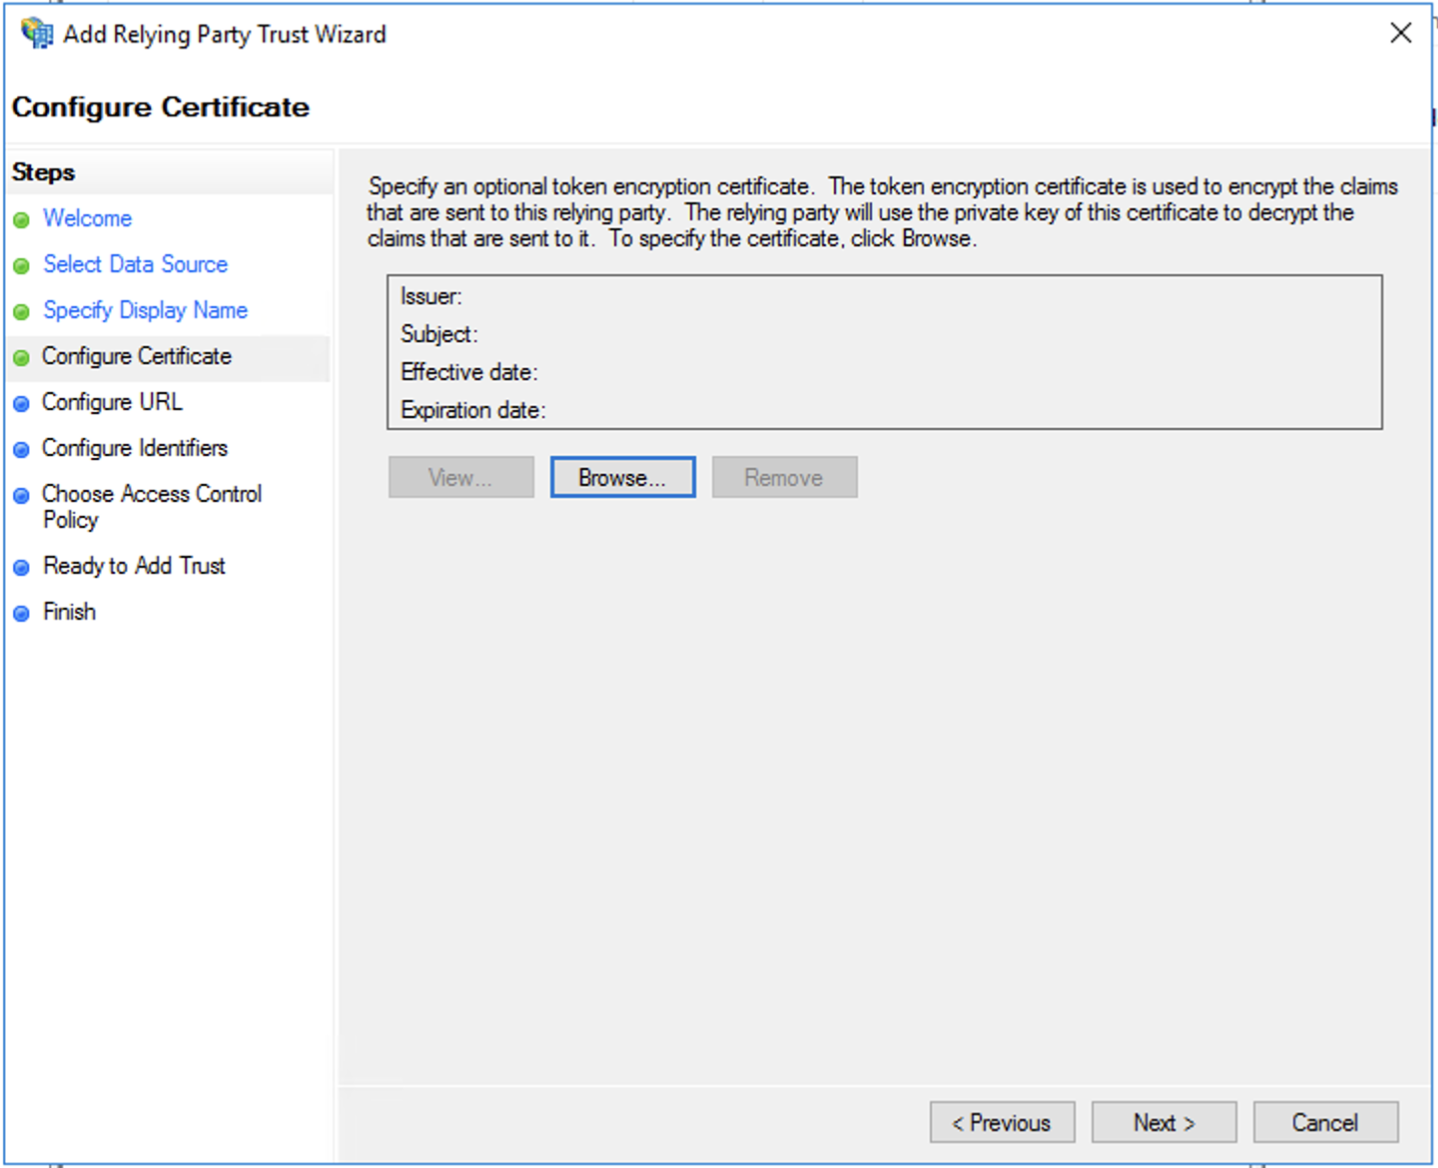
Leave the certificate configuration empty.
Click Next.
-
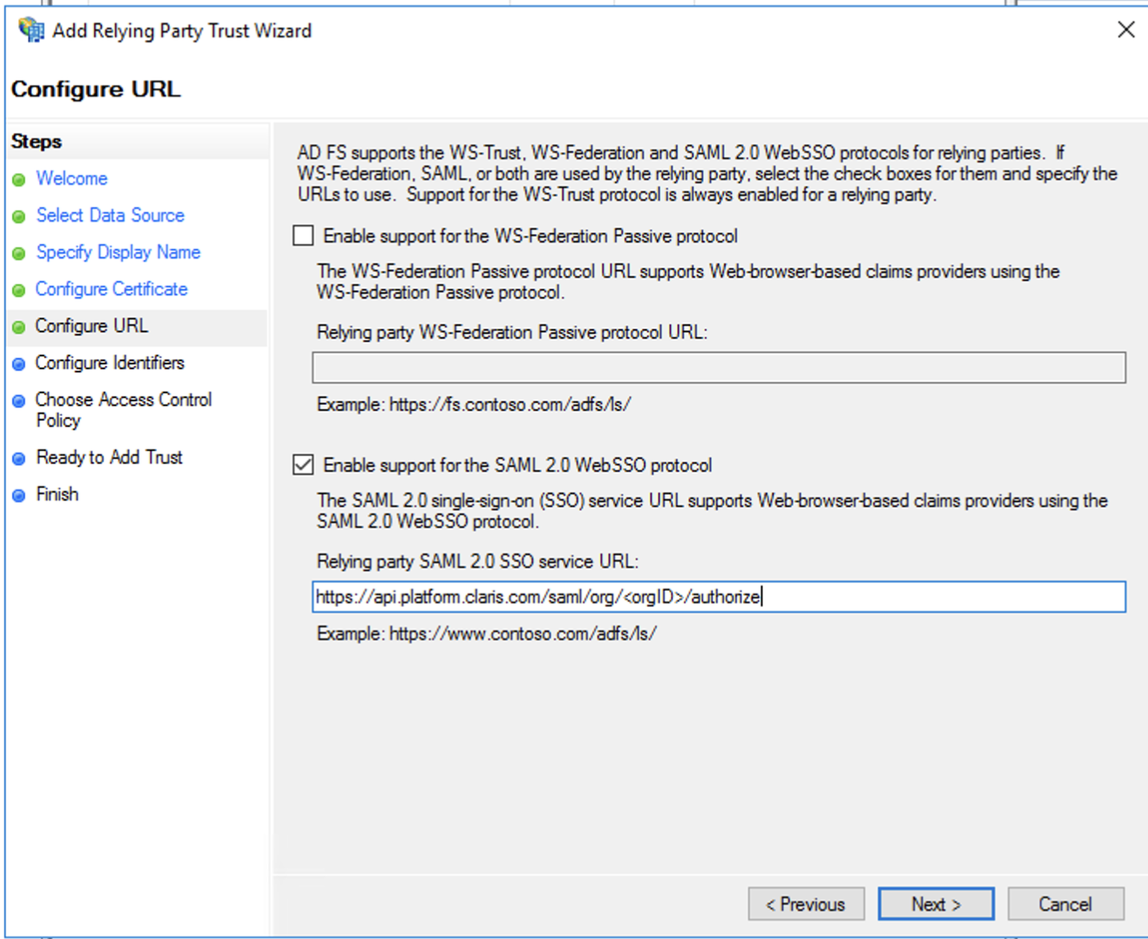
Select the Enable support for the SAML 2.0 WebSSO Protocol option. Then in Claris Studio, copy the Assertion Consumer Service URL value (see “Open the Claris Studio setup page” earlier) and paste it here.
Click Next.
-
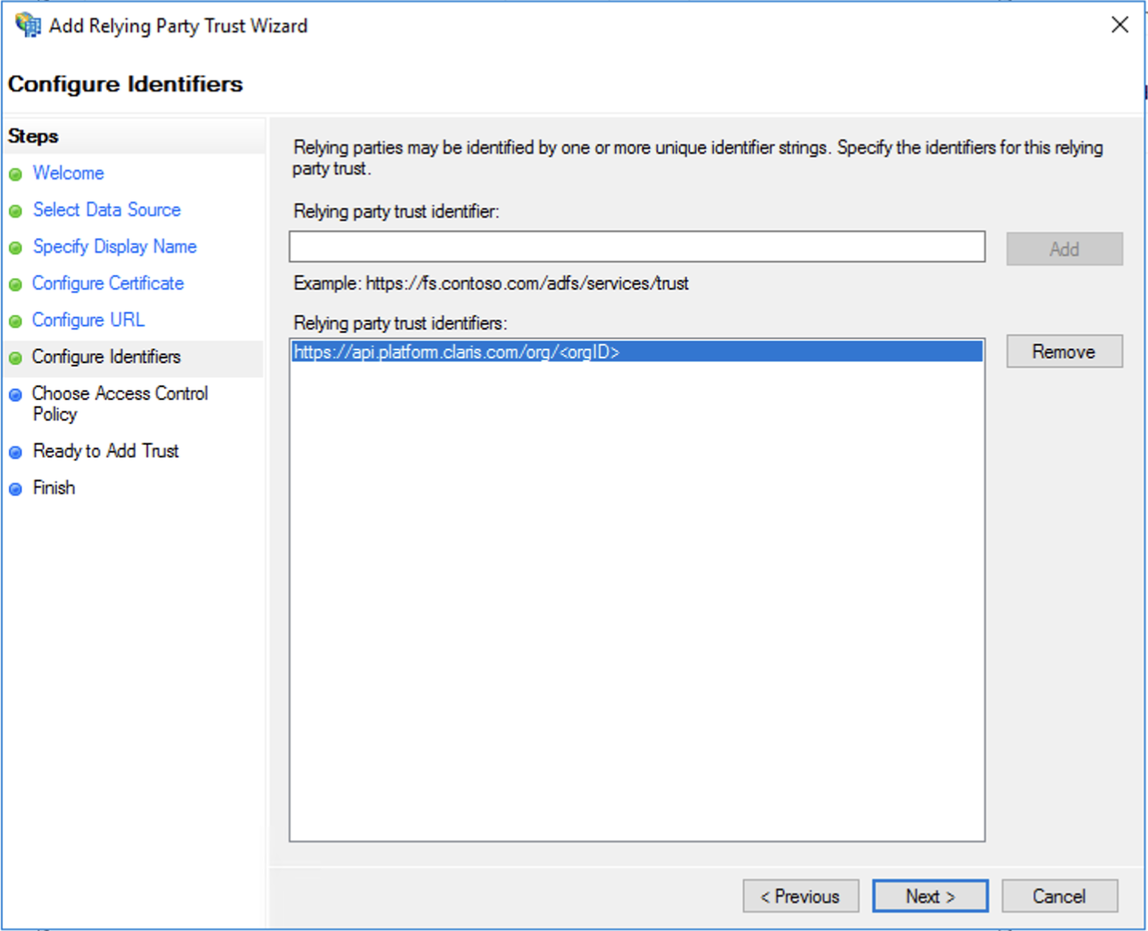
For Relying party trust identifier, in Claris Studio, copy Entity ID (see “Open the Claris Studio setup page” earlier) and paste it here.
Then click Add followed by Next to continue.
-
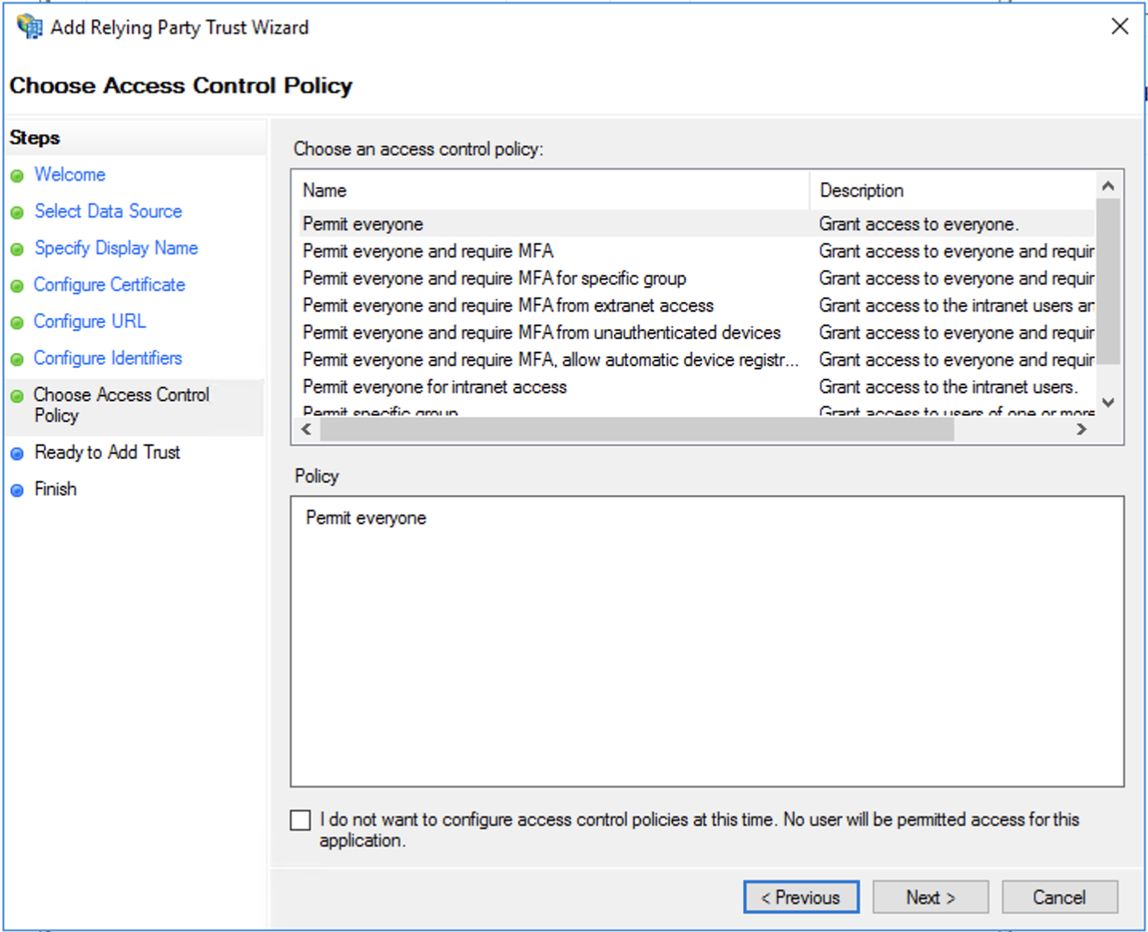
Choose an access policy to decide which users in your organization can access this Claris Studio team.
For example, choosing Permit Everyone will allow all users in your Active Directory instance to access this Claris Studio team.
Click Next.
-
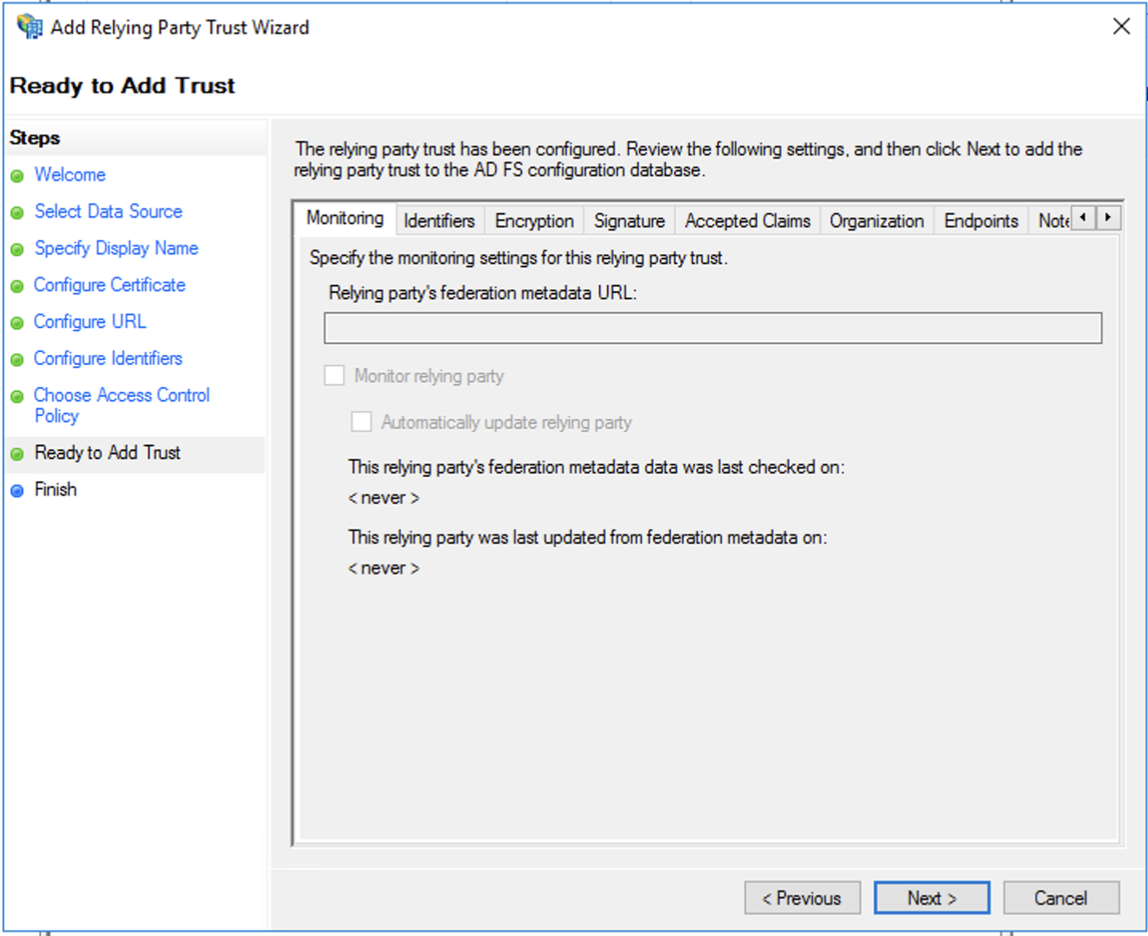
On the Ready to Add Trust screen, click Next without changing anything.
-
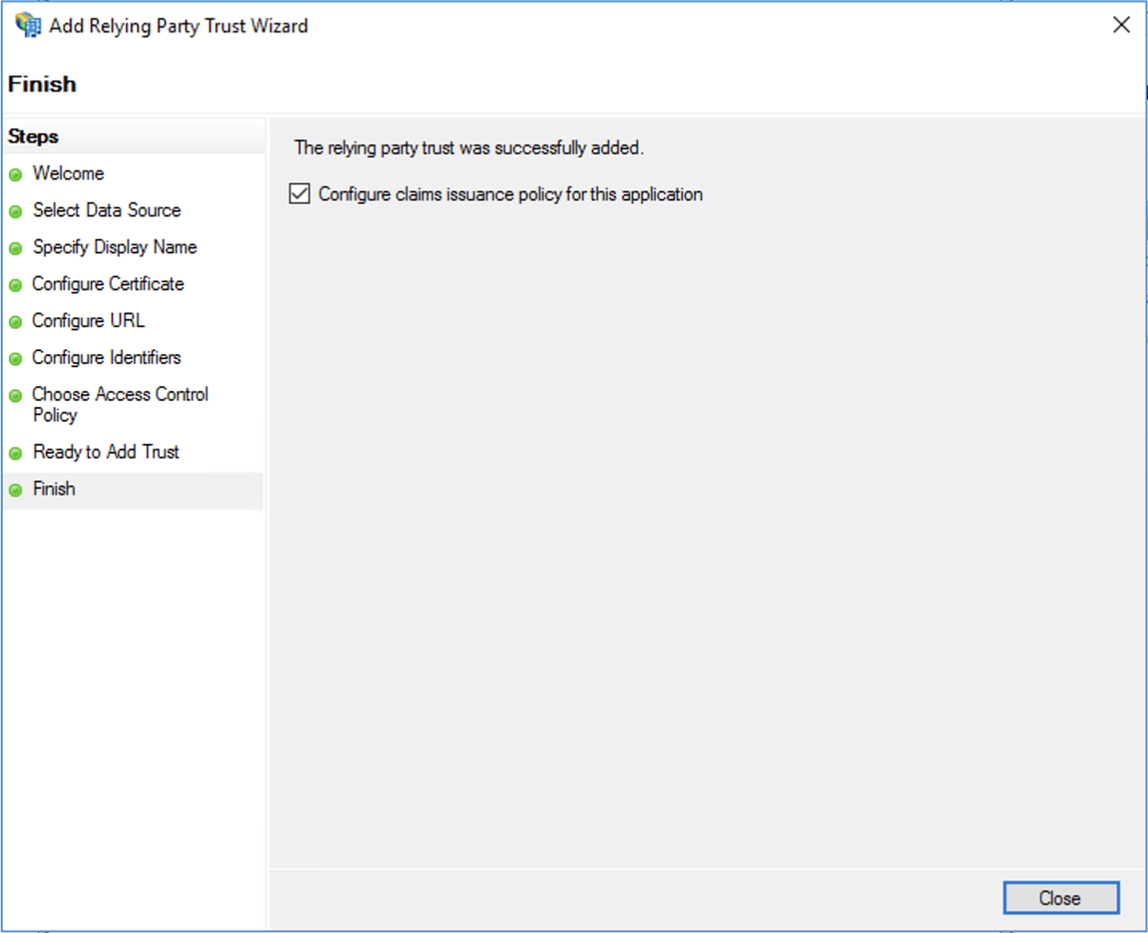
Be sure Configure claims issuance policy for this application is selected.
Click Close.
Add mappings
-
Properties of users in Active Directory must be mapped to names that Claris Studio will understand.
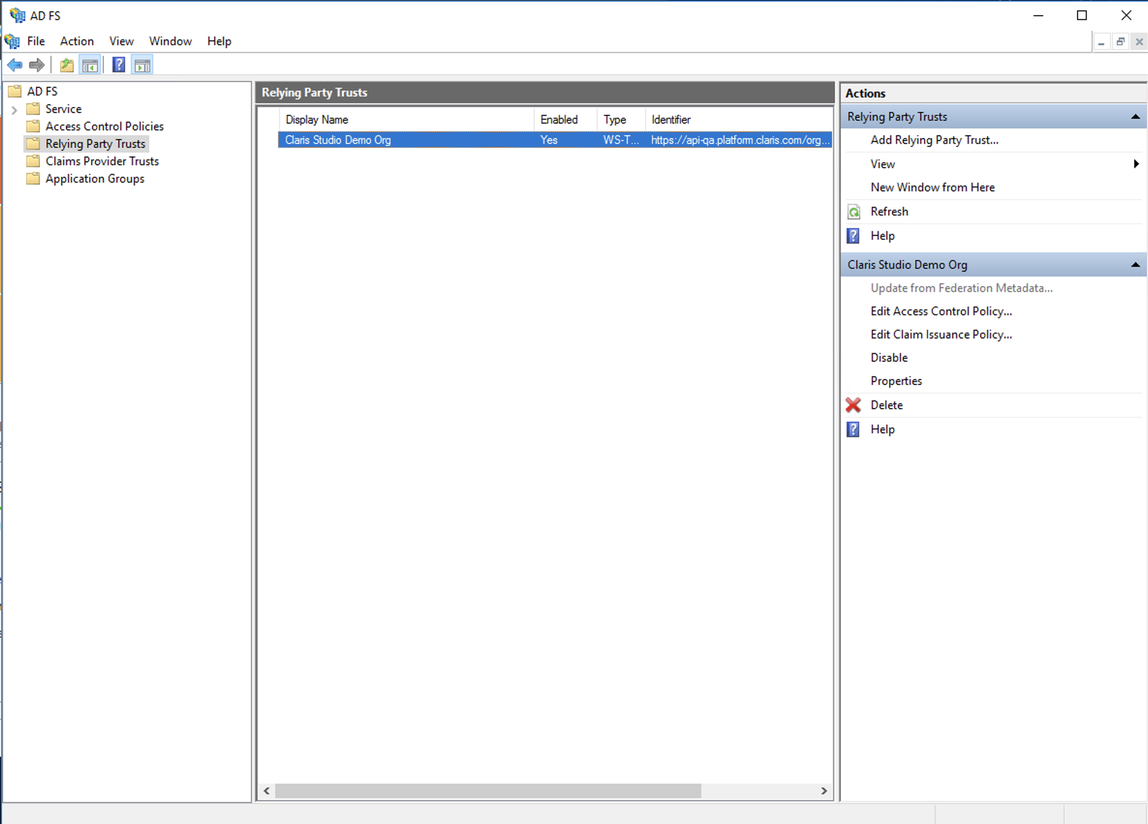
For Relying Party Trusts, select the trust you just added, then click Edit Claim Issuance Policy in the sidebar on the right.
-
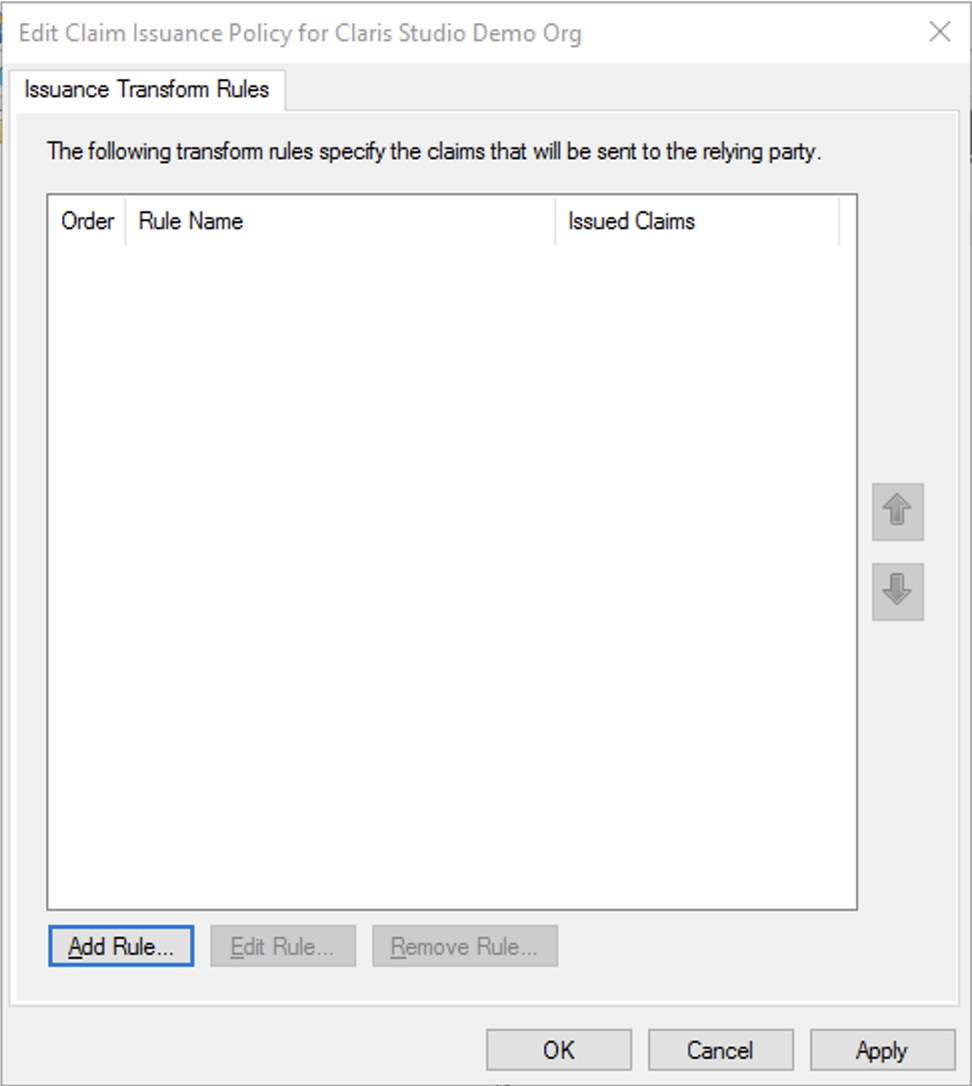
In the dialog, click Add Rule.
-
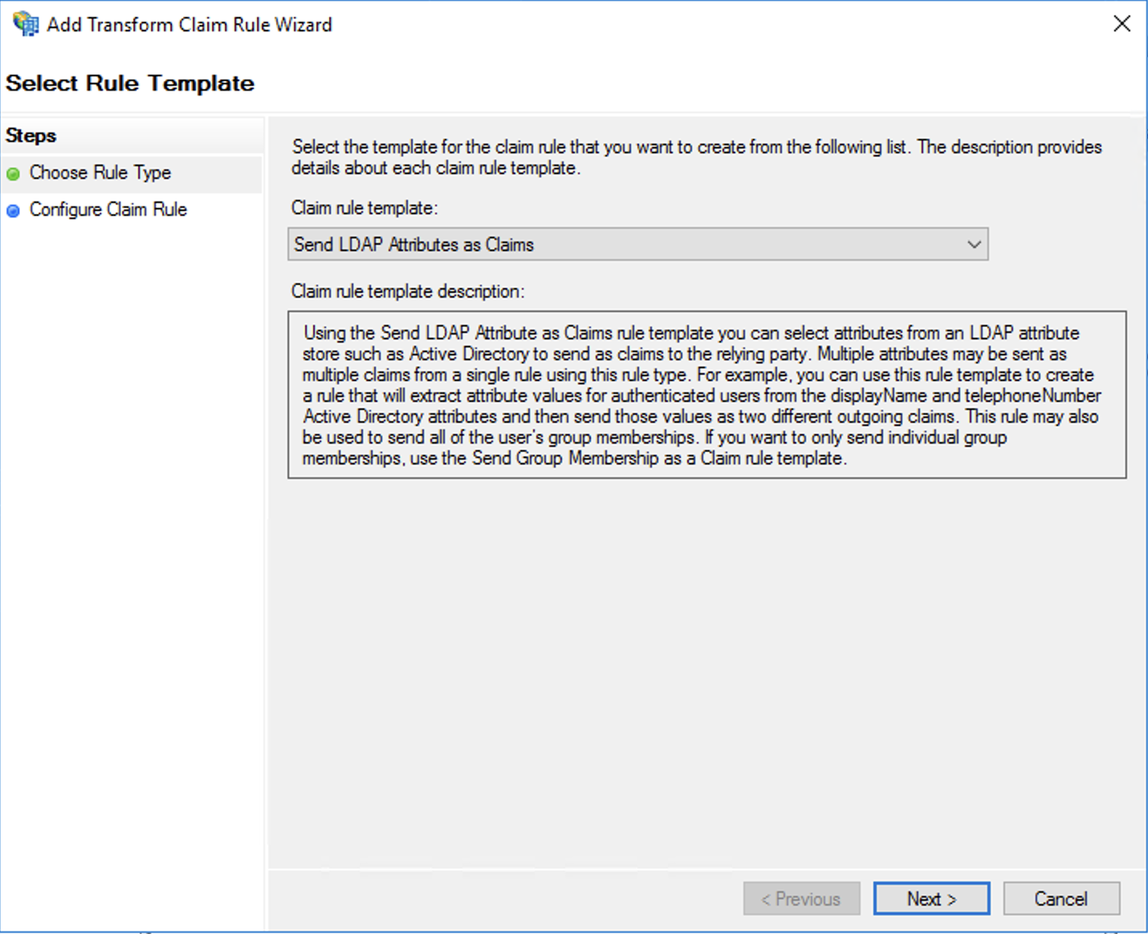
In the new rule wizard, for Claim rule template, leave the Send LDAP Attributes as Claims option selected.
Click Next.
-
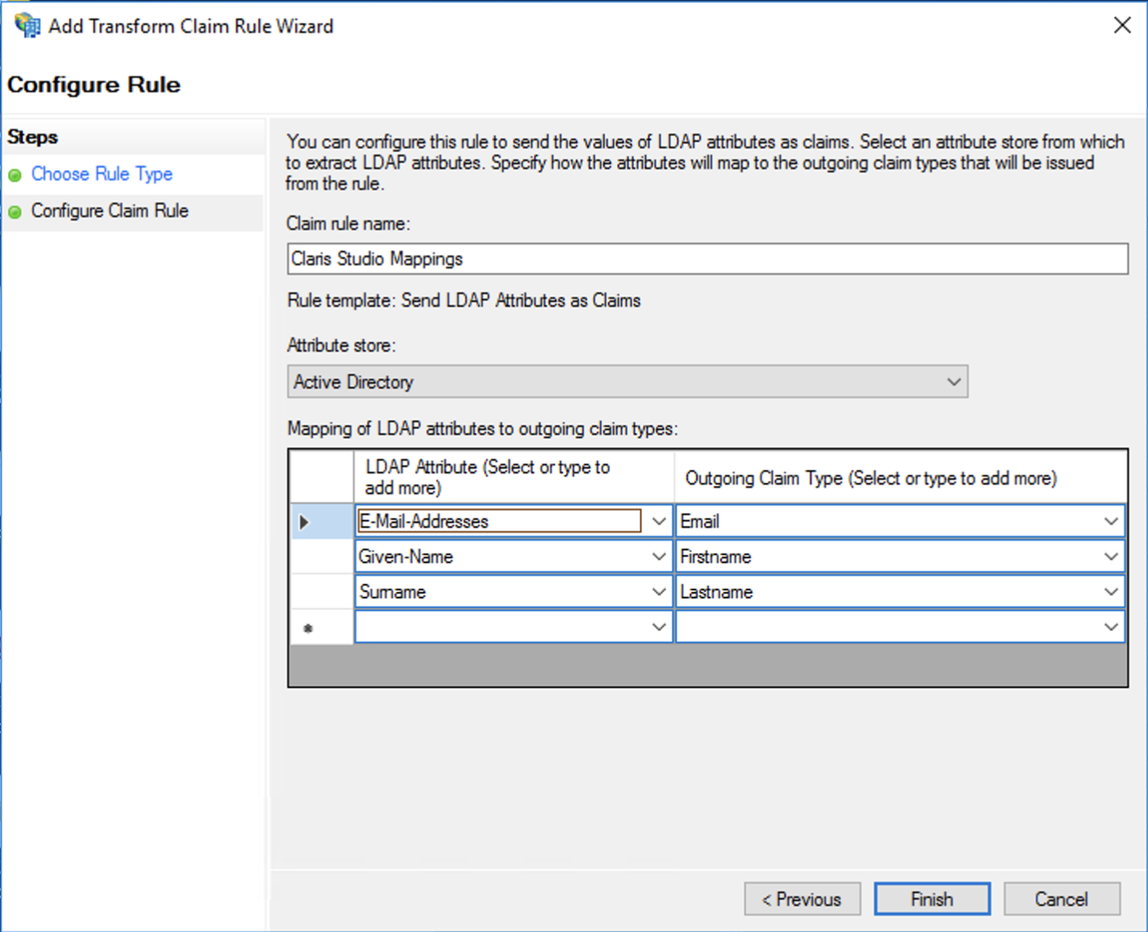
For Claim rule name, give the rule a descriptive name. For Attribute store, leave it set to Active Directory.
Then, click the options disclosure arrow and choose E-Mail-Addresses as the LDAP Attribute for the first row. On the next row, select the Given-Name option, and on the third row, select Surname.
In the Outgoing Claim Type column for each row, enter the following value for each LDAP Attribute. Be sure to enter the claims types exactly as shown, because they are case sensitive.
-
E-Mail-Addresses → Email
-
Given-Name → Firstname
-
Surname → Lastname
Click Finish when done.
-
-
In the dialog, click Apply.
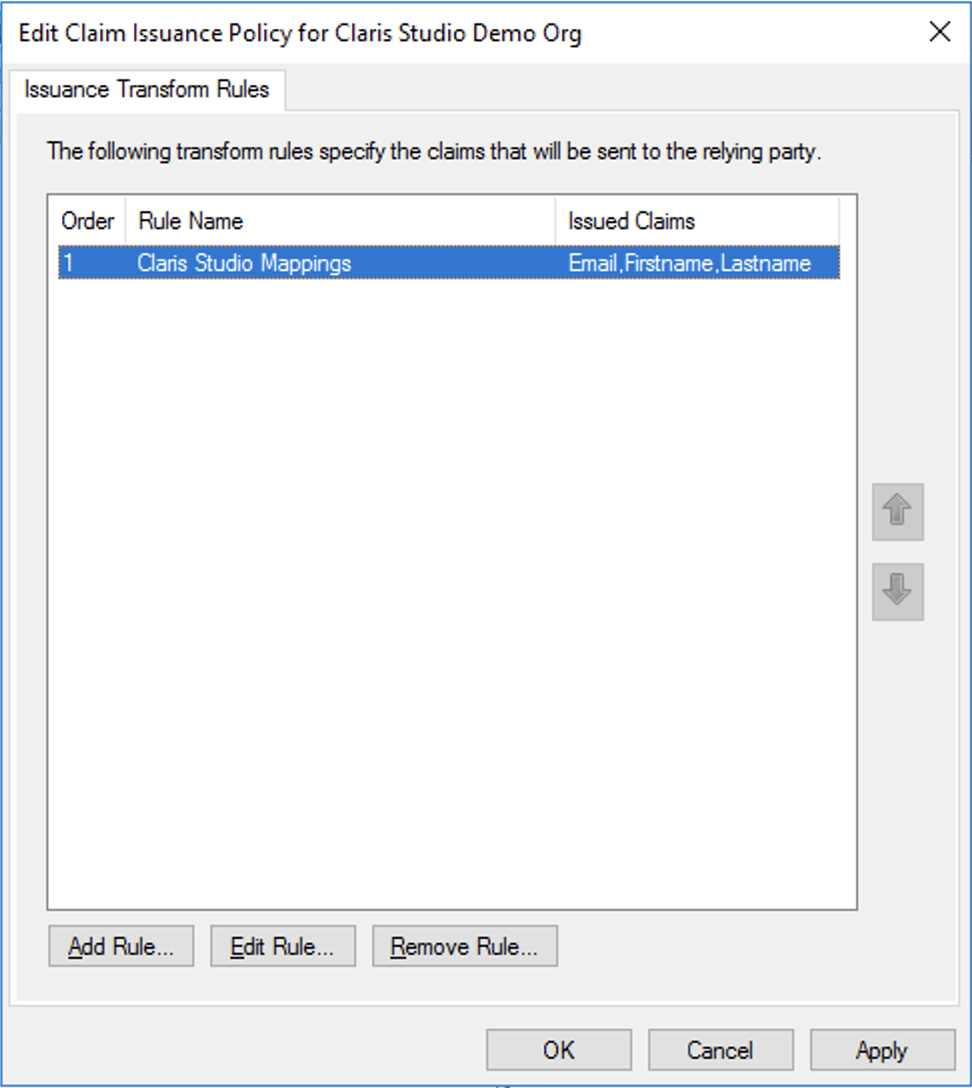
That’s it. You can now close any remaining windows and sign out of your Windows Server instance.
Enter values into Claris Studio
- Go back to the Claris Studio page you opened earlier (see “Open the Claris Studio setup page”).
-
In the Configure External Identity Provider dialog, for Protocol, choose SAML. Then for Metadata, enter the following URL:
https://<AD FS Domain>/federationmetadata/2007-06/FederationMetadata.xmlwhere <AD FS Domain> is your AD FS domain name or IP address
-
Select one or more Default Groups that you want to sign in using this external IdP, then click Apply.
If you have no groups, you can create one here and add users to it later. See Work with groups for more information.
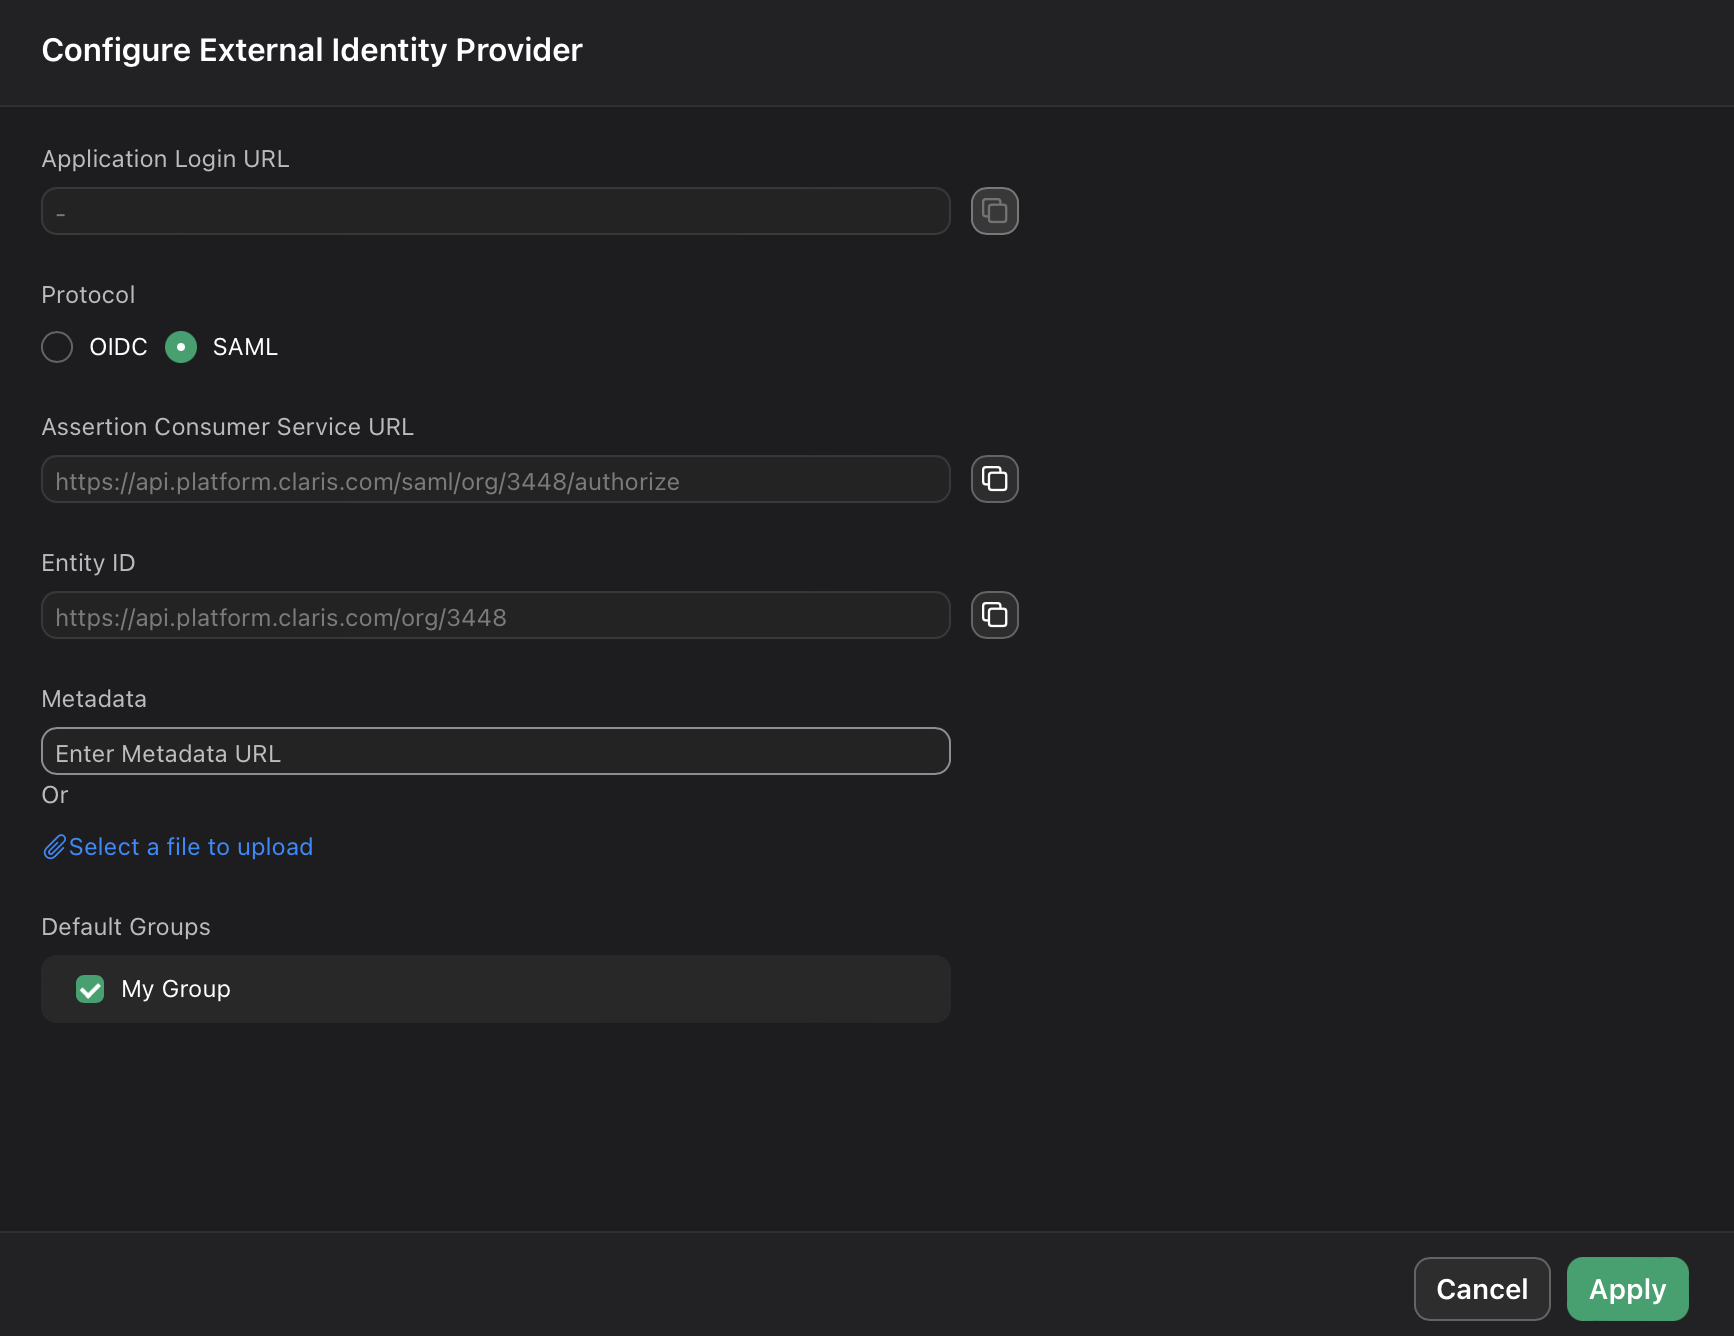
- On the Users page, copy the link labeled Application Login URL and provide it to users. Using this URL enables them to sign in to Claris Studio with their SSO credentials.