Amazon Cognito using OIDC
Follow the steps below to configure single sign-on (SSO) for Claris Studio with Amazon Cognito using OpenID Connect (OIDC). To establish trust between Amazon Cognito and a Claris Studio team, you’ll need to:
-
Create an app integration
-
Update it with your Claris Studio team details
-
Create secrets
-
Save those secrets in Claris Studio
Prerequisites
Before starting, ensure you have admin access to an AWS Cognito environment.
Open the Claris Studio setup page
-
Sign in to your Claris Studio team.
-
Click the Users tab on the left, then click Configure External IdP.

-
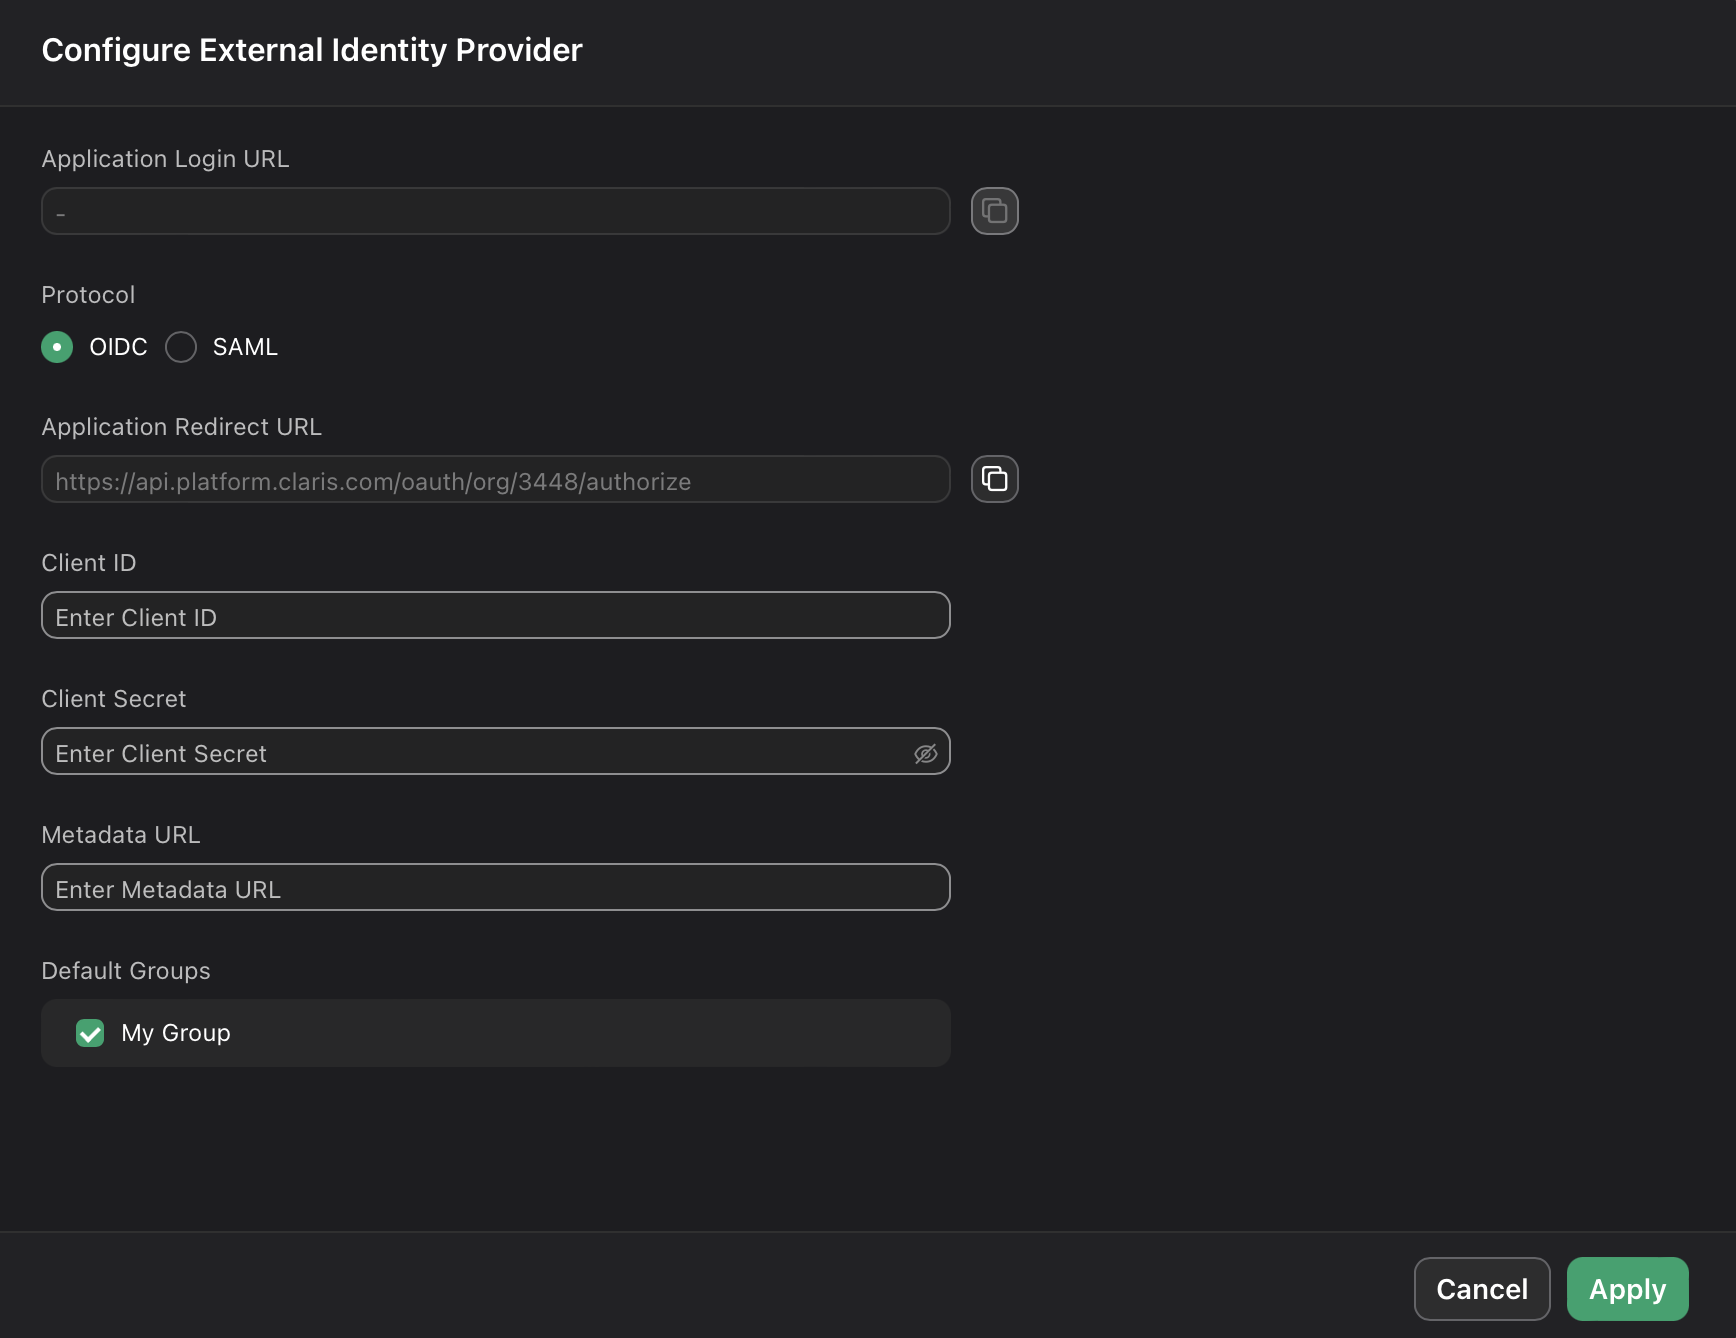
In the Configure External Identity Provider dialog, for Protocol, choose OIDC. Keep this page open to come back to later.
App integration
Set up the domain
-
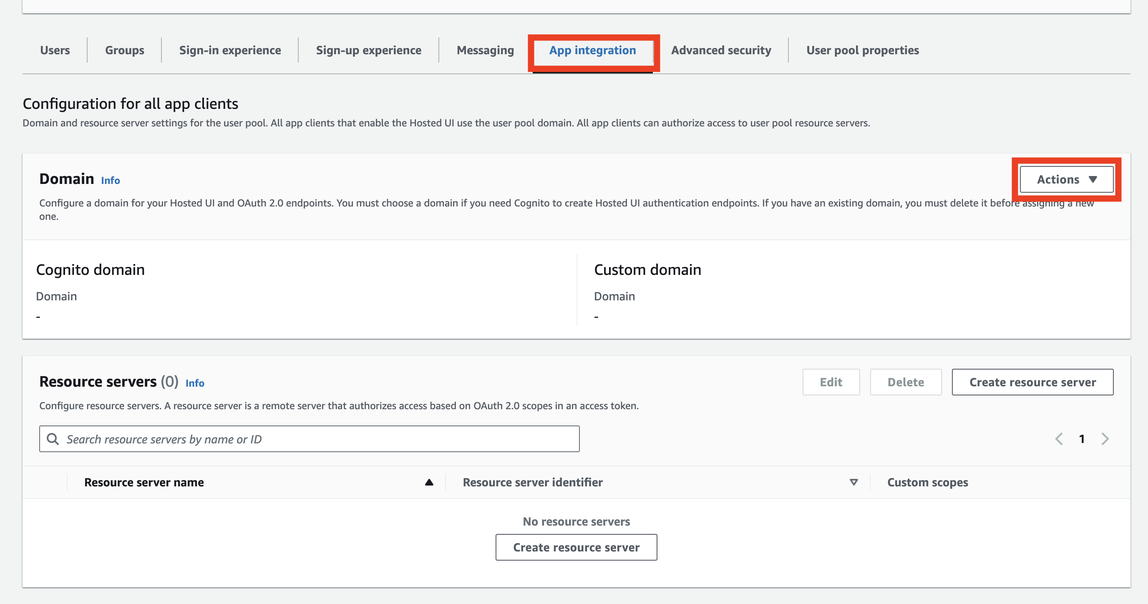
Sign in to AWS console, then go to Cognito.
-
Go to the App Integration section.
-
Click Create Domain.
-
Choose Cognito Domain, then provide a domain name (for example, user-pool-name).
https://{user-pool-name}.auth.us-west-2.amazoncognito.com
Configure app client
-
In Cognito, go to the App Client Settings.
-
Select the app client you created.
-
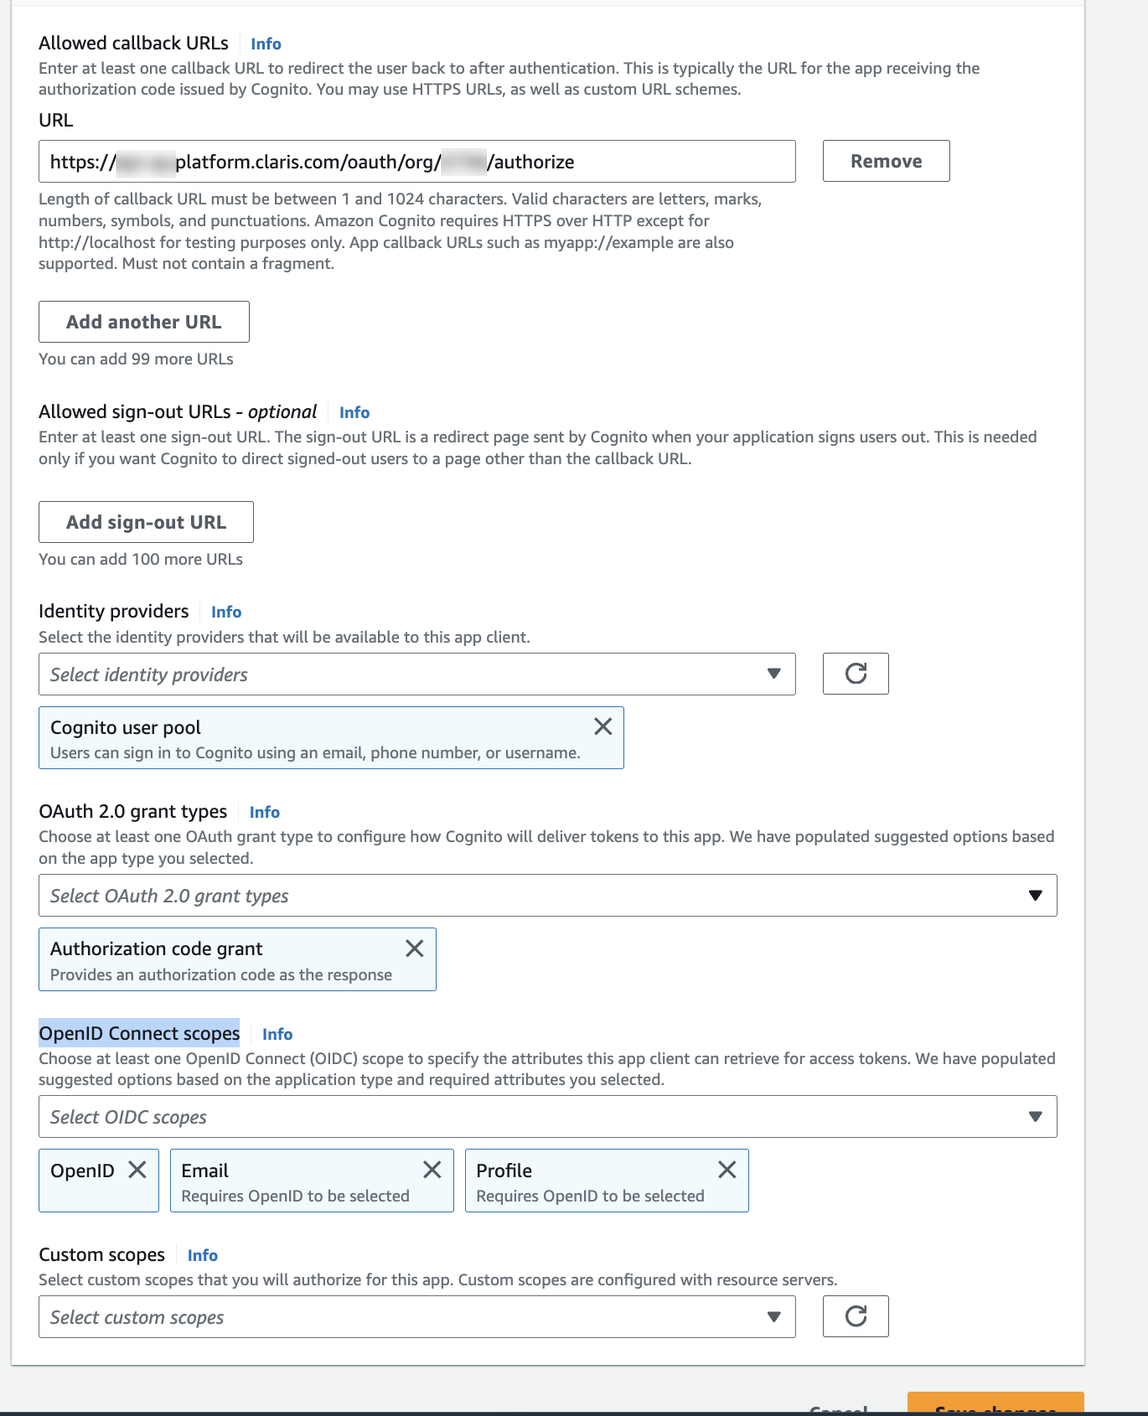
Under Hosted UI, click Edit, then enter the following information:
-
Callback URL: Enter the Studio QA callback URL from Claris Studio’s External Identity Provider Settings. For example:
https://platform.claris.com/oauth/org/<org-id>/authorize
-
Identity Providers: Select Cognito User Pool.
-
OAuth 2.0 Grant Types: Choose Authorization Code Grant.
-
OpenID Connect Scopes: Select openid, email, and profile.
-
-
Click Save Changes.


Enter values into Claris Studio
-
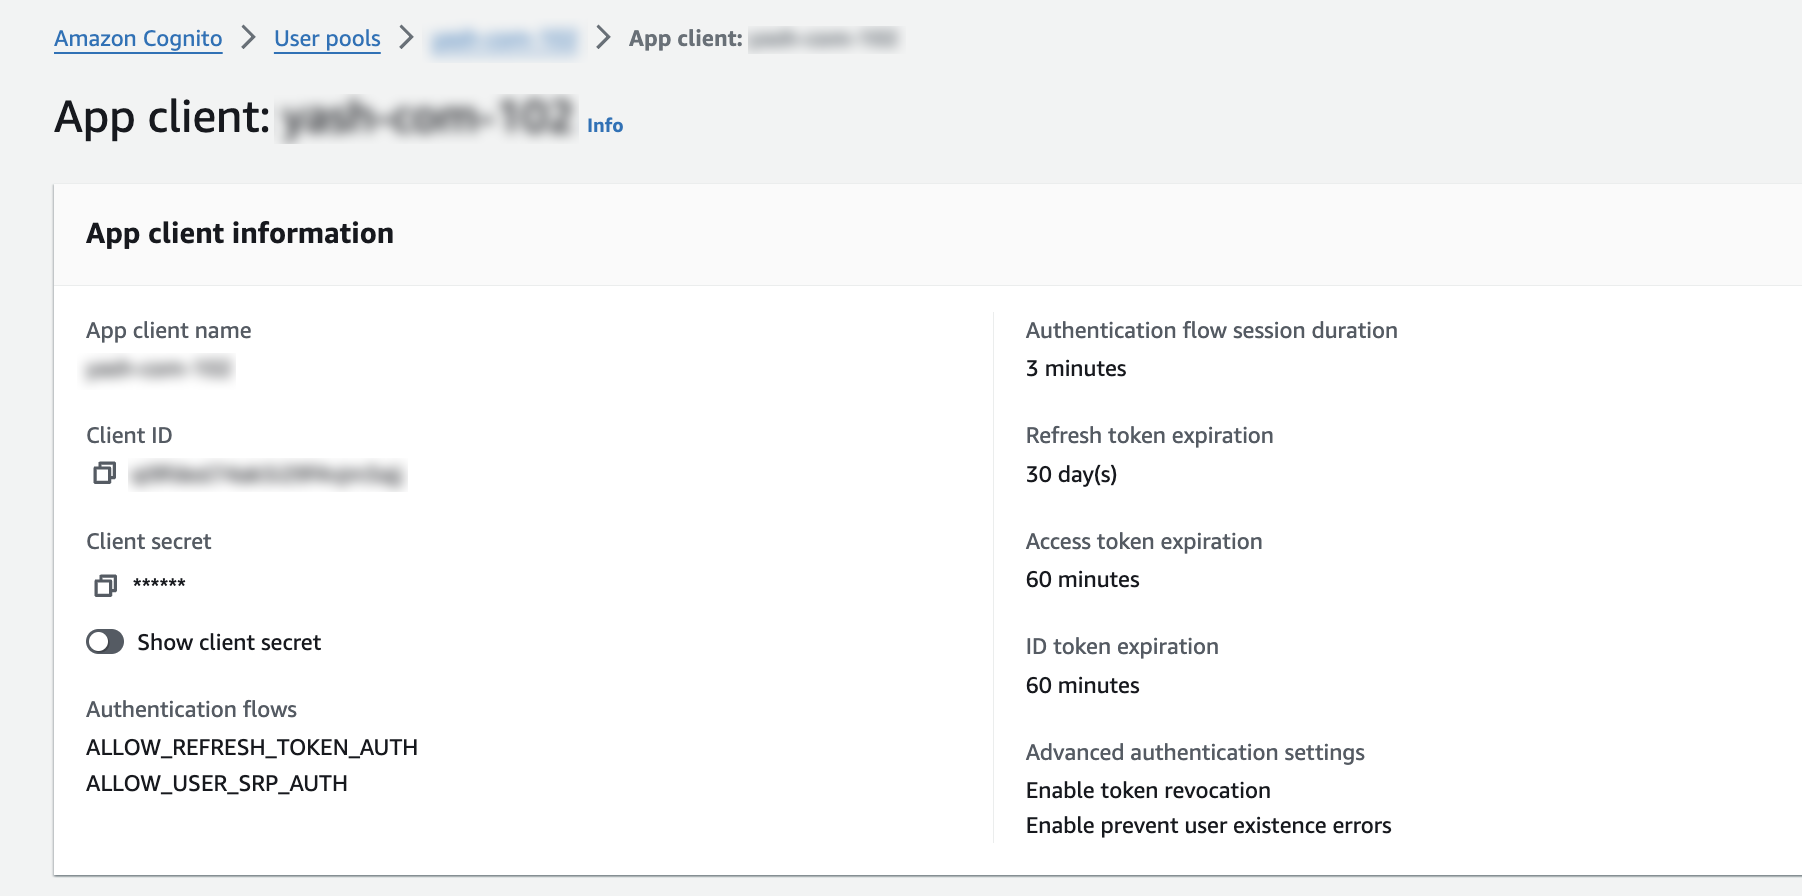
In Cognito, from App Client Settings, copy the Client ID and Client Secret.

- Go back to the Claris Studio page you opened earlier (see “Open the Claris Studio setup page”).
-
In the Configure External Identity Provider dialog, for Protocol, choose OIDC, then provide the following information:
-
Client ID: Paste the Client ID copied from Cognito.
-
Client Secret: Paste the Client Secret copied from Cognito.
-
Metadata URL: Enter:
https://cognito-idp.<awsregion>.amazonaws.com/<userpoolid>/.well-known/openid-configuration
-
-
Select one or more Default Groups that you want to sign in using this external IdP, then click Apply.
If you have no groups, you can create one here and add users to it later. See Work with groups for more information.

- On the Users page, copy the link labeled Application Login URL and provide it to users. Using this URL enables them to sign in to Claris Studio with their SSO credentials.