Microsoft Entra ID using SAML
Follow the steps below to configure single sign-on (SSO) for Claris Studio with Microsoft Entra ID using Security Assertion Markup Language (SAML). To establish trust between Entra ID and a Claris Studio team, you’ll need to:
-
Create an enterprise application.
-
Add SAML to the application.
-
Assign users.
-
Enter the metadata URL in Claris Studio.
Open the Claris Studio setup page
-
Sign in to your Claris Studio team.
-
Click the Users tab on the left, then click Configure External IdP.

-
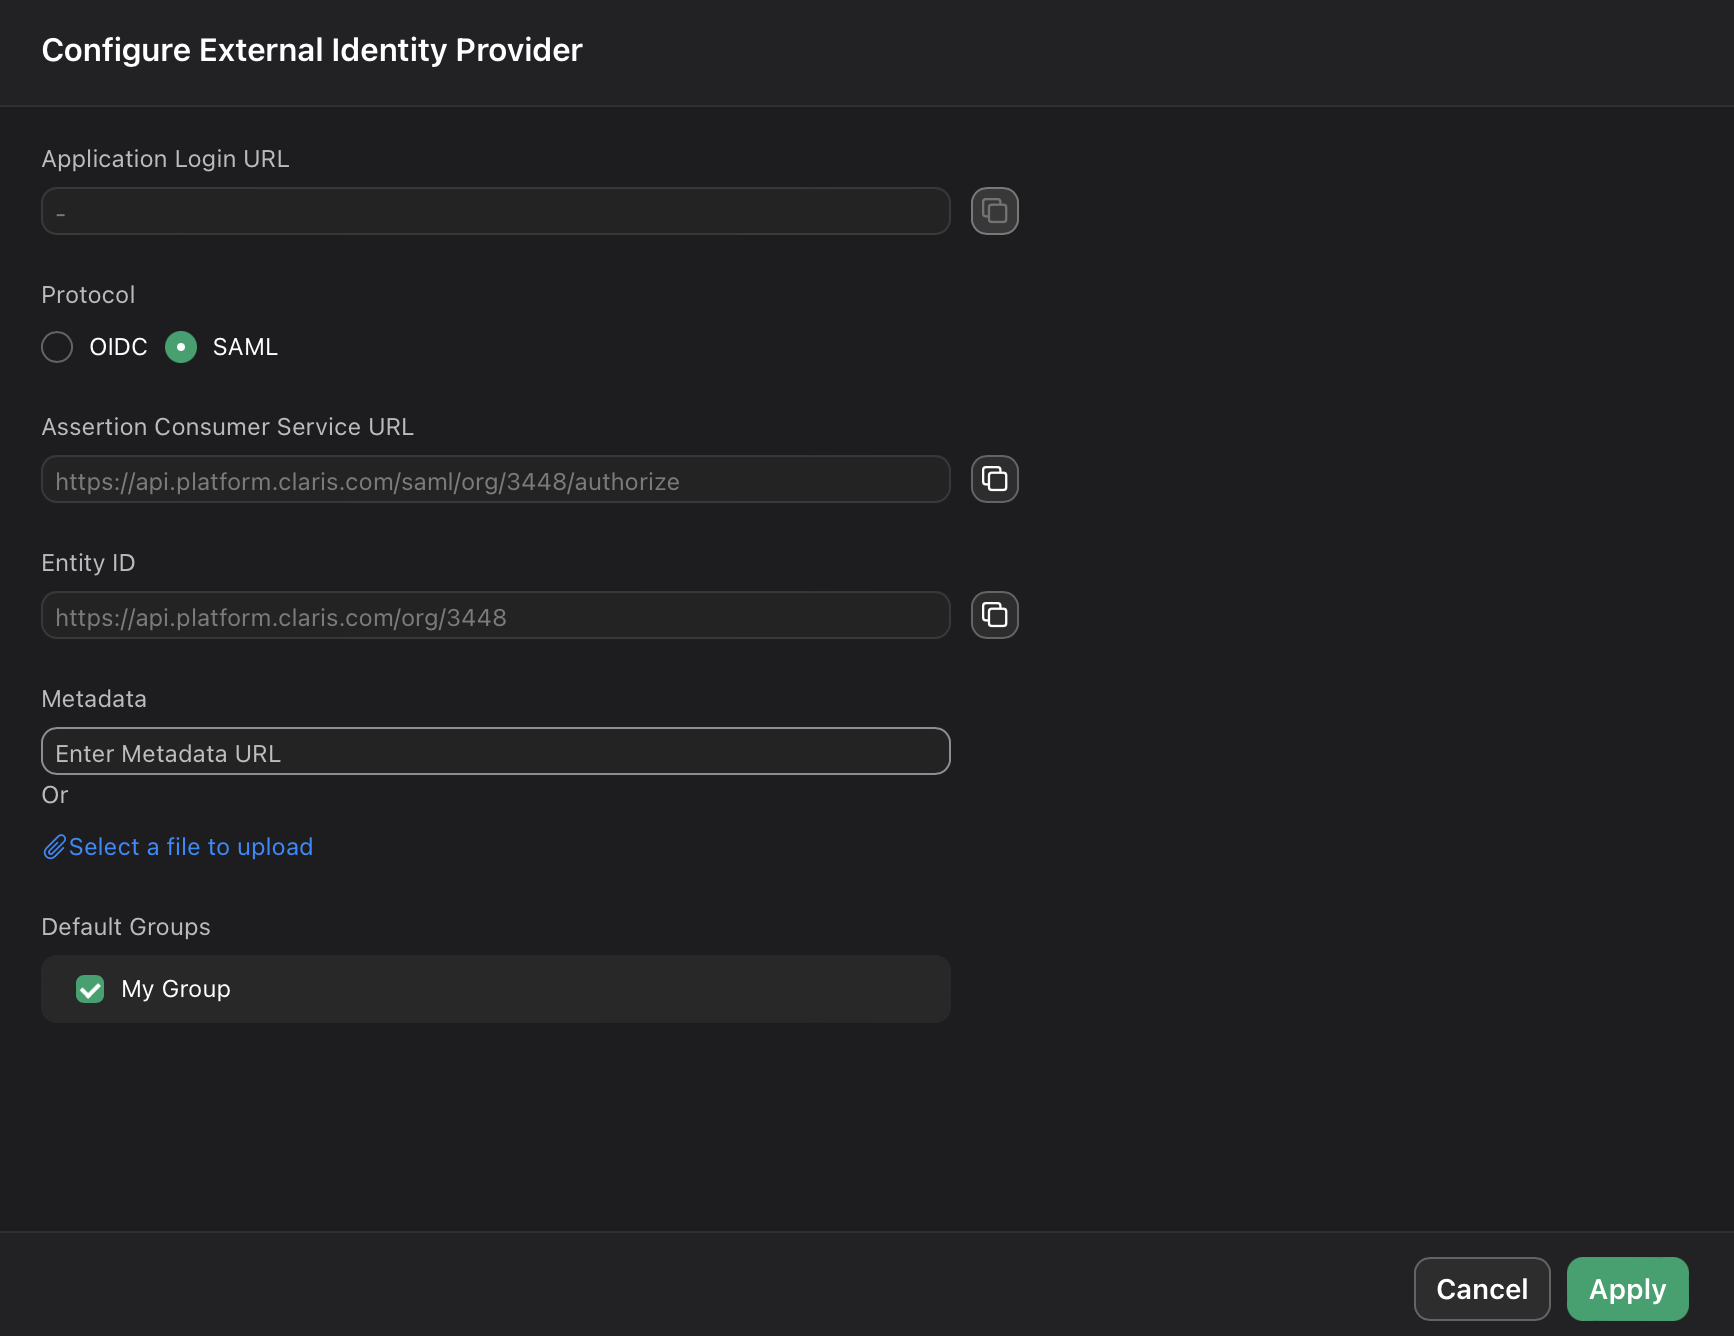
In the Configure External Identity Provider dialog, for Protocol, choose SAML. Keep this page open to come back to later.
Create an enterprise application
-
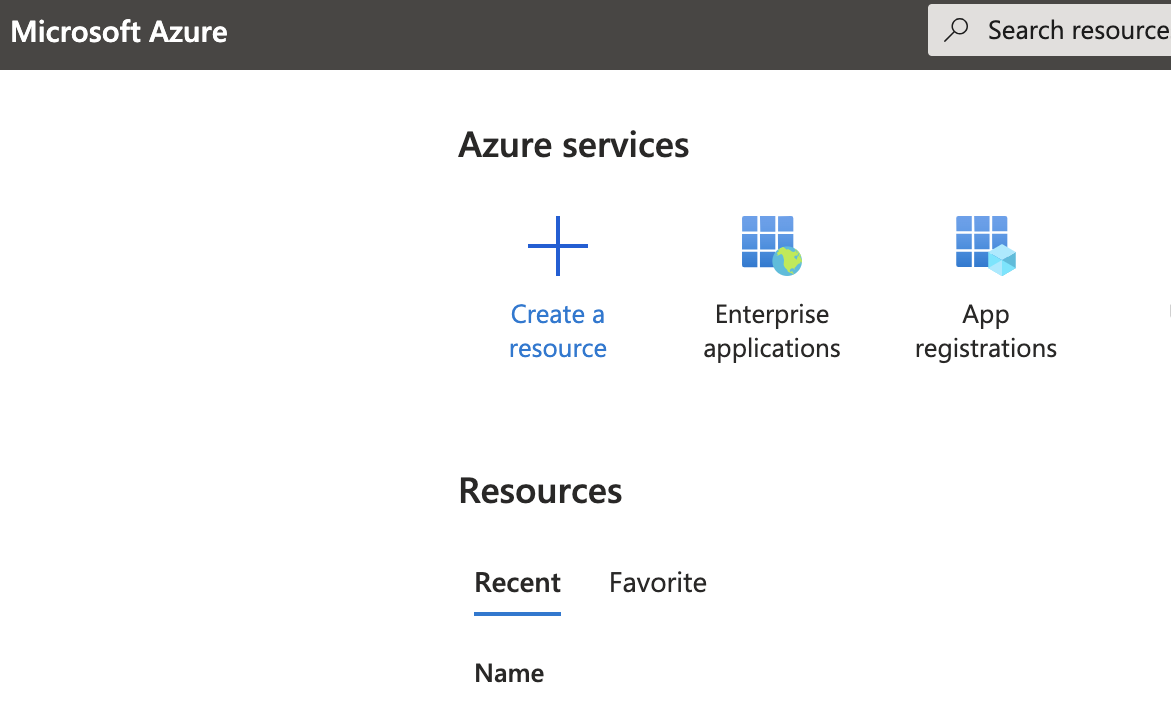
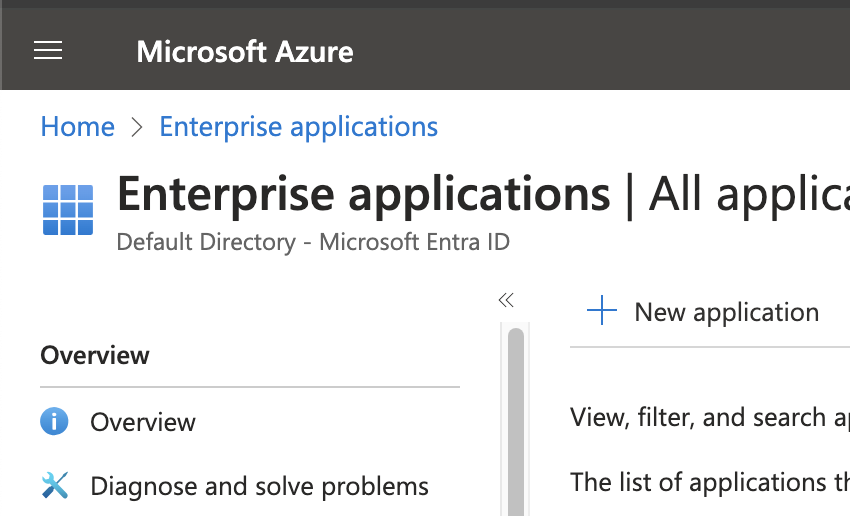
Sign in to the Azure portal. Under Azure services, click Enterprise Applications. On the next page, click + New Application near the top left corner.
-
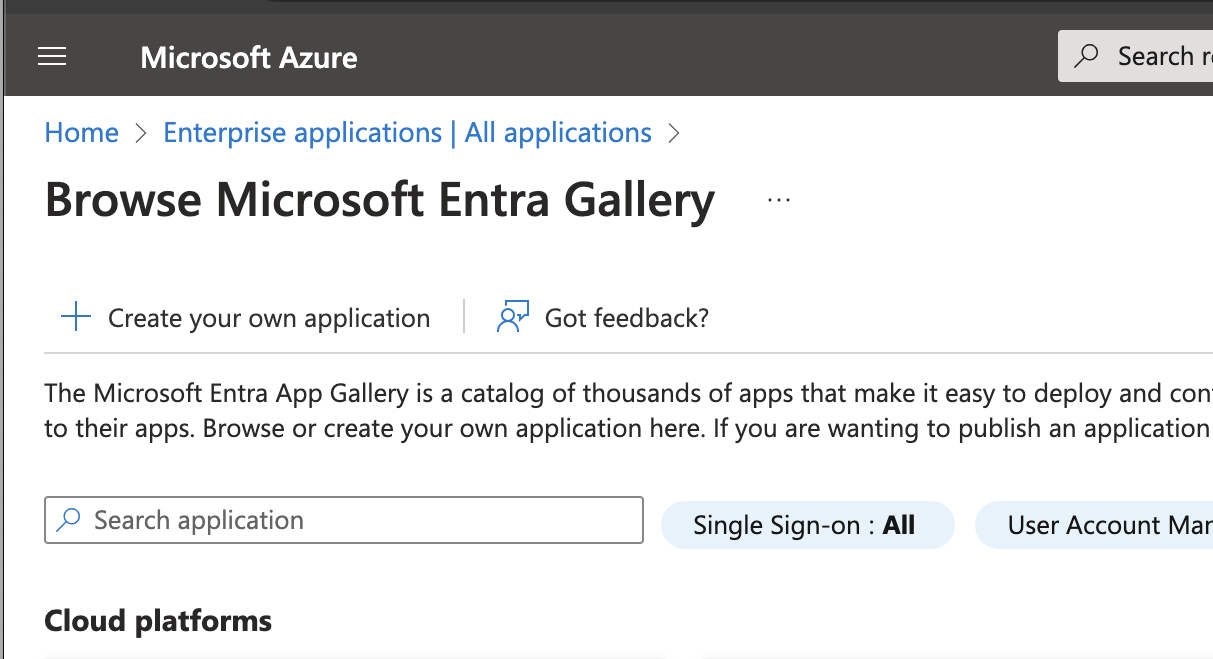
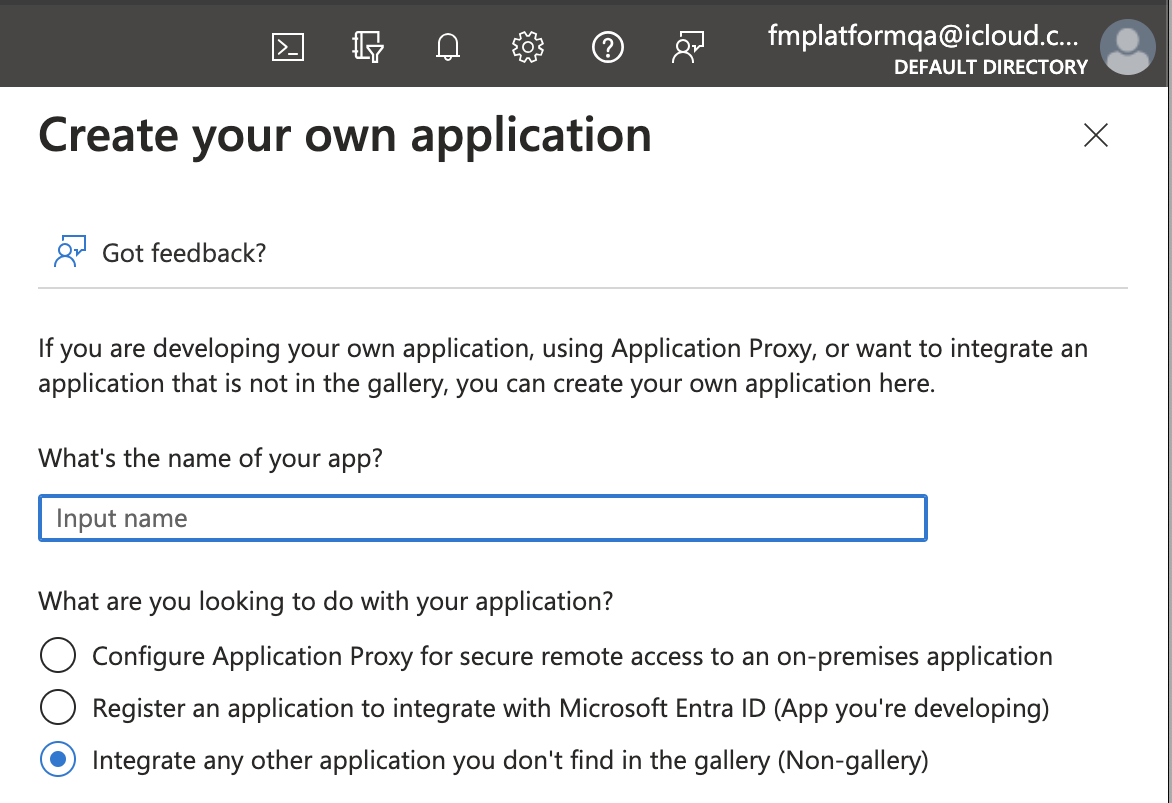
To create a custom application for Claris Studio, click + Create your own application. Enter a name for your app, then select the Integrate any other application you don't find in the gallery option.
-
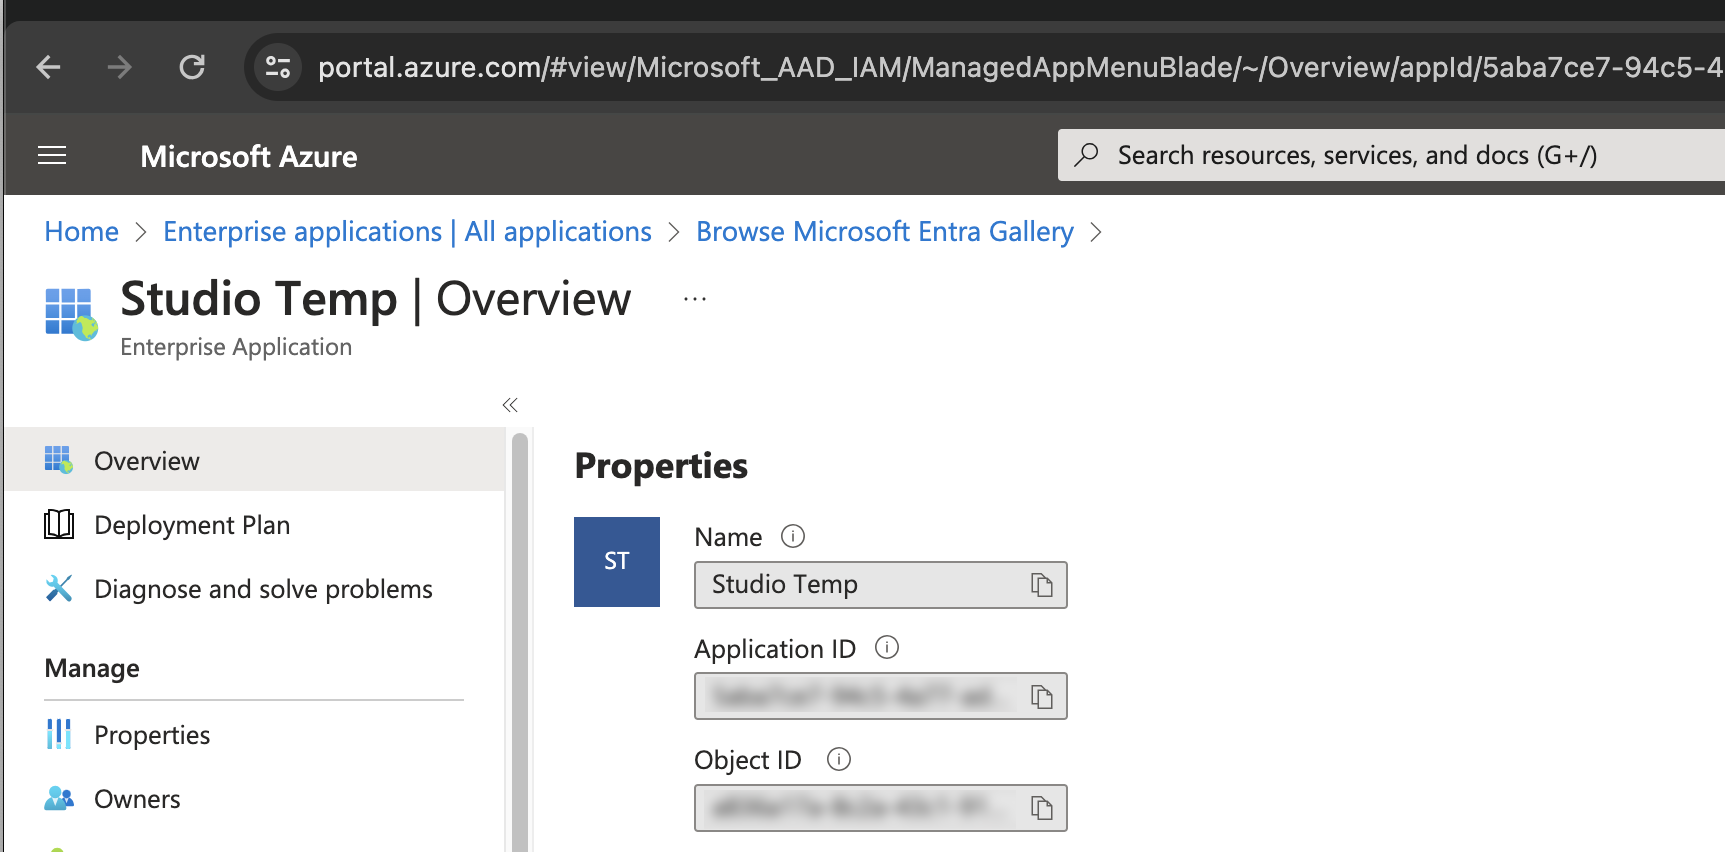
In your new application, you’ll see Name, Application ID, and Object ID. You can ignore these and continue to the next step.
Set up SAML in the new application
-
In the left sidebar under Manage, click Single Sign-On.
Here, click the SAML option.
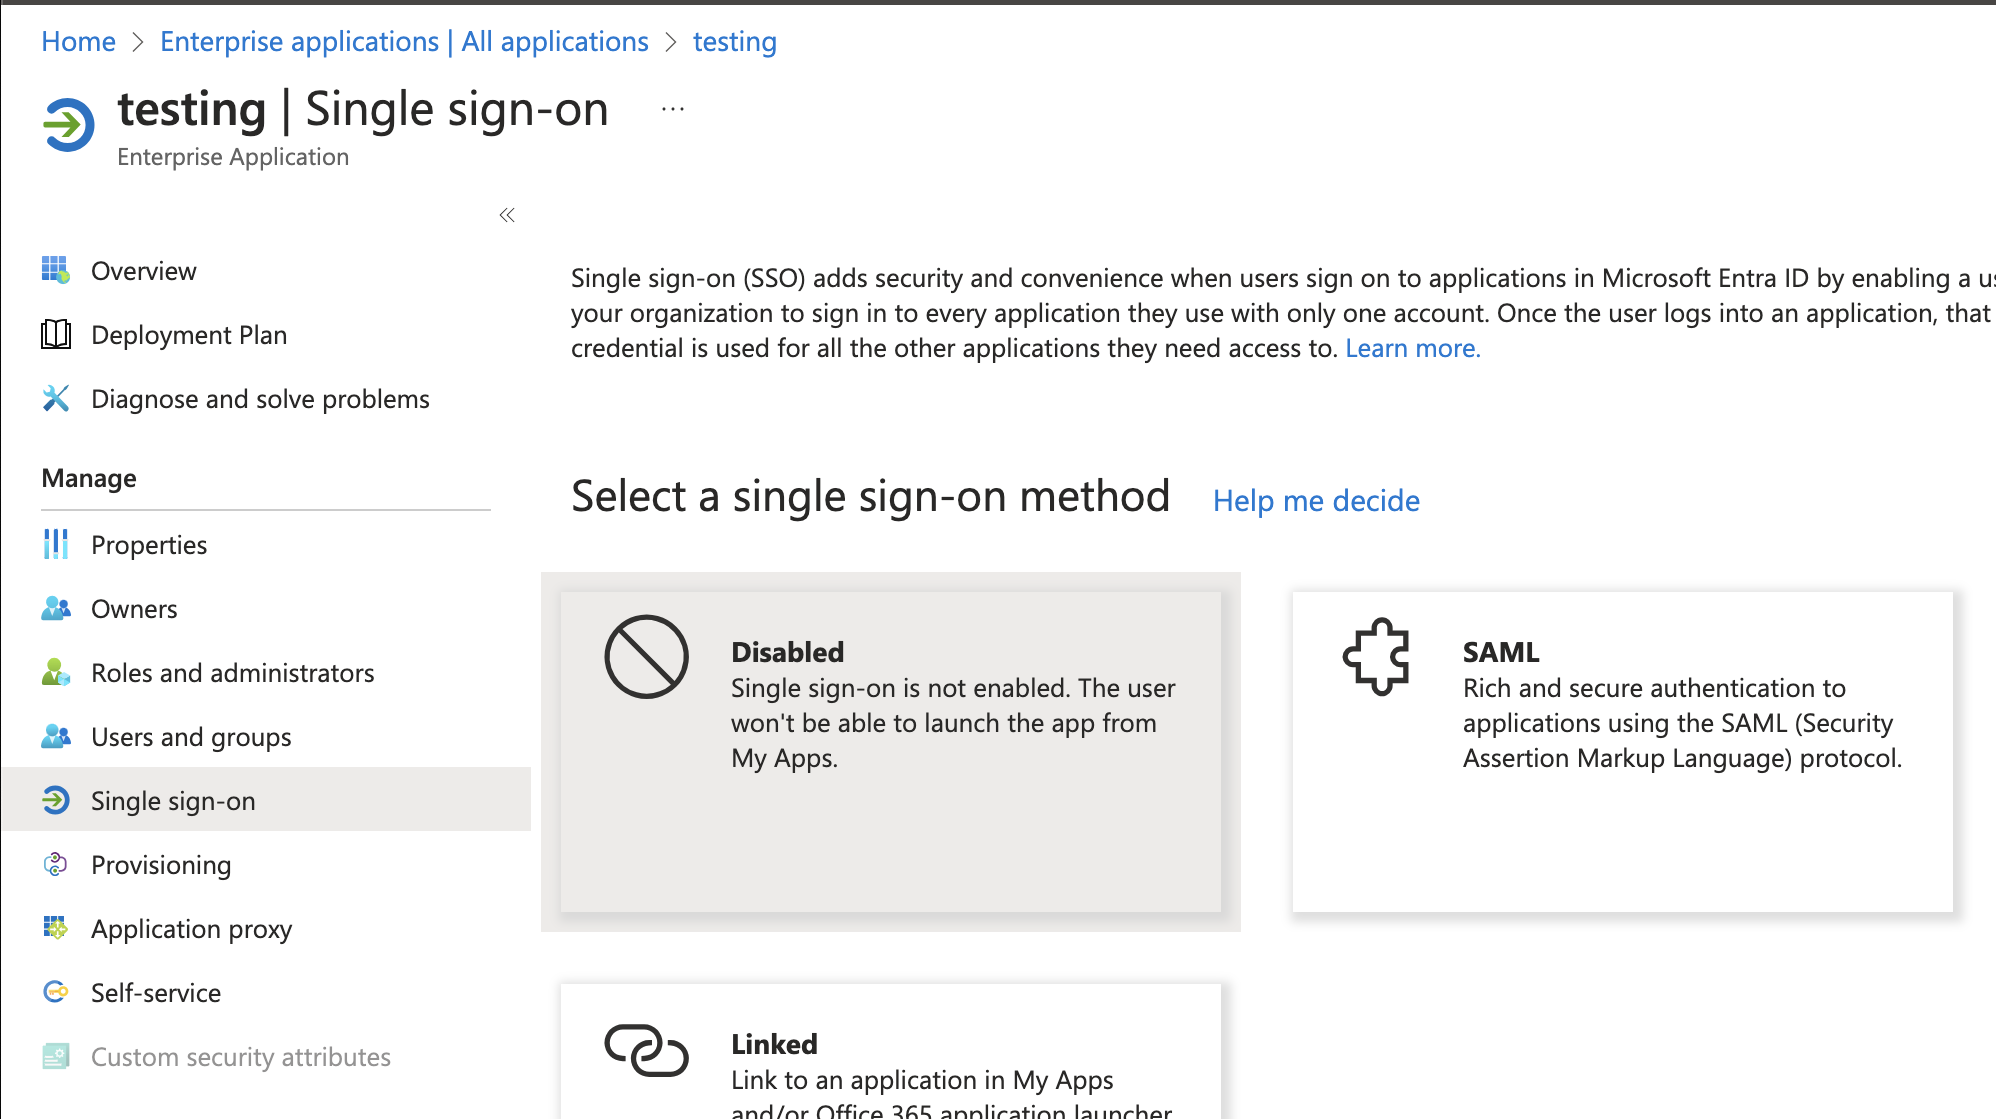
-
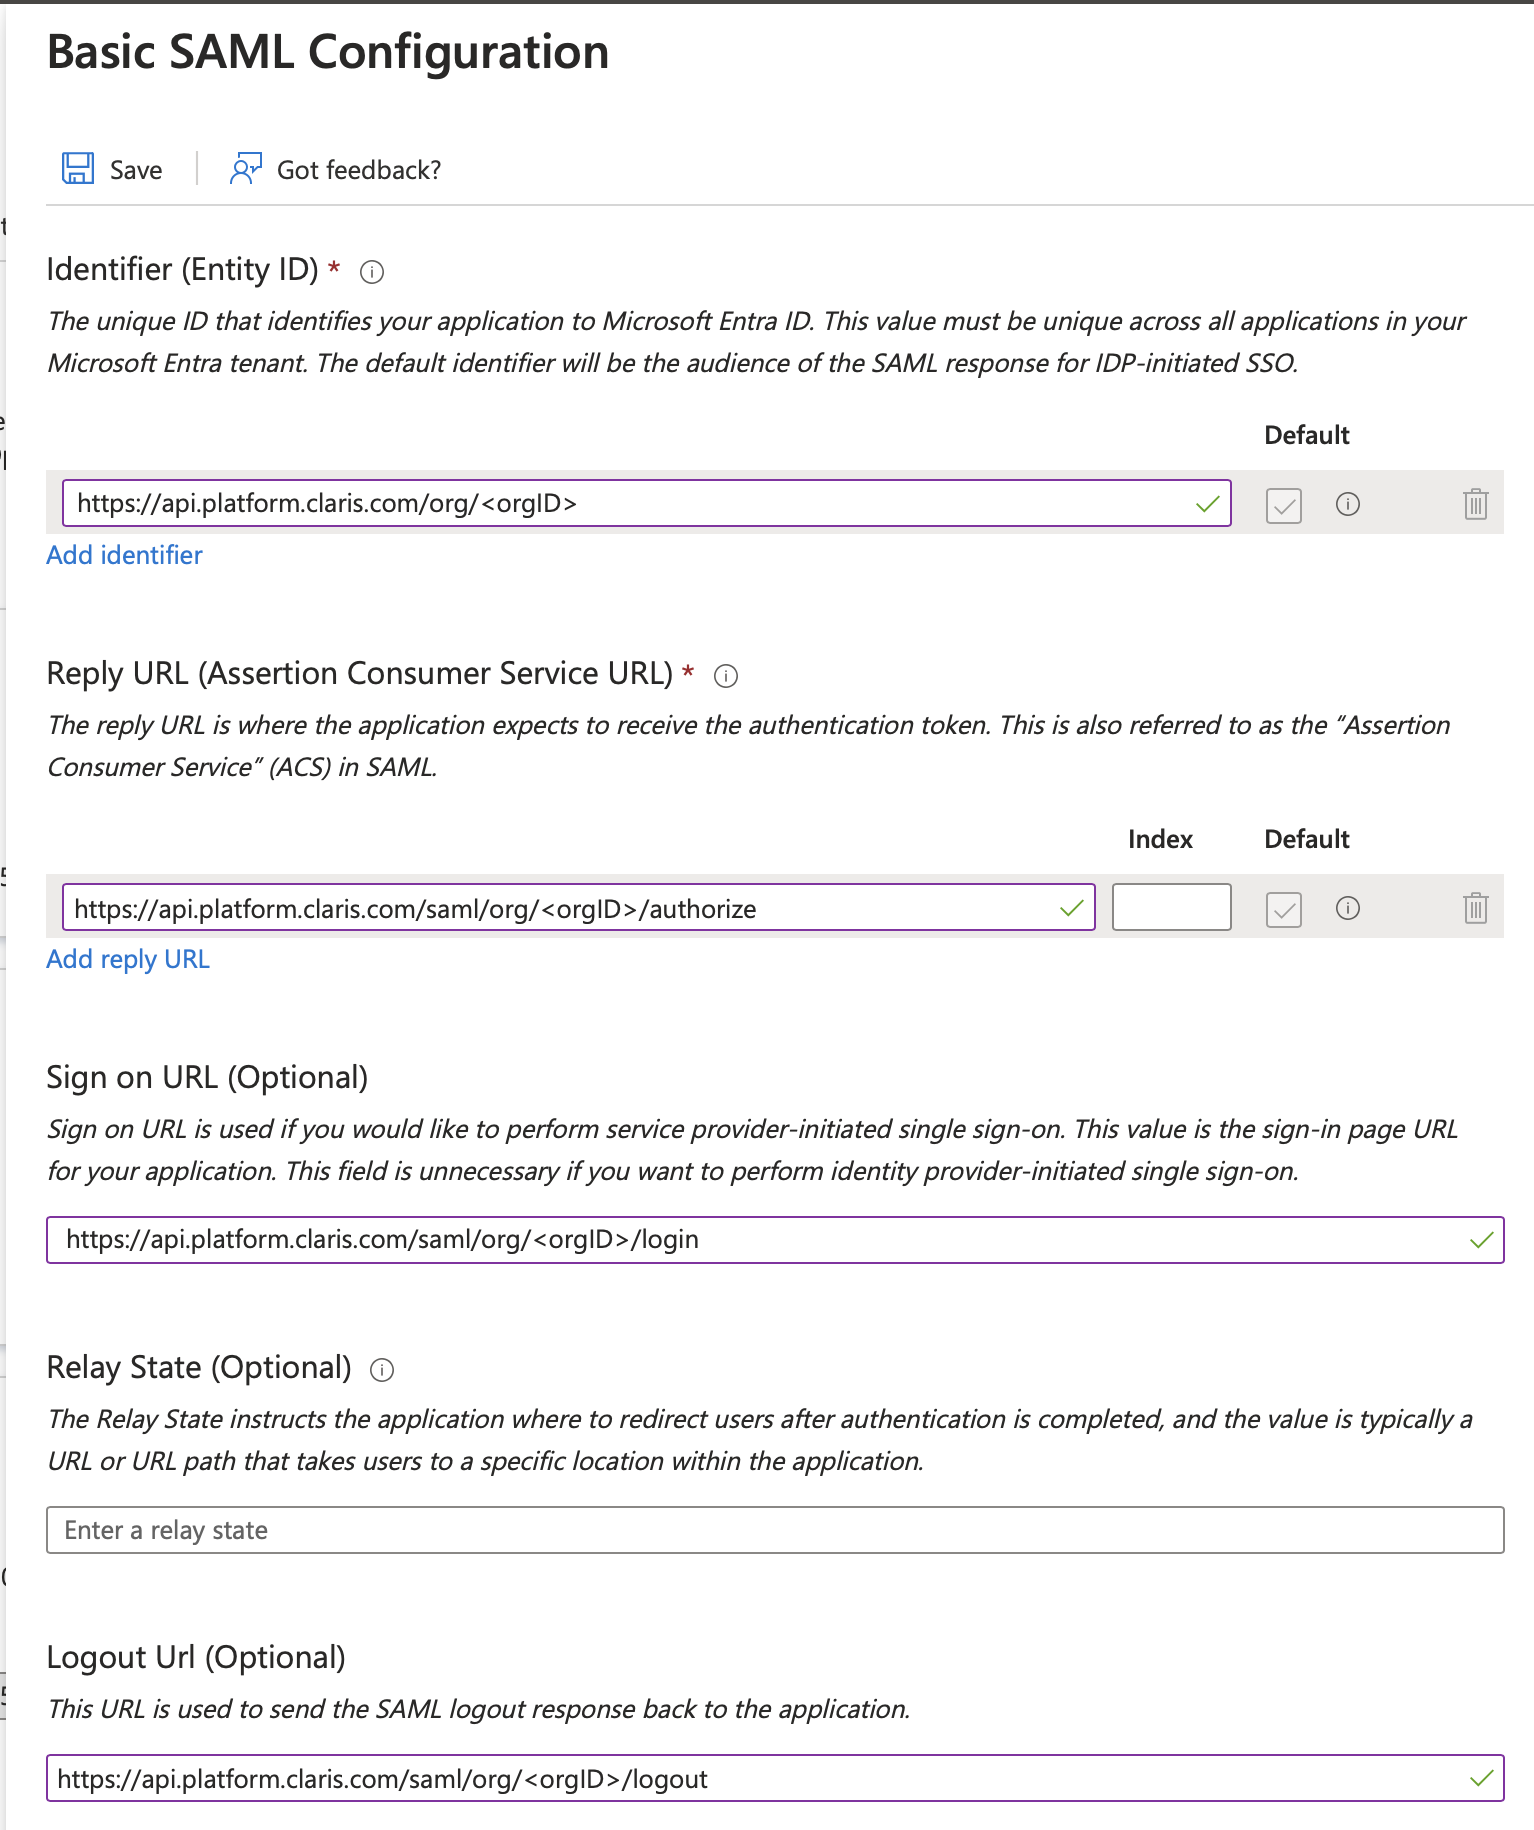
In step 1, Basic SAML Configuration, click Edit. Follow the instructions below to fill in each of the fields on the new configuration sidebar to the right of the page.
-
Identifier (Entity ID): In Claris Studio, copy Entity ID (see “Open the Claris Studio setup page” earlier) and paste it here.
-
Reply URL (Assertion Consumer Service URL): In Claris Studio, copy Assertion Consumer Service URL (see “Open the Claris Studio setup page” earlier). Click Add reply URL and paste it here.
-
Sign on URL: In Claris Studio, copy Assertion Consumer Service URL (see “Open the Claris Studio setup page” earlier) and paste it here. Replace the authorize portion at the end of the URL with login.
-
Relay State: Skip this field.
-
Logout Url: In Claris Studio, copy Assertion Consumer Service URL (see “Open the Claris Studio setup page” earlier) and paste it here. Replace the authorize portion at the end of the URL with logout.
-
-
When you’re done, click Save at the top left of the window. Then close the right sidebar.
-
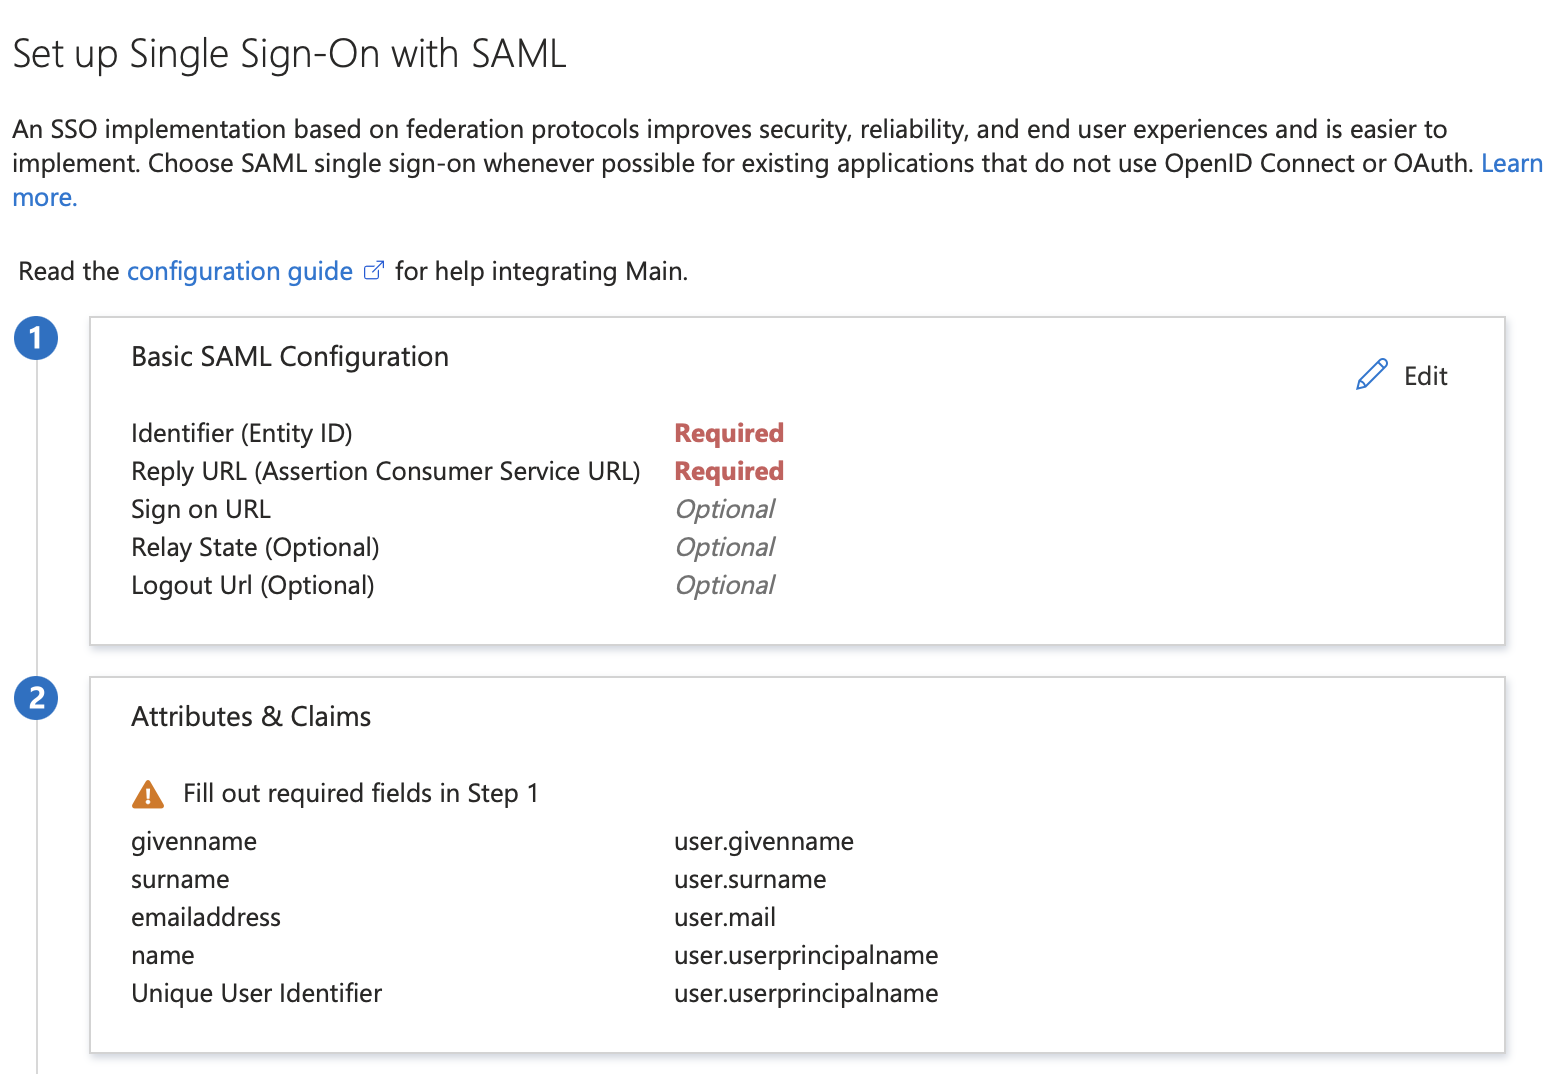
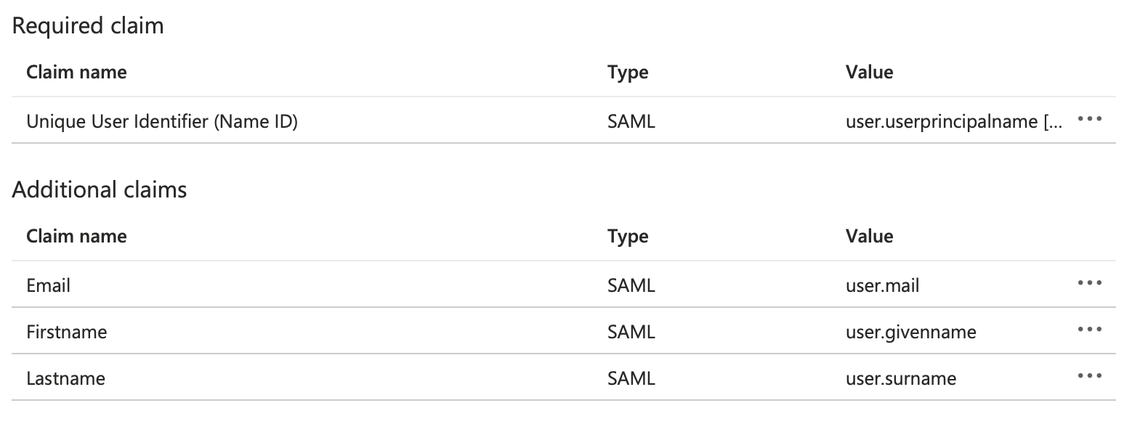
In step 2, Attributes & Claims, click Edit. Under Additional Claims, you should already see four claims listed.

For each of the rows with a given label in the Value column, you need to assign a new label for the Name field.
For each of the rows listed below:
-
Click the row.
-
Change the Name field to the new name. Be sure the first letter is capitalized and the rest is lowercase.
-
Change the Namespace to be blank.
-
Click Save at the top left.
For the unchanged row with value user.userprincipalname, click
 , then click Delete. Click OK to confirm.
Your settings for this step should match the ones shown here.
-
Value user.givenname → new name Firstname
-
Value user.surname → new name Lastname
-
Value user.mail → new name Email
-
-
-
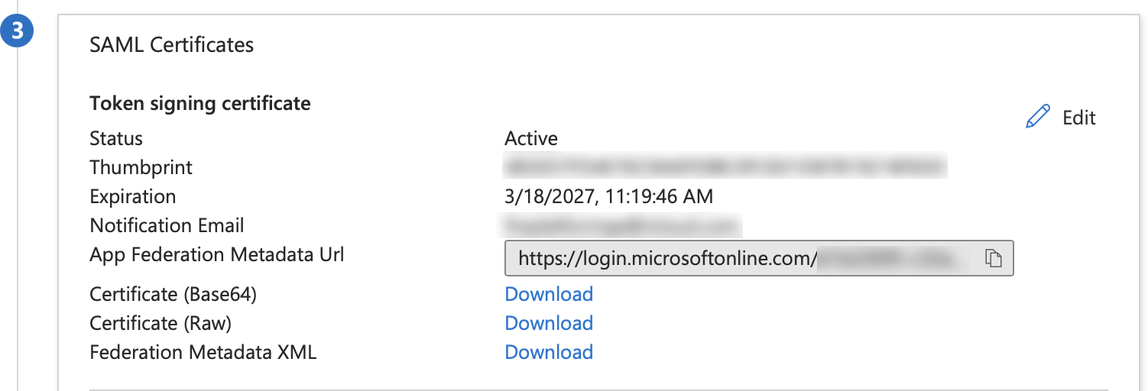
Go back to the SAML setup page (step 3, SAML Certificates) and copy the App Federation Metadata URL from Step 3 by clicking its clipboard icon. Save this value somewhere secure. You’ll need it again later.
Assigning users
-
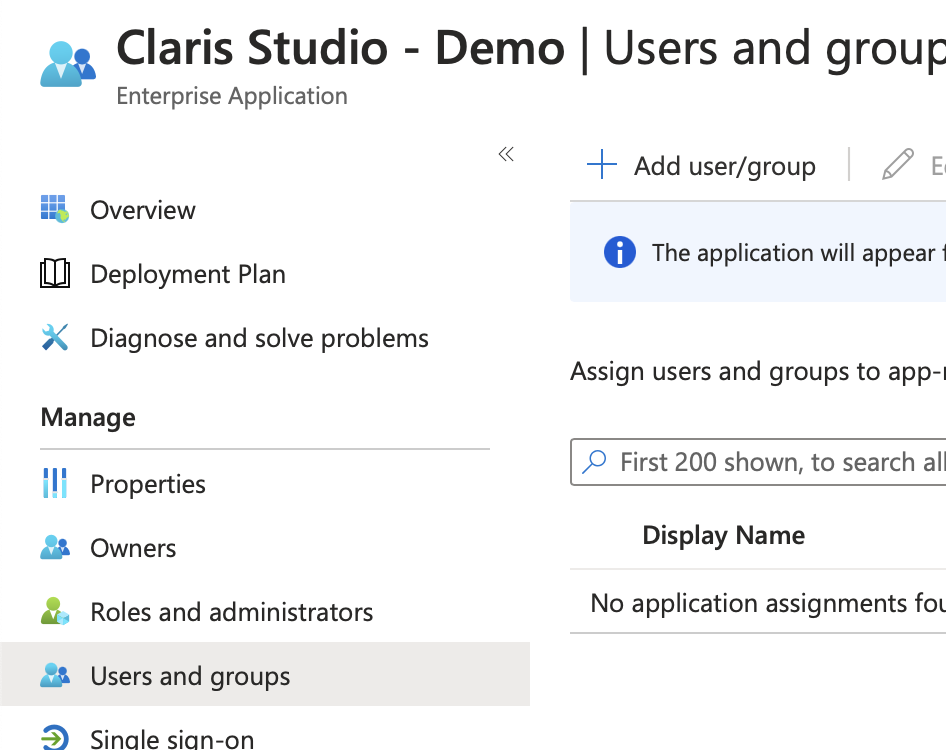
You must assign users to actually use this new SSO integration. In the left sidebar under Manage, click Users & Groups.
-
Click + Add user/group near the top and add any users and groups that you would like to have access to Claris Studio.
-
'Click Assign at the bottom of the page.
Enter values into Claris Studio
- Go back to the Claris Studio page you opened earlier (see “Open the Claris Studio setup page”).
-
In the Configure External Identity Provider dialog, for Protocol, choose SAML. Then for Metadata, paste the App Federation Metadata URL value that you saved in “Set up SAML in the new application.”
-
Select one or more Default Groups that you want to sign in using this external IdP, then click Apply.
If you have no groups, you can create one here and add users to it later. See Work with groups for more information.
- On the Users page, copy the link labeled Application Login URL and provide it to users. Using this URL enables them to sign in to Claris Studio with their SSO credentials.