Creating custom connectors
You can create custom connectors by combining third-party APIs with the JSON schema used by Claris Connect. This gives you the power to create connectors for additional apps and APIs.
Note Creating custom connectors requires knowledge of JSON, APIs, HTTP requests, authentication, and authorization methods.
To create a custom connector:
-
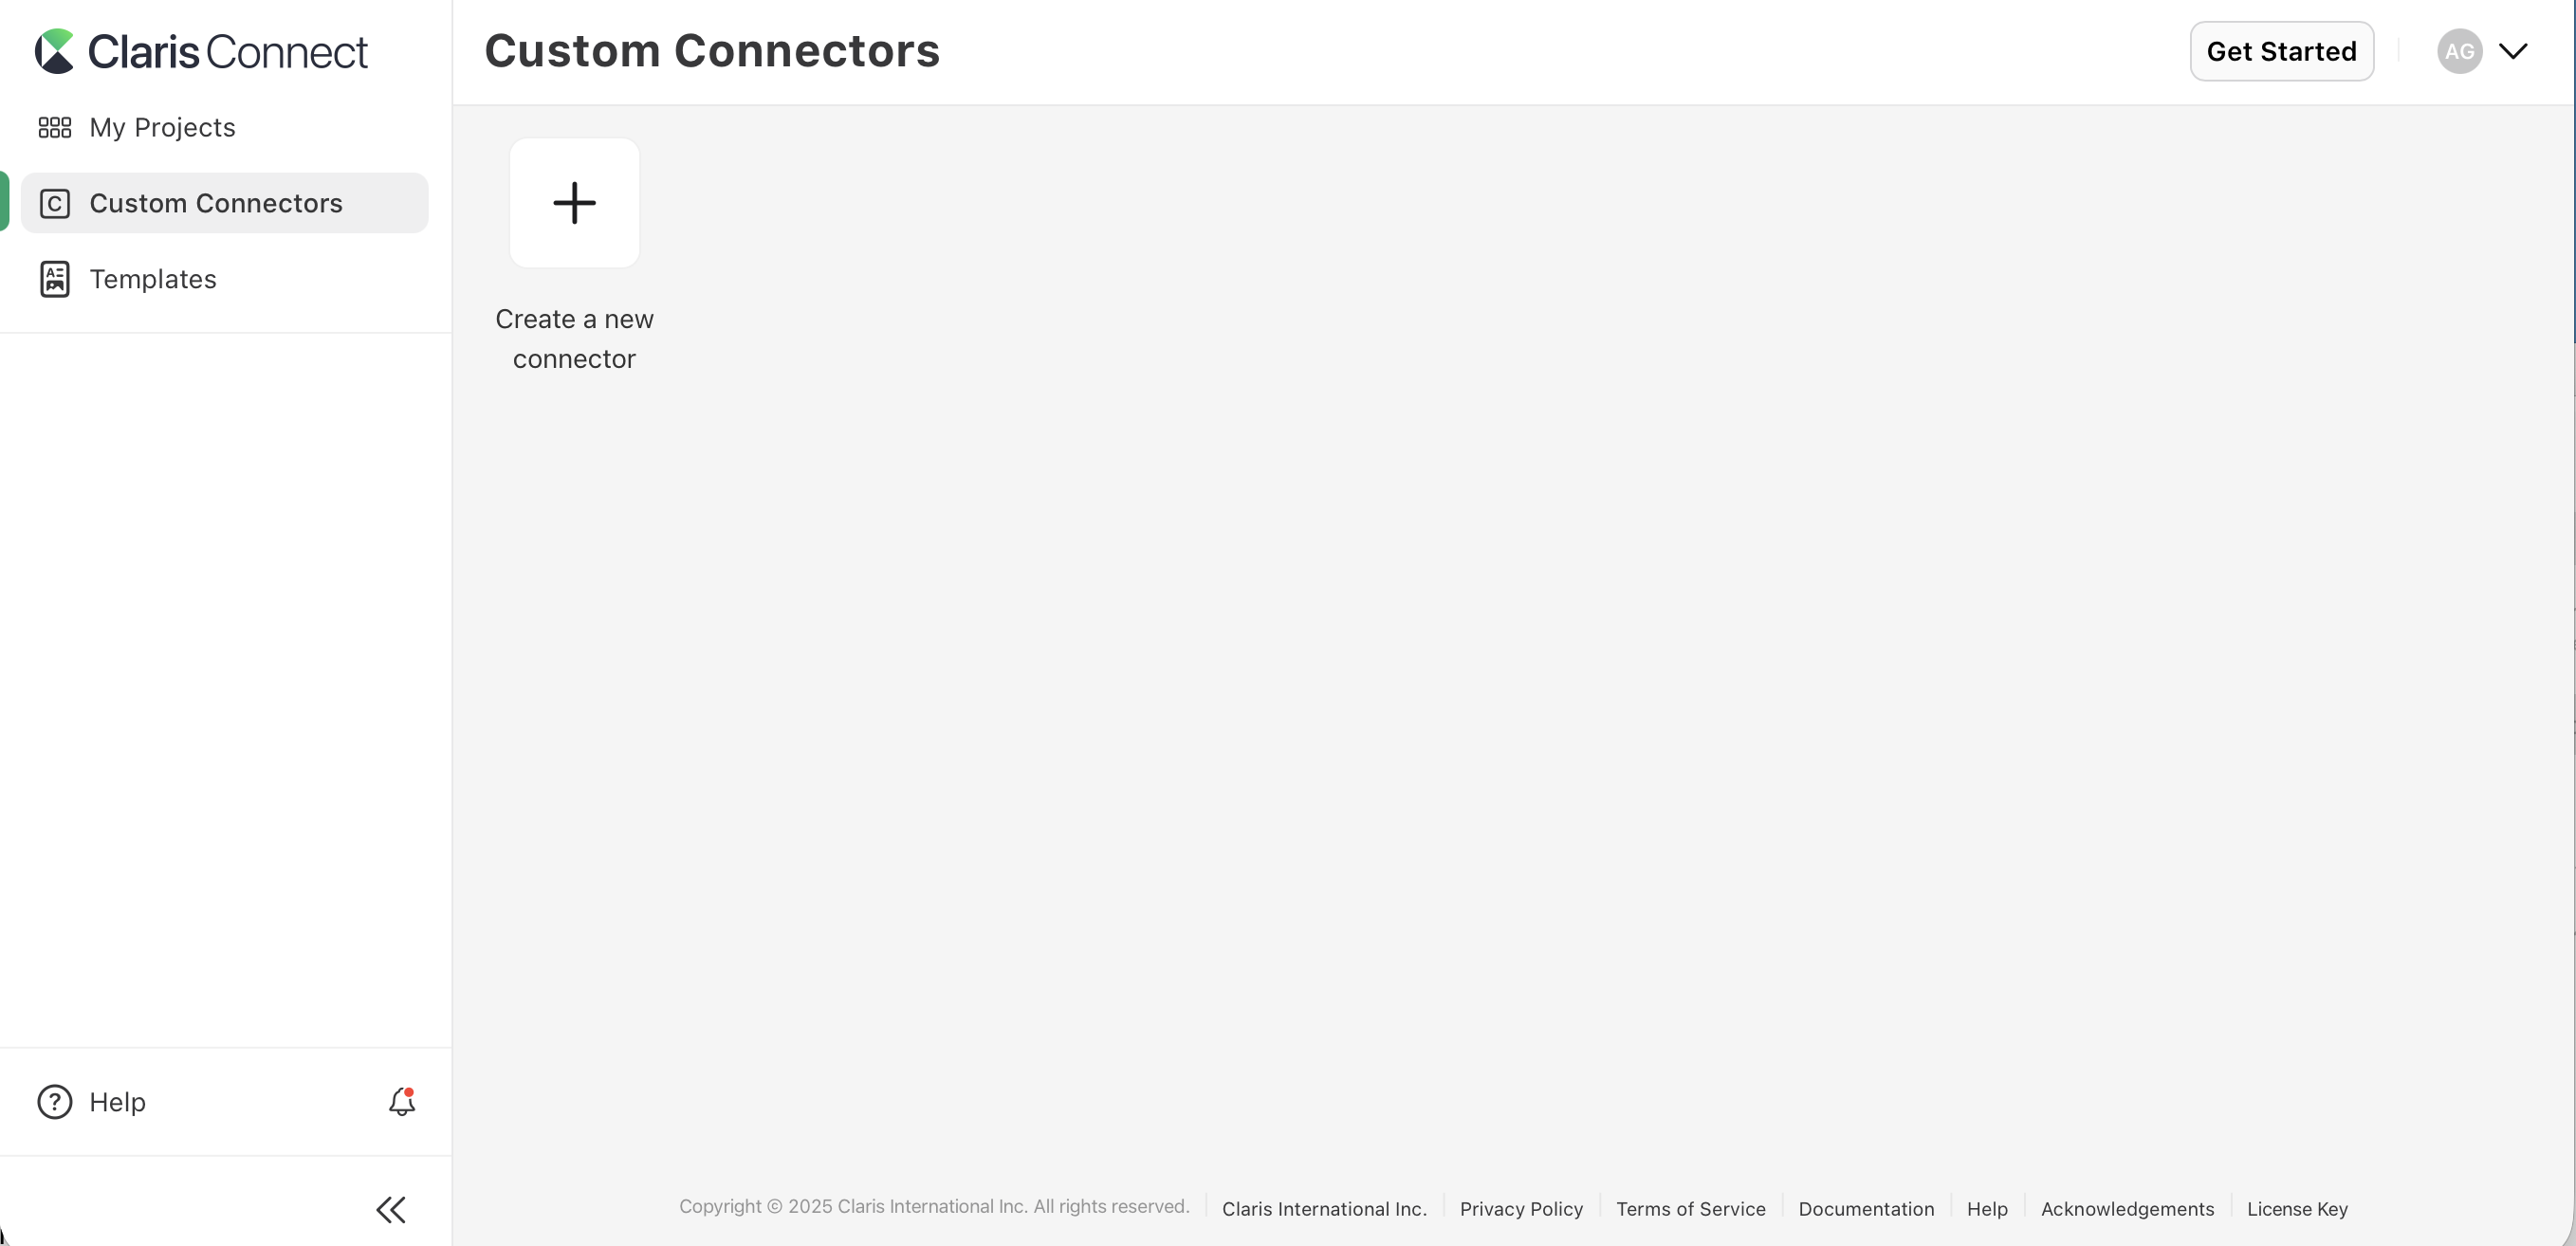
On the homepage, click Custom Connectors in the sidebar.
-
Click Create a new connector.
-
Select a sample or enter your own JSON, then click Save & Test. See Using the custom connector editor.
Note JSON data must conform to the schema defined by Claris Connect. See Schema definition.
-
In the Debugger tab, test authentication and action steps if desired:
-
To test authentication, click Sign In, enter the required information (specified in the
requiredSettingsproperty), then click Test. -
To test actions, click the action row to expand it, enter test data into the available fields, then click Test.
After clicking Test, you can view the request and response bodies in the Request and Response tabs respectively.
-
-
If necessary, click Return to Editor and fix any errors in the JSON, test authentication and actions again, then click Create Connector.
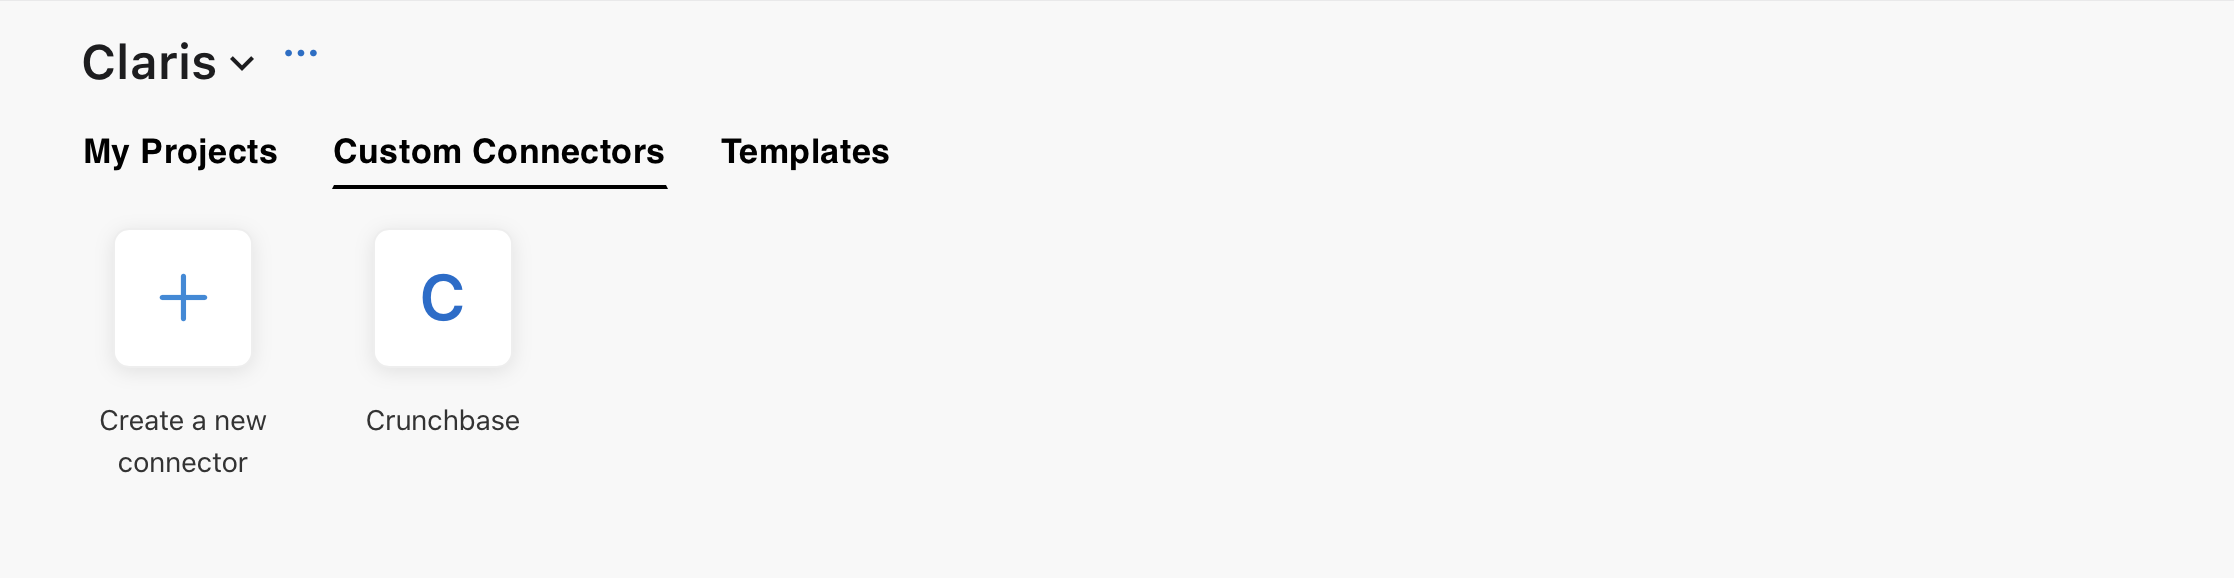
You can find a list of the custom connectors created by users in your team on the Custom Connectors page.
To use a custom connector in a flow, add it to the flow as a step, similar to any other connector. See Create a flow and Action steps.
Using the custom connector editor
Use the custom connector editor with one of these options to easily create a custom connector:
-
Adjust the custom connector sample
-
Build a new connector from scratch
Adjust the custom connector sample
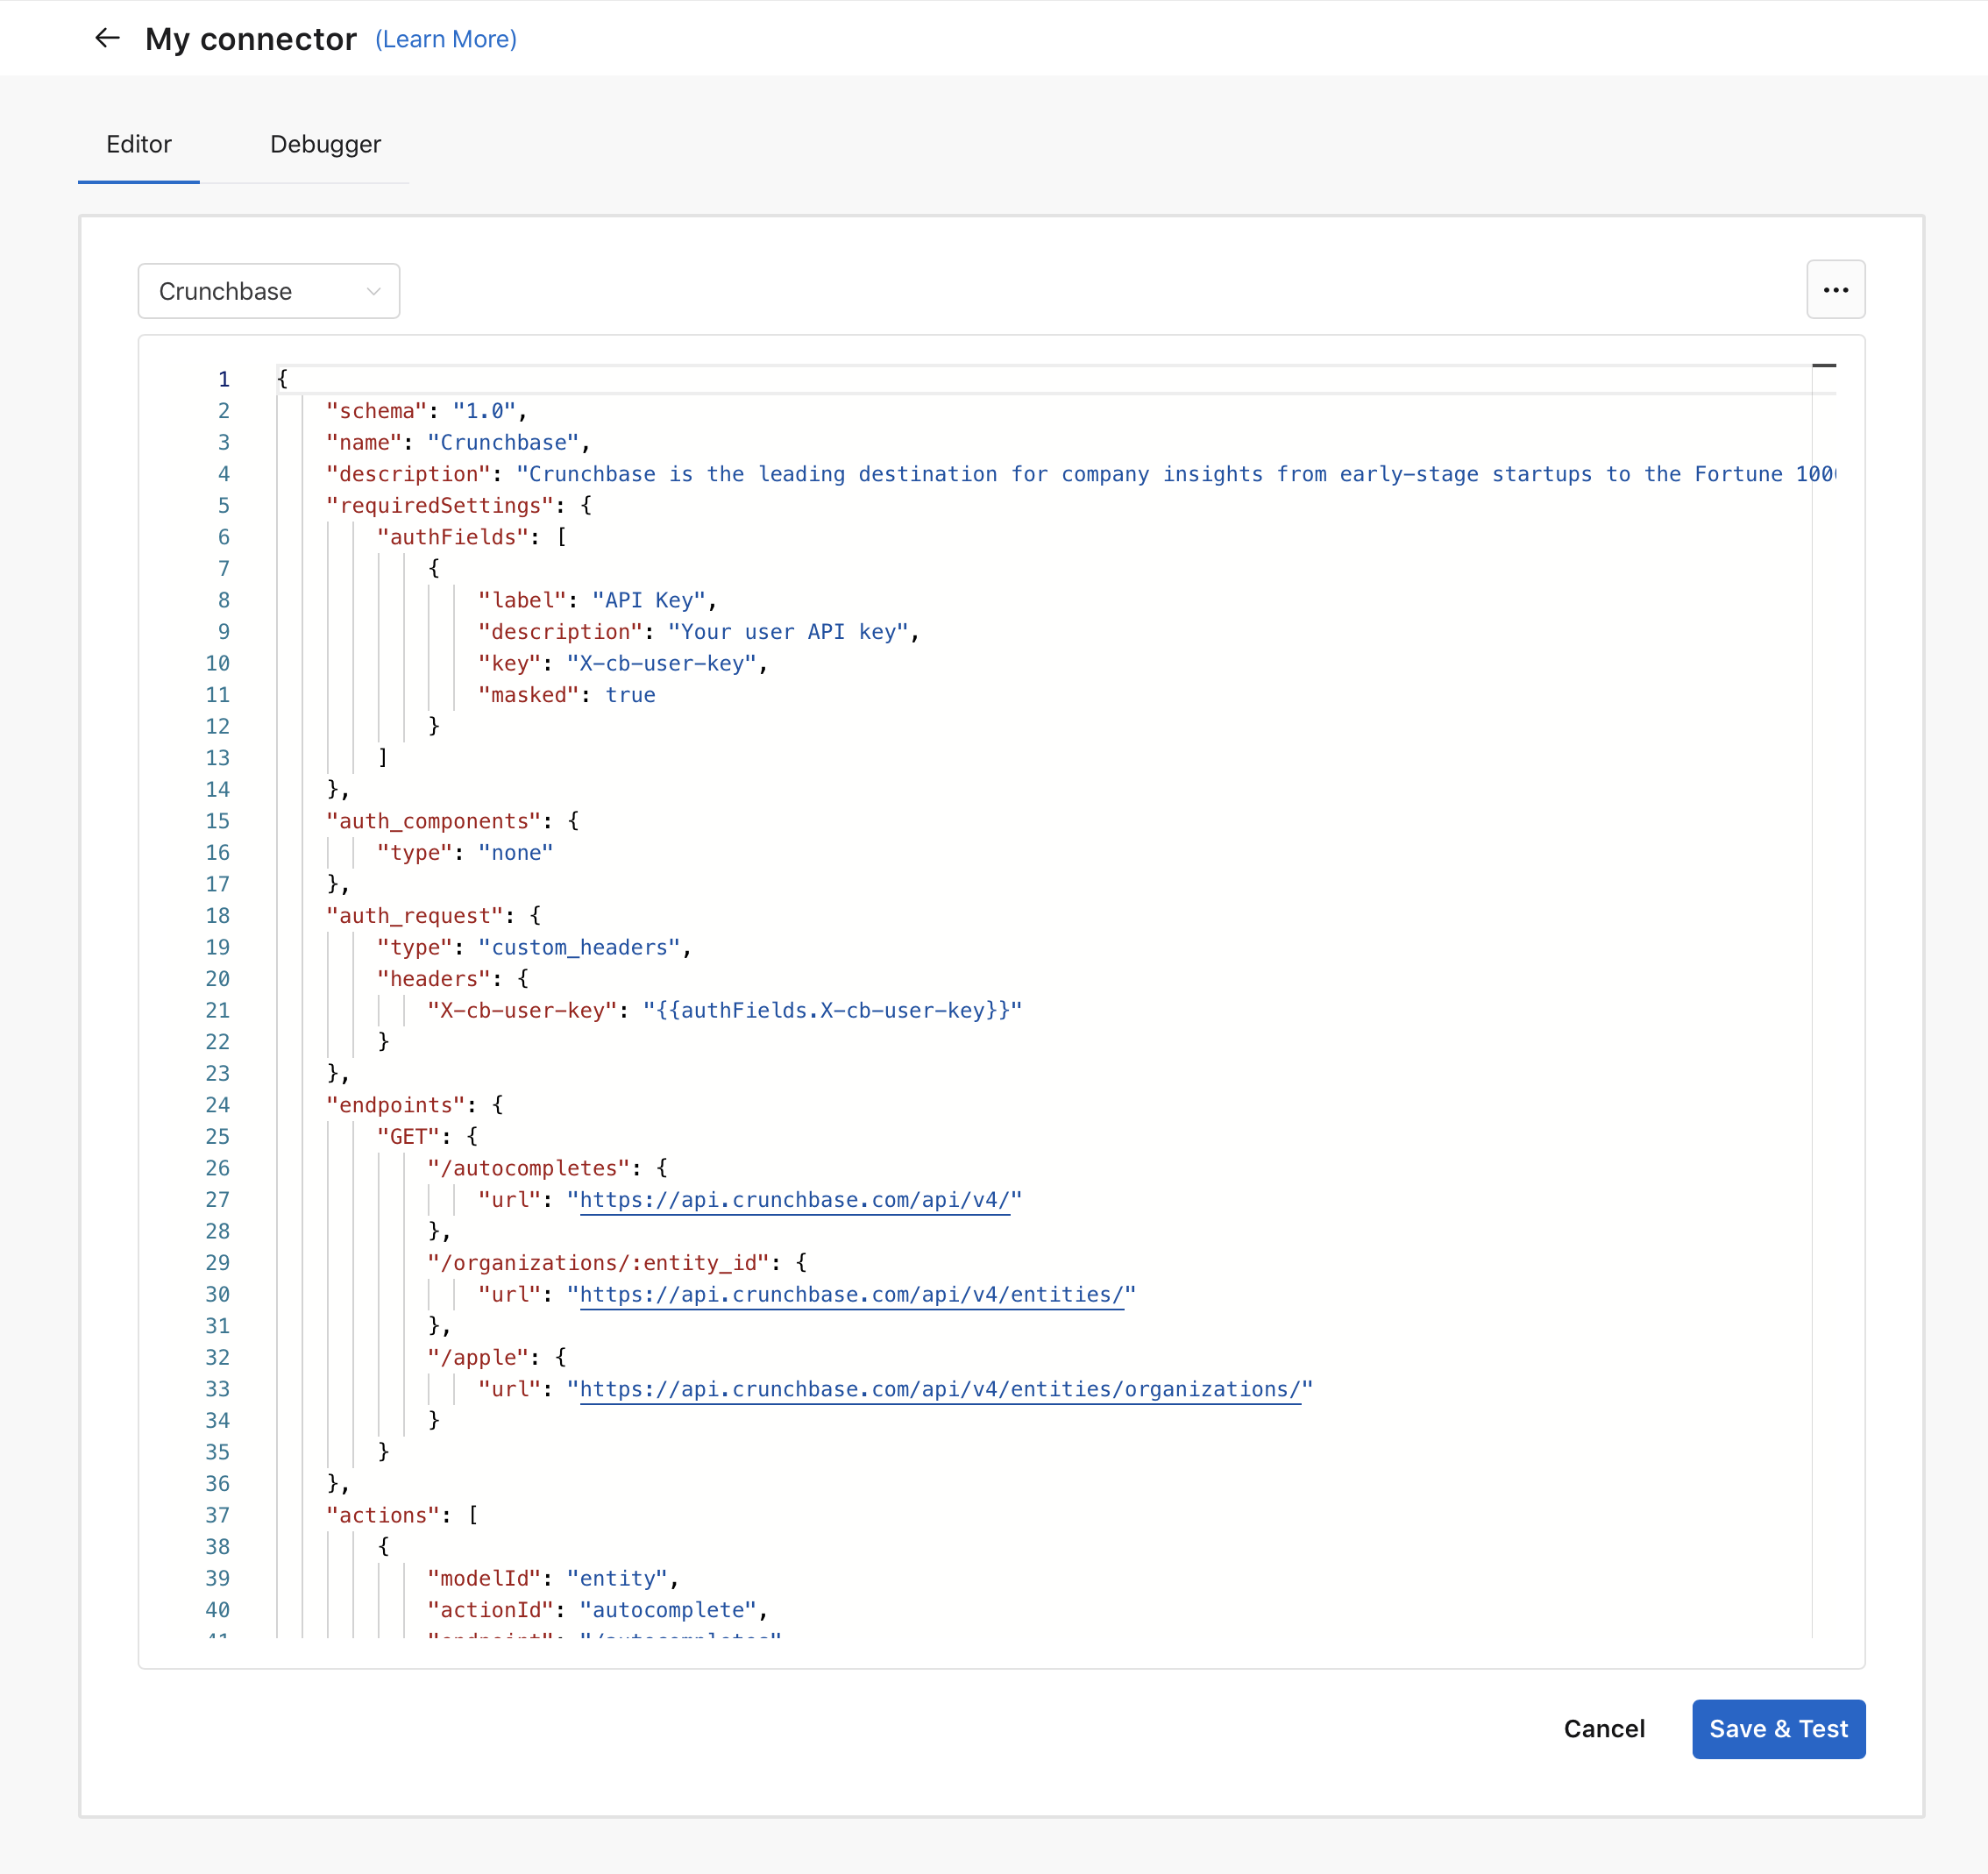
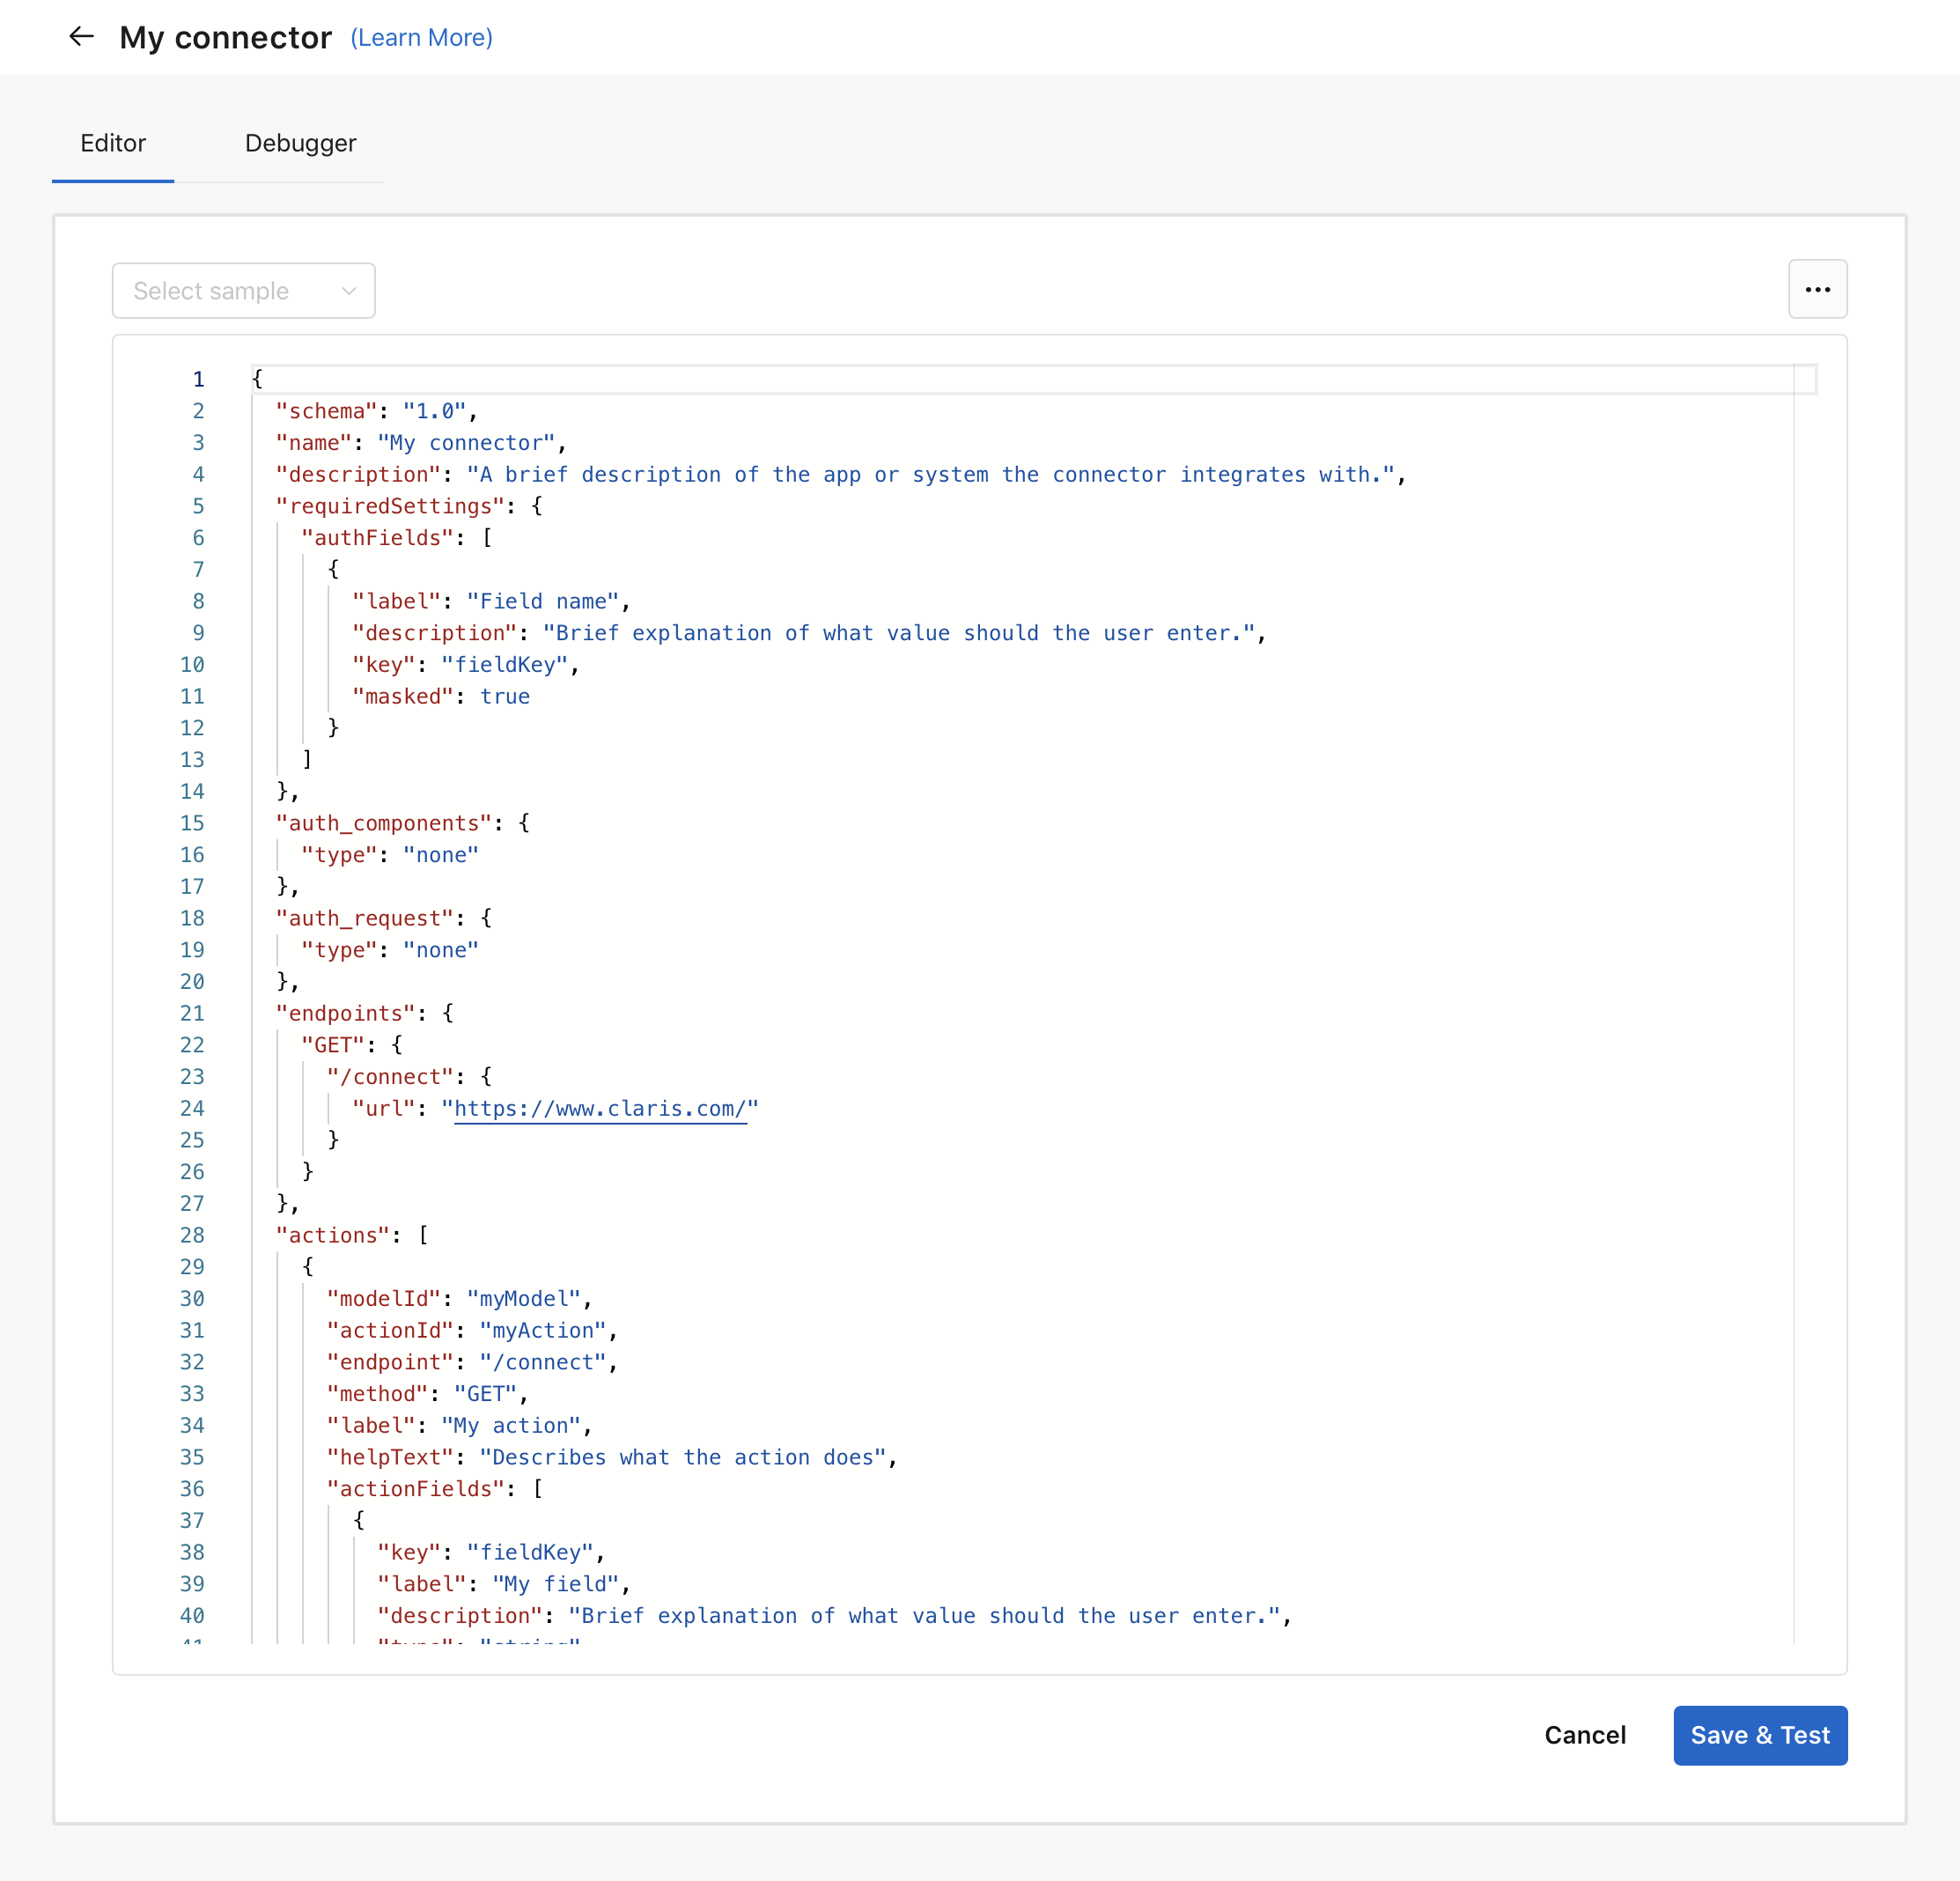
When you first enter the custom connector creation page, you'll see a sample connector that represents the framework of a custom connector with mock values. From there, you can adjust the values and reconfigure the properties for the API you want to use as necessary. Simply replace the default values with the appropriate values for the API, using the editor to ensure the values and properties are valid and result in a functional custom connector.
To start from a sample connector instead of the default sample, choose a connector from the samples pull-down menu.
Build a new connector from scratch
If you are familiar with JSON and the API of the app to create a connector for, you can build a custom connector completely from scratch using the built-in editor.
To build a connector from scratch:
-
Click Custom Connectors in the sidebar.
-
Click Create a new connector.
-
Delete the starting sample.
-
Use the editor to add objects and properties for your connector. See Adding objects and properties below.
-
Save and test your connector with the debugger, then click Create Connector.
Adding objects and properties
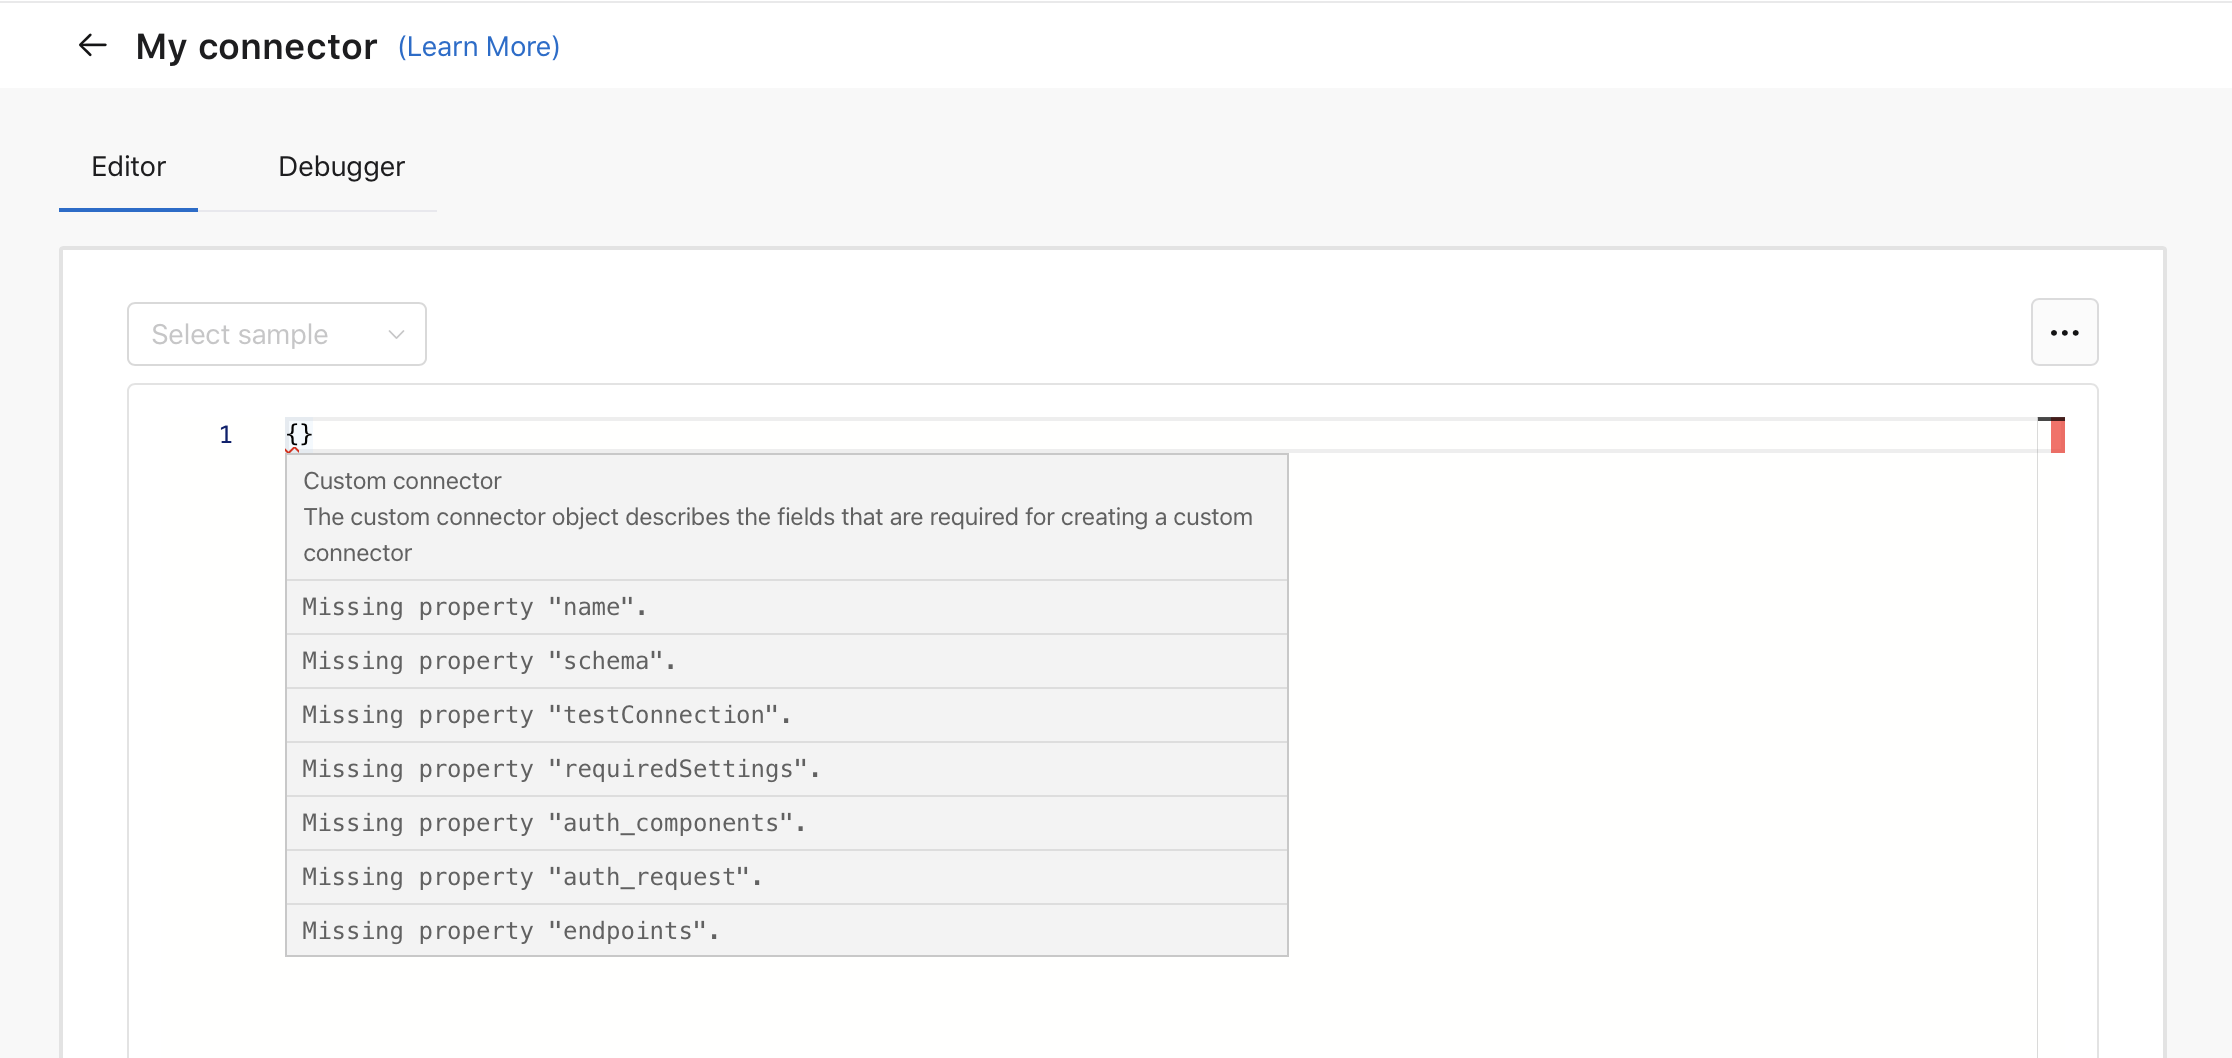
The editor shows which objects and properties are required at each level of the schema definition. For example, when you first start, only the top-level custom connector object is present. The editor shows the properties required for the top-level object, which are name, schema, testConnection, requiredSettings, auth_components, auth_request, and endpoints. See Schema definition.
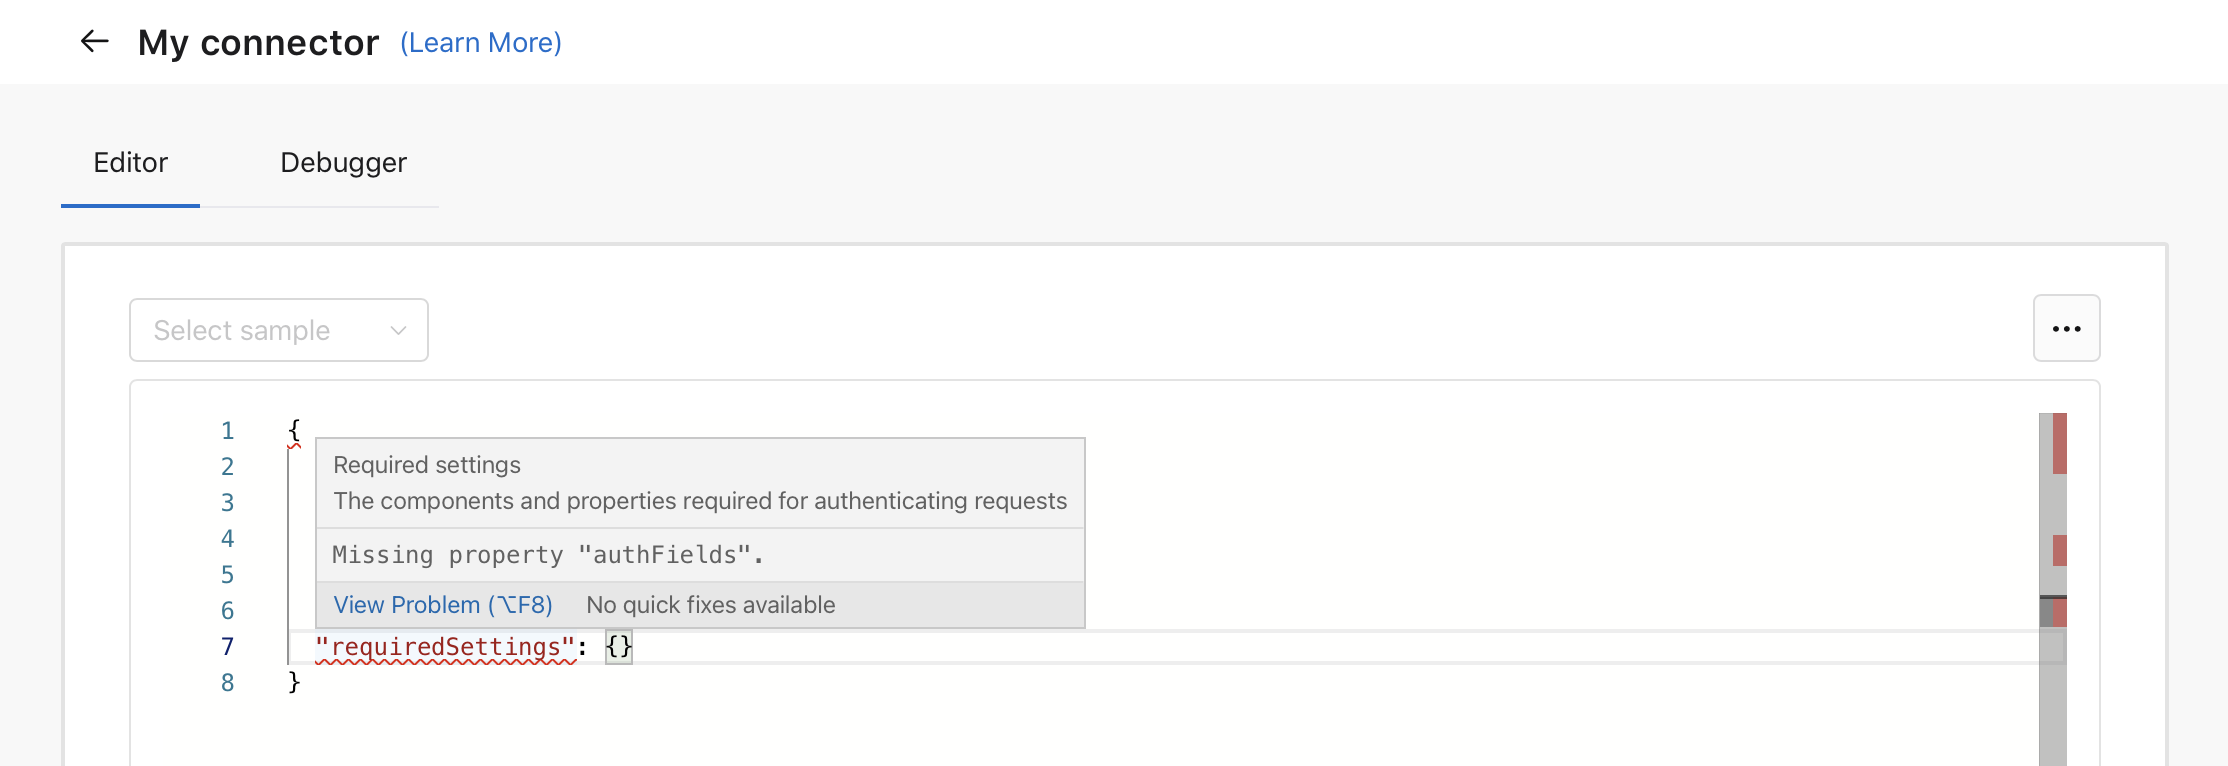
After you add those properties, the editor shows any additional properties that are required. For example, the requiredSettings property is itself an object that requires the authFields property, which is an array that then requires an object containing the label and key properties.
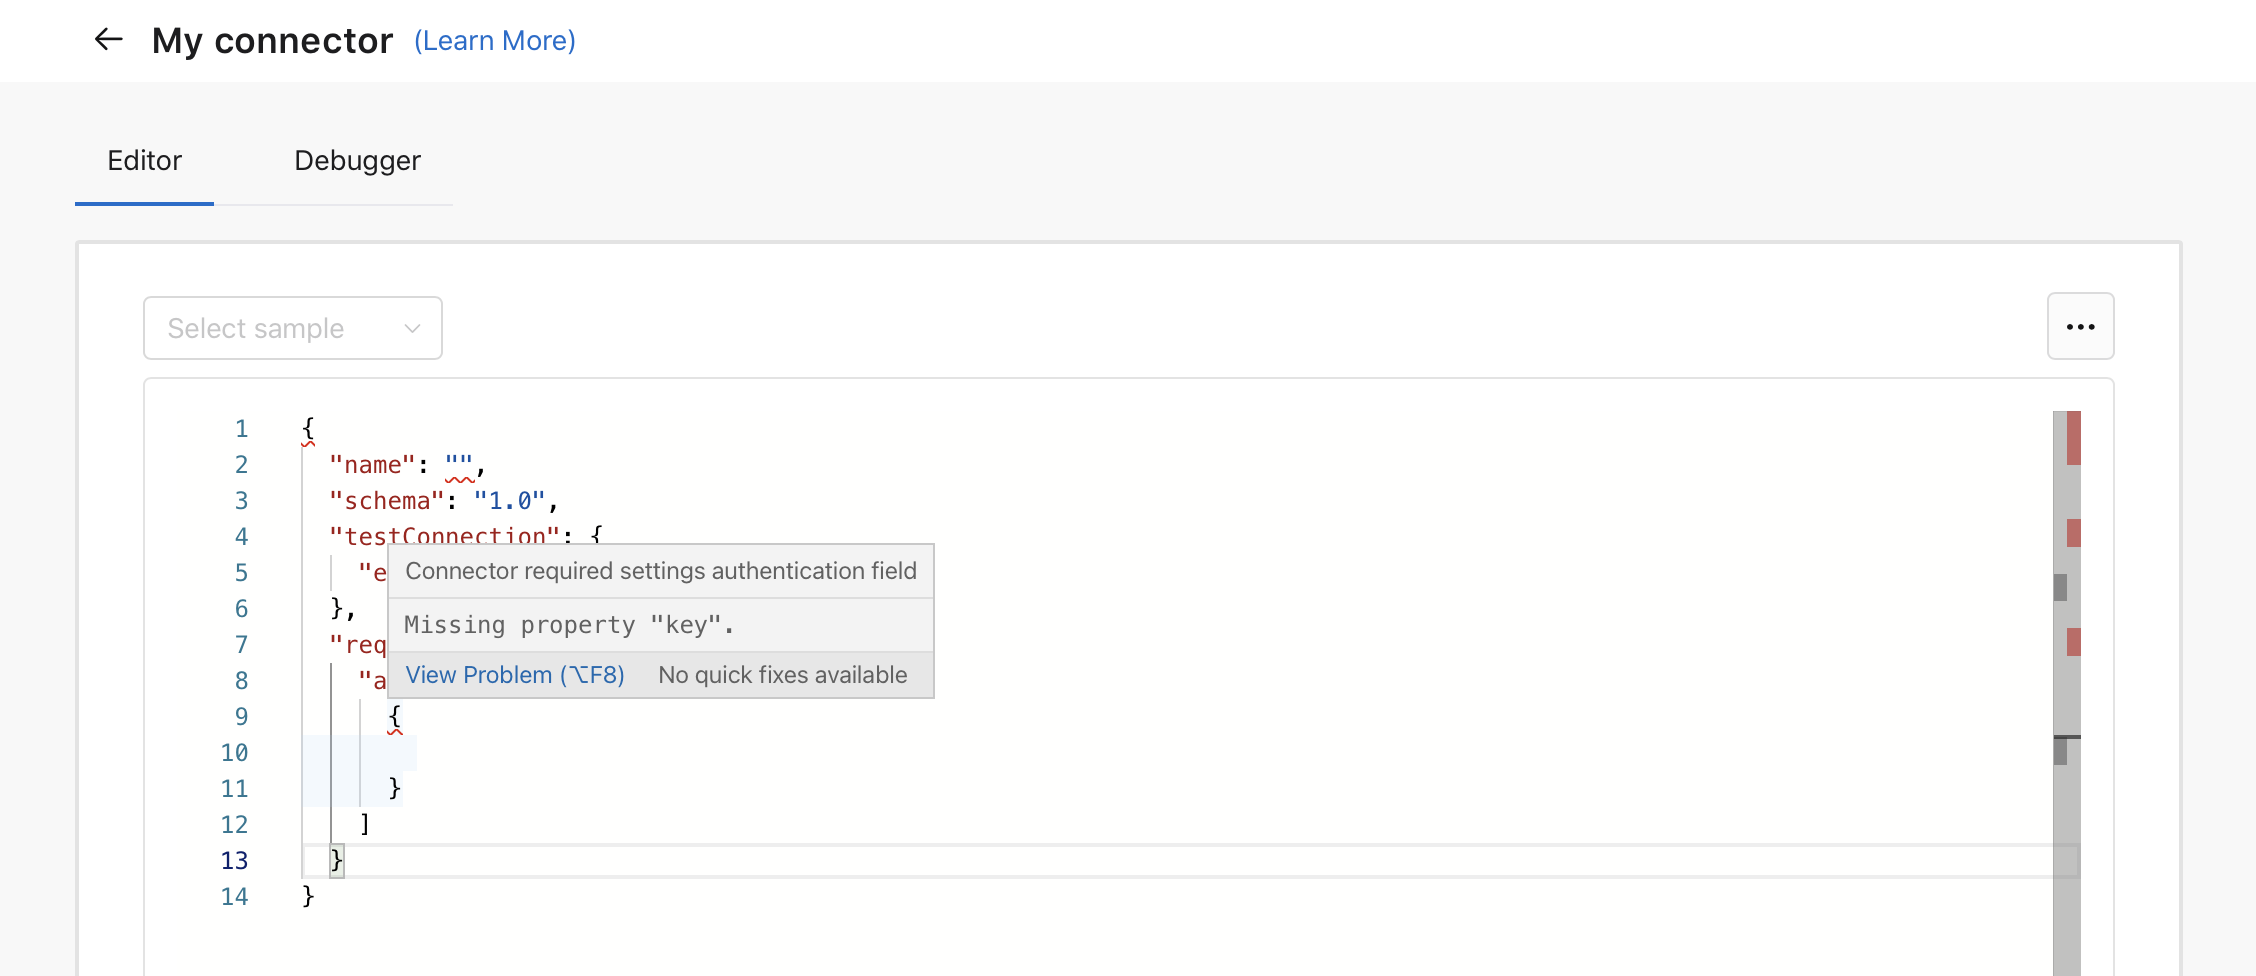
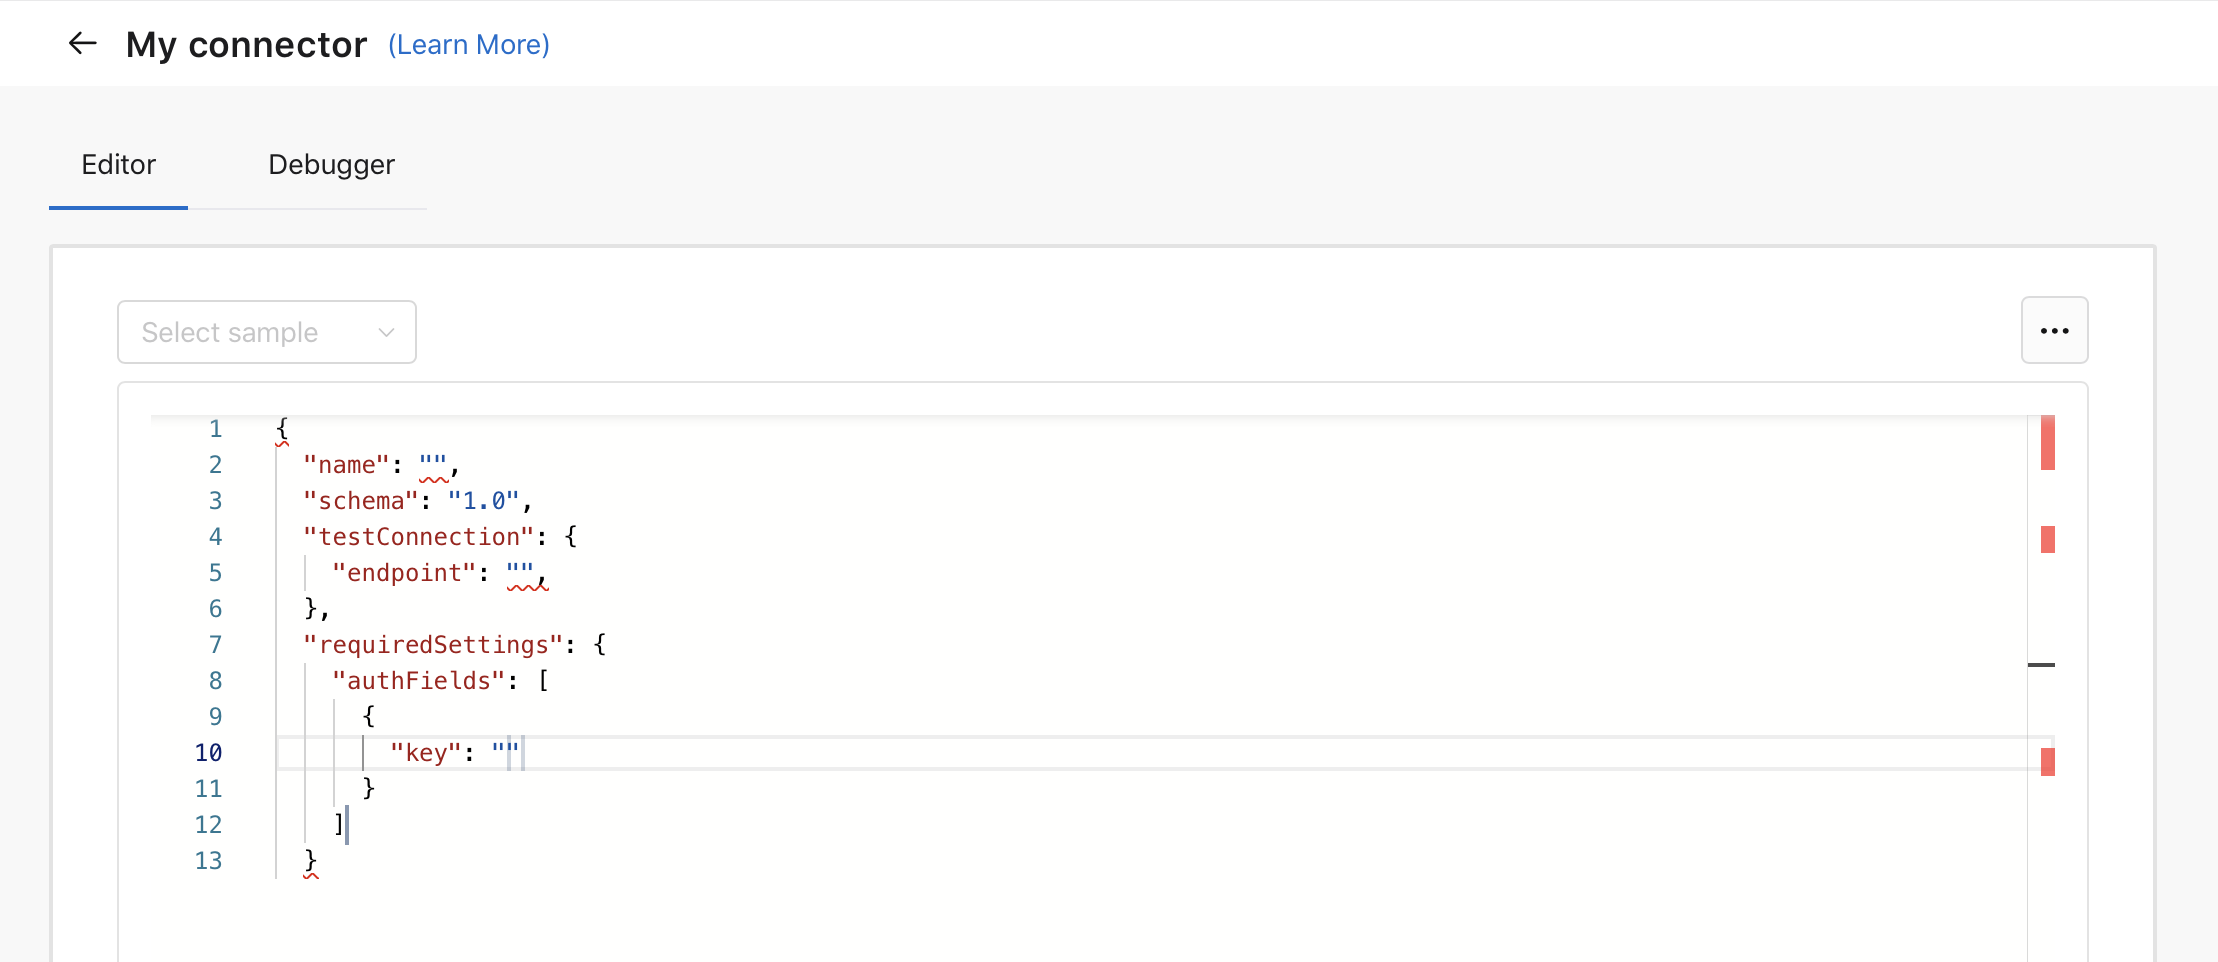
Continue adding required objects and properties until the entire framework of a connector is built out, either setting the values of each property as you go or filling them in after the framework is complete. As you make changes, the editor validates the JSON data against the connector definition, highlights any errors, and provides details for resolving the error.
For example, if the value of schema doesn’t follow the expected format, the editor will highlight the value and show the expected format.
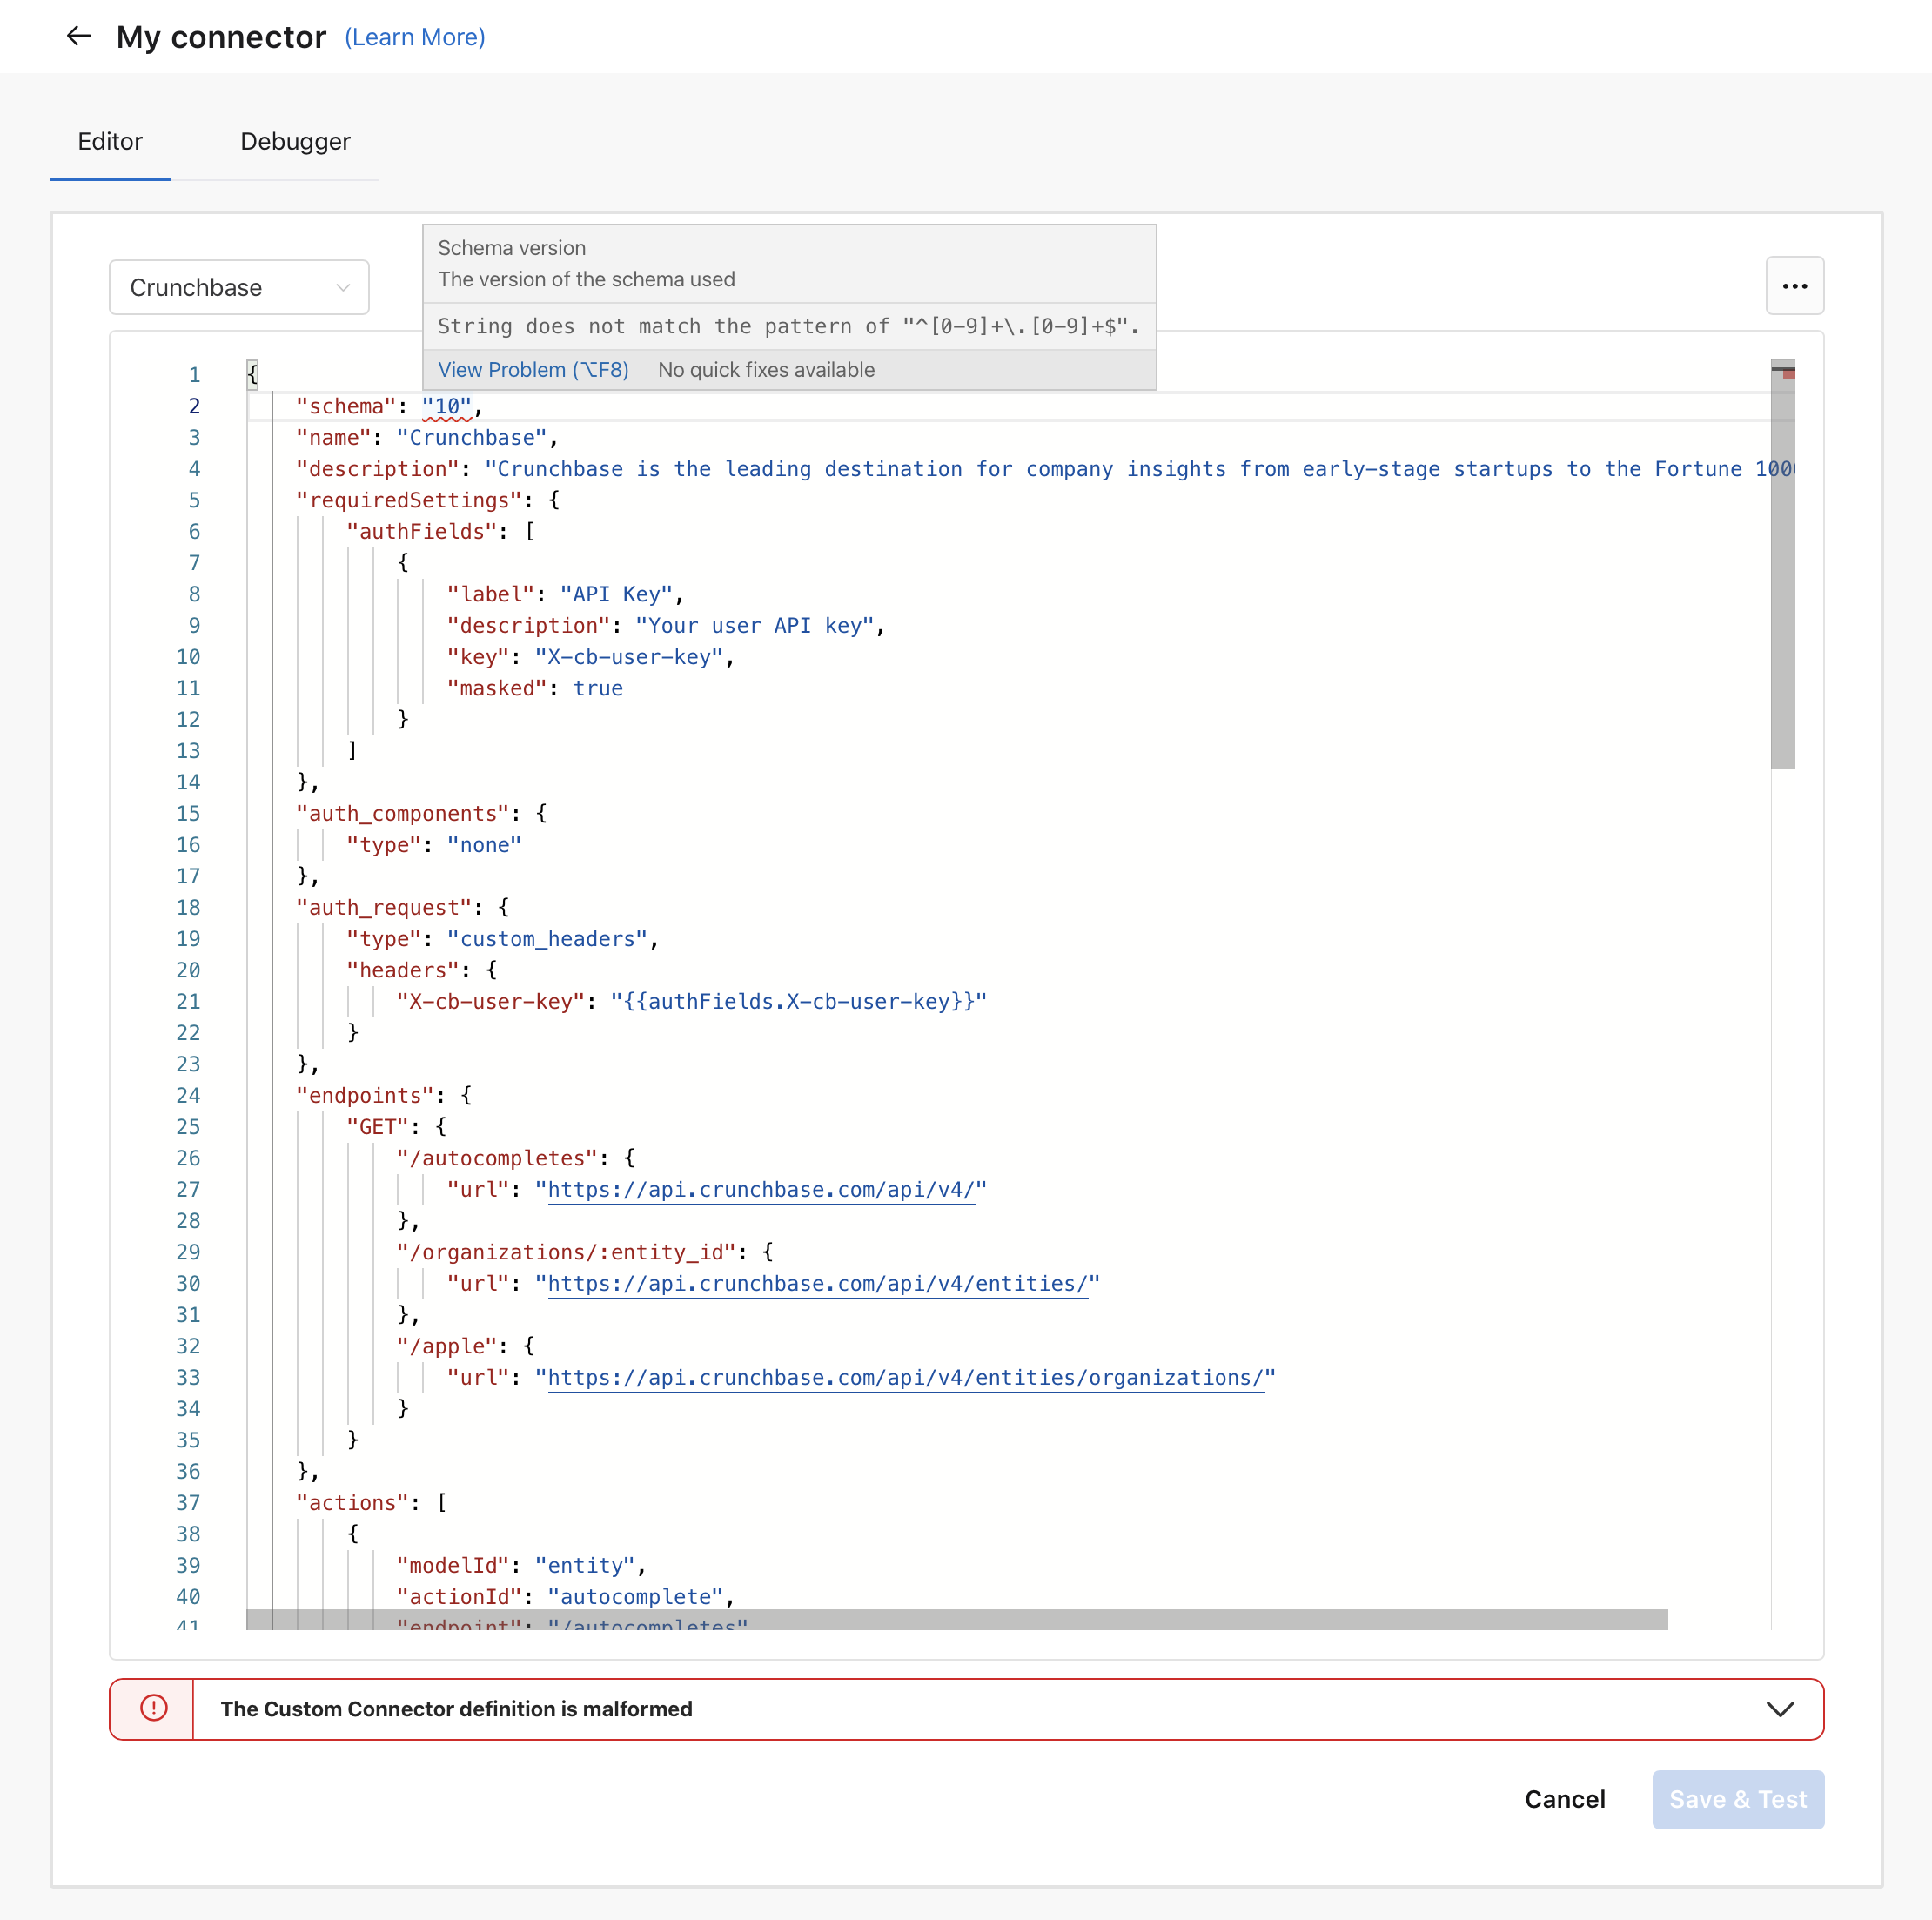
In this example, 10 is an invalid value and should be changed to 10.0 to be valid.
Once the JSON is valid, you can use the debugger to test authentication and connector actions before you finish creating the connector.
Copying custom connectors
After a custom connector has been created, you can copy the existing JSON data so that you can create a new connector with different settings.
To copy a custom connector:
-
Click Custom Connectors in the sidebar.
-
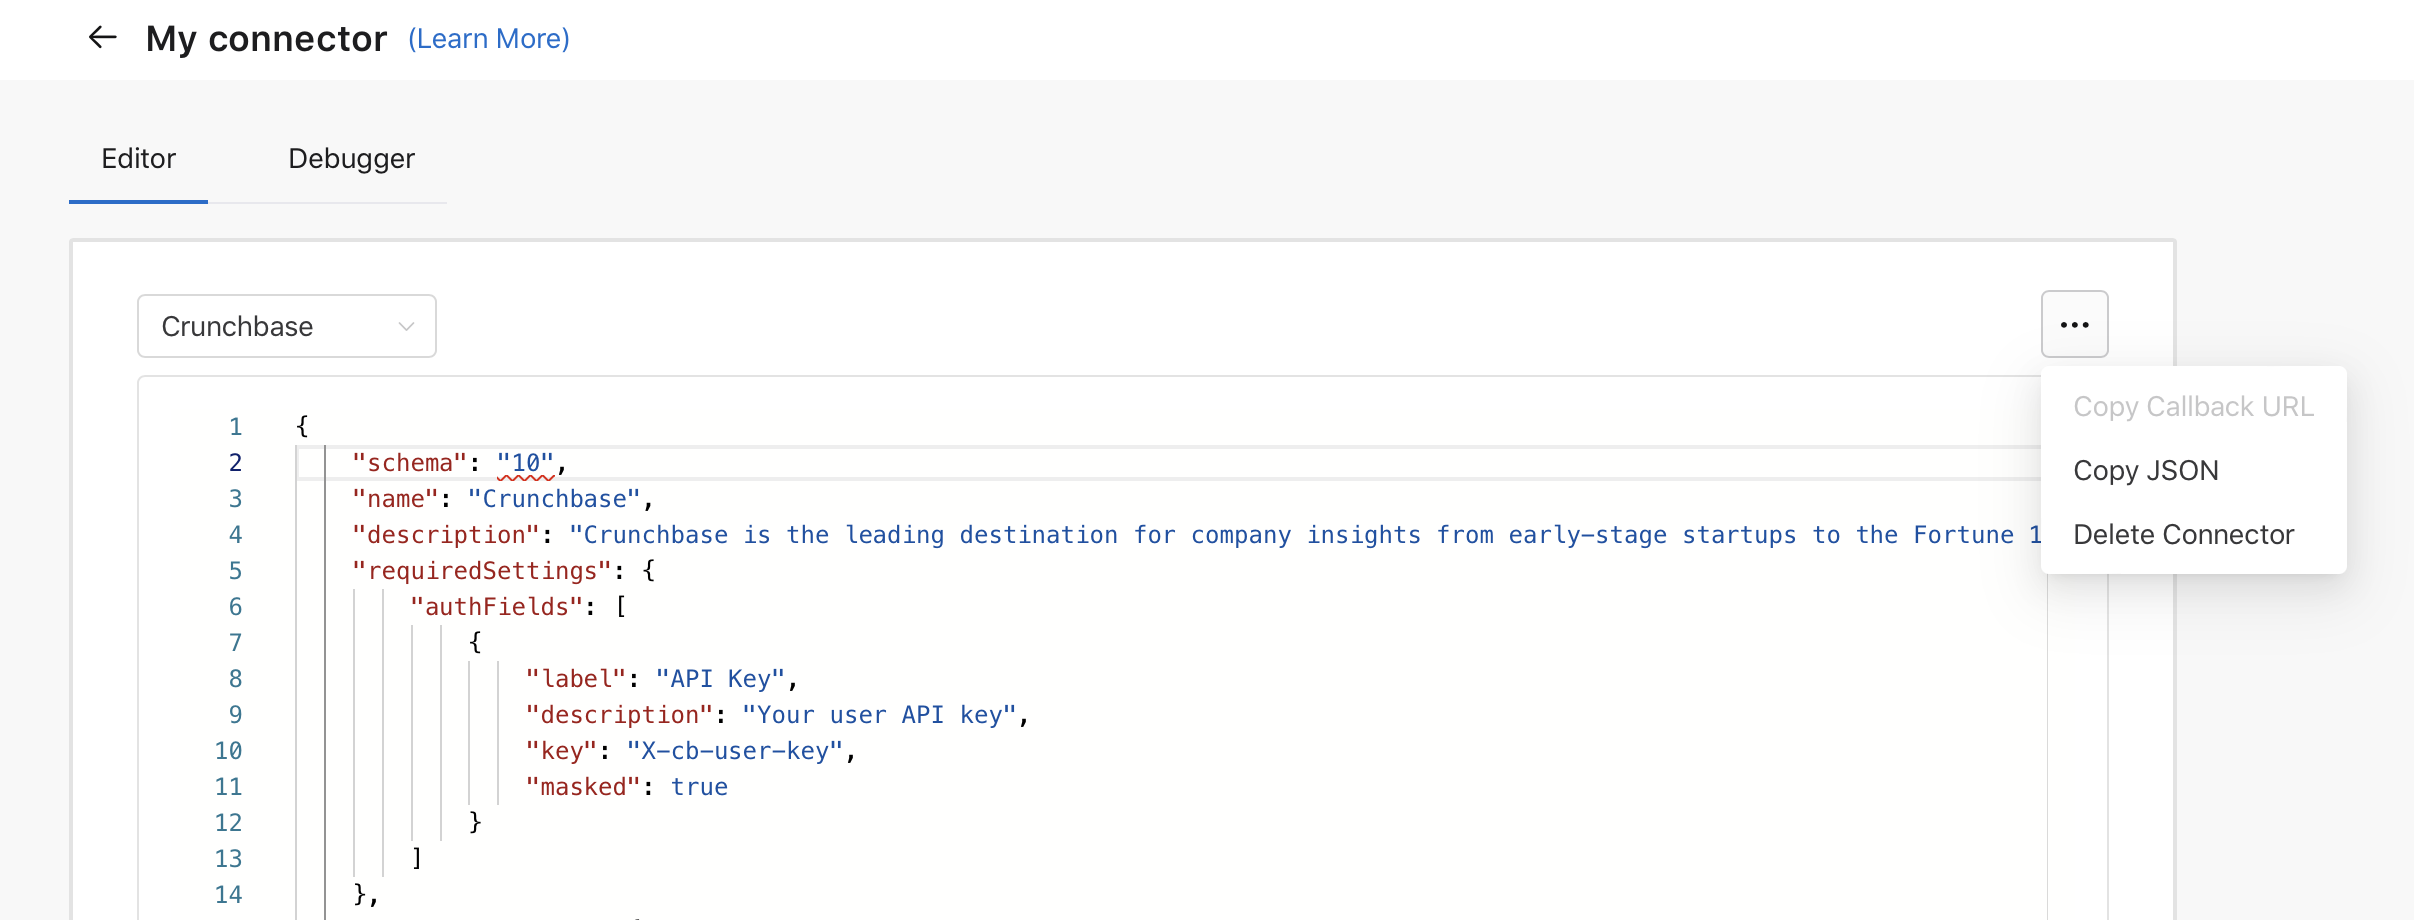
Click the connector you want to copy.
-
Hold the pointer over
 , then click Copy JSON.
 -
Click
 to return to the Custom Connectors tab, then click Create a new connector.
 -
Delete the starting sample, paste the copied JSON data into the editor, click Save & Test, then click Create Connector.
Deleting custom connectors
To delete a custom connector:
-
Click Custom Connectors in the sidebar.
-
Click the connector you want to delete.
-
Hold the pointer over
, then click Delete Connector.
Limitations on creating custom connectors
-
Refresh tokens are not supported for OAuth2.
-
You cannot create custom triggers.