Connecting via the Follett Aspen SIS
This documentation covers the following:
Setting up Claris Connect in Follett Aspen
Claris Connect must be authorized to access the Follett Aspen SIS before connecting to the SIS in a flow. To authenticate Claris Connect in Follett Aspen, you create a new OAuth client for Claris Connect. You will use the Client Identifier and Client Secret Key when connecting to Follett Aspen to create your flow.
Important When you create the Client Secret Key, it is displayed only then. Make a note of the key and keep it in a safe place to use when connecting to Follett Aspen from Claris Connect. If you misplace the key, you must generate a new one in Follett Aspen.
Prerequisites
-
The Follett Aspen IT administrator must assign Admin privileges for you to be able to set up authentication.
-
The IT administrator will also provide the URL for your Follett Aspen domain.
-
You must have previously created a Follett Aspen account with a username and password.
To set up authentication for your Follett Aspen SIS account:
-
Sign in to Follett Aspen with your username and password.
-
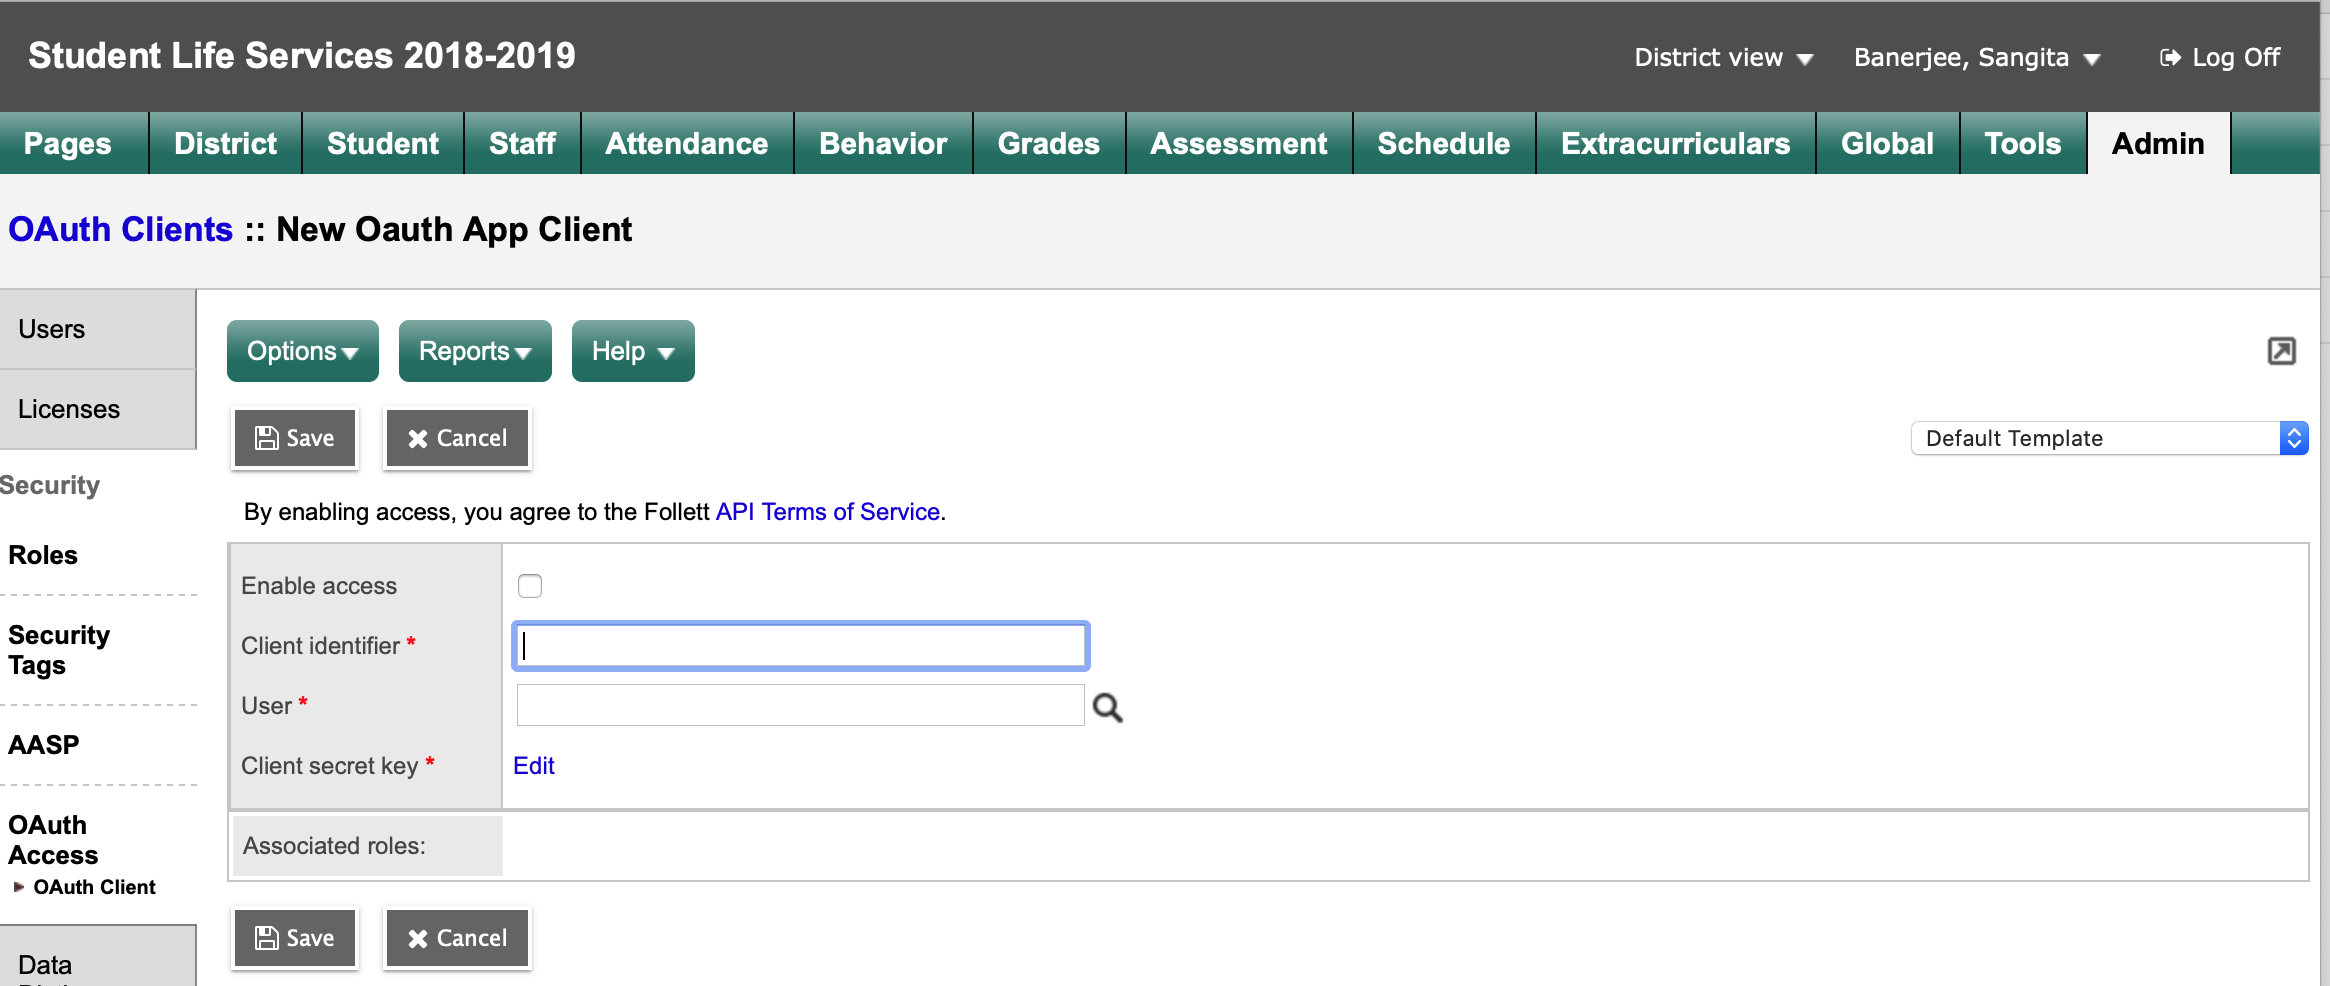
Click the Admin tab at the top right of the page.
-
On the left pane, click Security and then OAuth Access.
-
On the OAuth Clients page, from the Options menu, click Add.
-
Enter the information required to configure Claris Connect as a new OAuth client:
-
Select the Enable Access checkbox.
-
Enter the Client Identifier, which is used as the username when connecting to Follett Aspen from Claris Connect.
-
Set the User role to Administrator, System. (Or, if you have that role, you can search for your name.)
-
Click Edit to create a Client Secret Key. This key is displayed only when you create it.
-
Enter a secret key that meets the requirements shown onscreen, enter it again, then click OK.
-
-
Click Save in the Options menu.
The newly created Client ID is listed in the OAuth Client table.
About the daily data sync to Apple School Manager
For the prerequisites for connecting your SIS and Apple School Manager, see Claris Connect for Apple School Manager User Guide.
When you are ready, use the Daily Sync from Follett Aspen to Apple School Manager template to create your flow in Claris Connect. The template wizard walks you through these preconfigured steps:
-
Connect: sign in to the Apple School Manager and Follett Aspen SIS accounts
-
Configure:
-
In Step 1, you set up the trigger, which initiates the flow run. For the trigger, you specify when the flow will run using the Claris Connect Schedules utility.
-
Step 2 is automatic and requires no configuration by you. Step 2 consists of the processing and transfer of the Follett Aspen SIS data to Apple School Manager.
-
-
Finish: this step also requires no configuration, and takes you to the project that is automatically created to house your flow.
Creating your flow from the template
-
Go to https://connect.claris.com/.
-
Sign in using your Managed Apple Account and password.
You land on either the Projects or Templates tab. If you don’t have any projects, the Templates page appears.
-
Click the Follett Aspen icon. The Introduction page of the Follett Aspen template wizard appears.
-
Review the information needed to complete the template setup, and click Next.
-
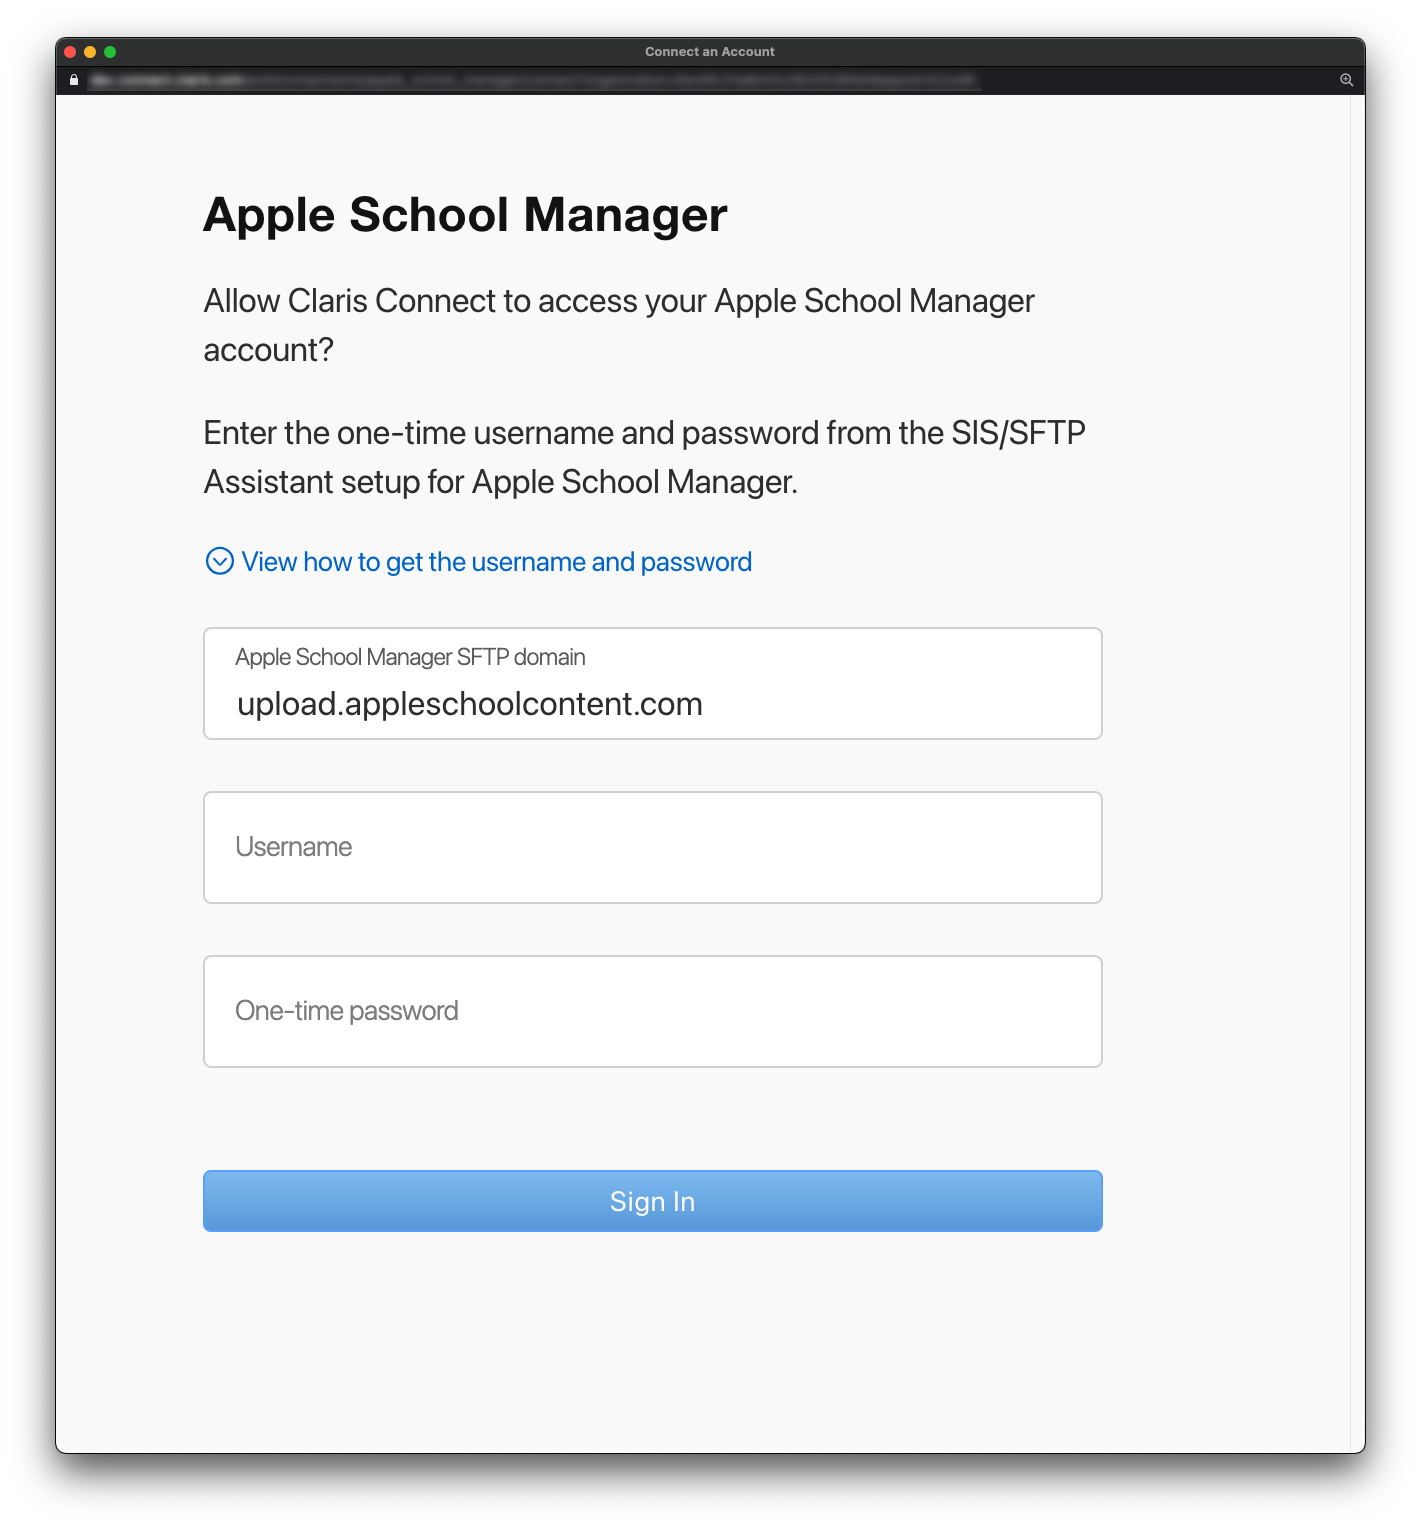
On the Connect page, next to Apple School Manager, click Connect New Account. The Apple School Manager dialog box appears, with the SFTP domain pre-filled.
-
Click View how to get the username and password for information on the username and one-time password in Apple School Manager.
-
Open a new browser window and sign in to Apple School Manager.
-
Copy and paste the username and then the password from Apple School Manager into the dialog box, and click Sign In.
-
-
On the Connect page, next to Follett Aspen Student Information System, click Connect New Account.
-
In the Follett Aspen dialog box, perform these steps:
-
Enter your Follett Aspen domain (without the https://).
-
Click View how to obtain these credentials for information on getting the Client Identifier from the Follett Aspen portal.
-
Enter the Client Identifier and the Client Secret Key in their respective fields, and click Sign In.
Note You must have the Client Secret Key available. Otherwise, you’ll need to create a new one in Follett Aspen.
-
-
When both accounts are connected, click Next.
-
On the Configure page, set the hour and time zone for when you want the flow to run, and select whether it should run on the weekend (True is yes, and False is no).
Tips
-
To choose a US time zone, first type US/ in the box for the time zone list.
-
Choose an hour when there is little activity on your SIS portal. Schedule the flow to run on the weekend only if there is activity then.
-
-
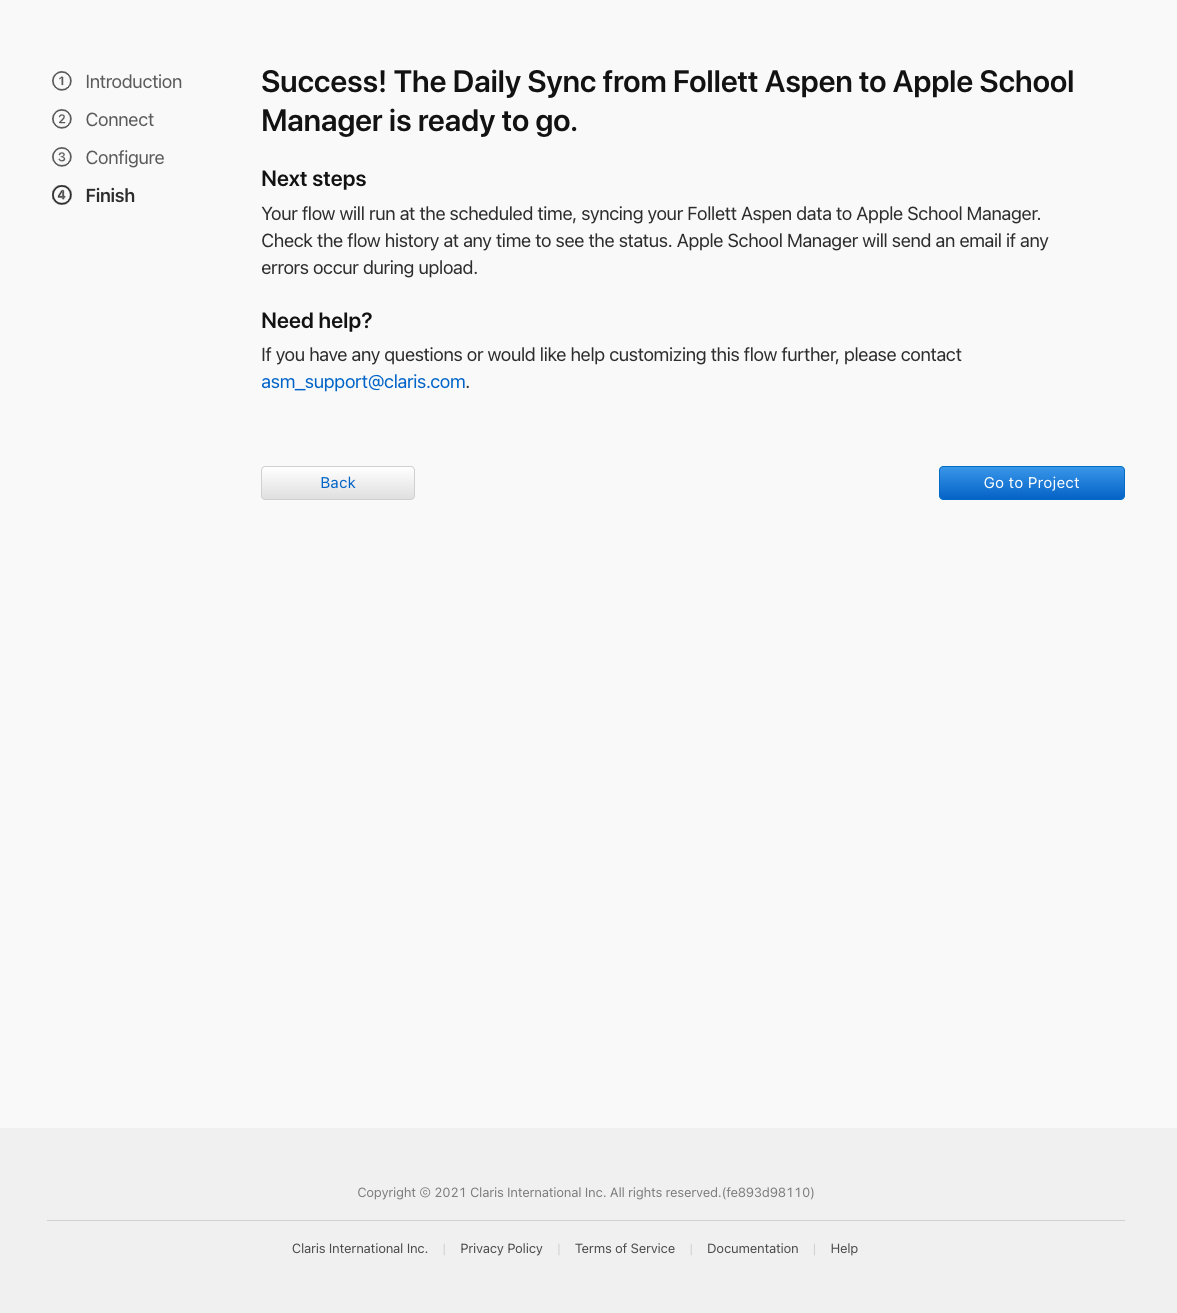
Click Next to go to the Finish page, which describes what happens next:
-
On the Finish page, click Go to Project.
A dialog box prompts you to turn on saving request and response data for the project.
-
To turn on the option for saving request and response data, click Start.
You can view the request and response data for each step of a flow run on the History tab. See Viewing flow history.