Using frames
Frames allow you to display data and content from multiple tables within a single custom view, giving you flexible control over your layout and data presentation.
By default, custom views start with a single frame that uses the full height and width of the view.
Note Frames are only available in custom views.
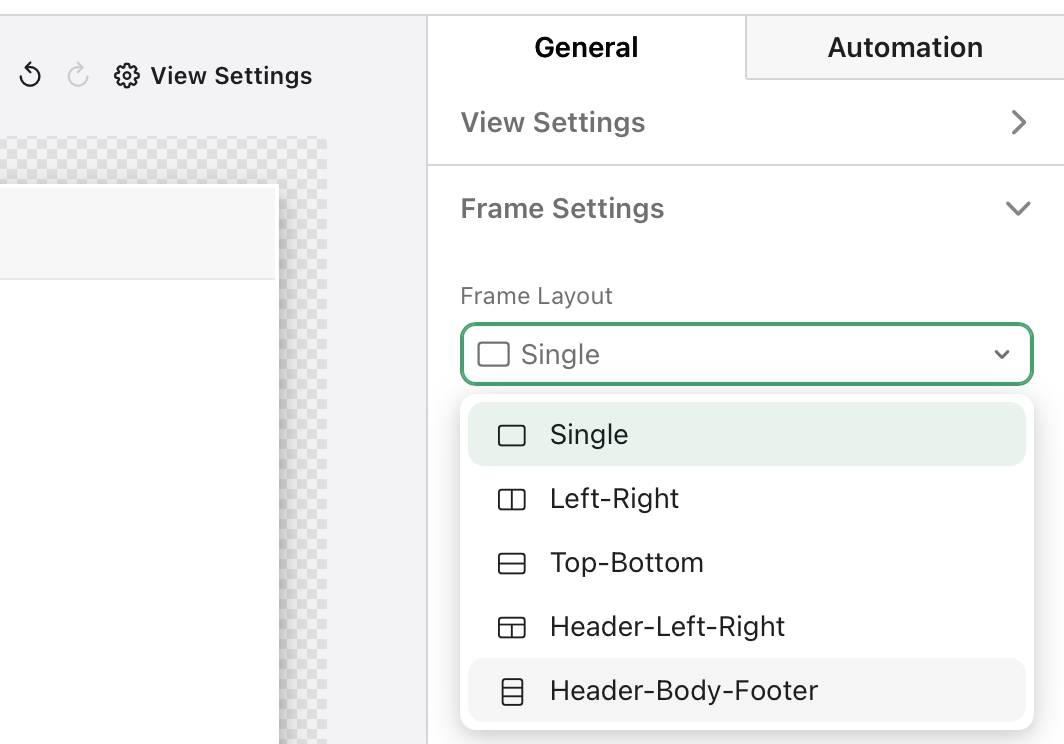
Frame layout options
You can choose from several predefined layout arrangements. To change the frame layout:
-
Click
 View Settings above the main view area.
 -
In the Frame Settings section of the properties pane, choose one of the following Frame Layout options:
-
Single - One frame occupying the full view
-
Left-Right - Two frames side by side
-
Top-Bottom - Two frames stacked vertically
-
Header-Left-Right - Header frame above two side-by-side frames
-
Header-Body-Footer - Three frames stacked vertically
-
Configuring frame properties
With a frame selected, use the properties pane to customize the behavior of the frame.
General tab
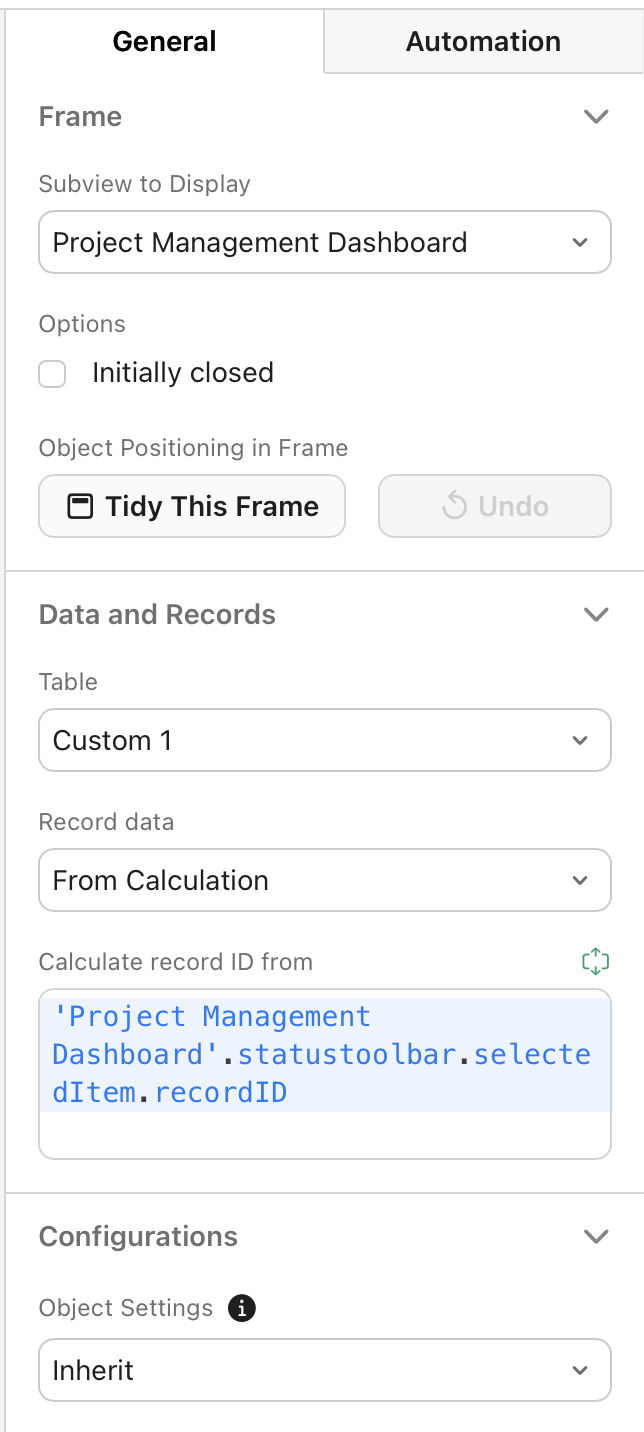
Frame
-
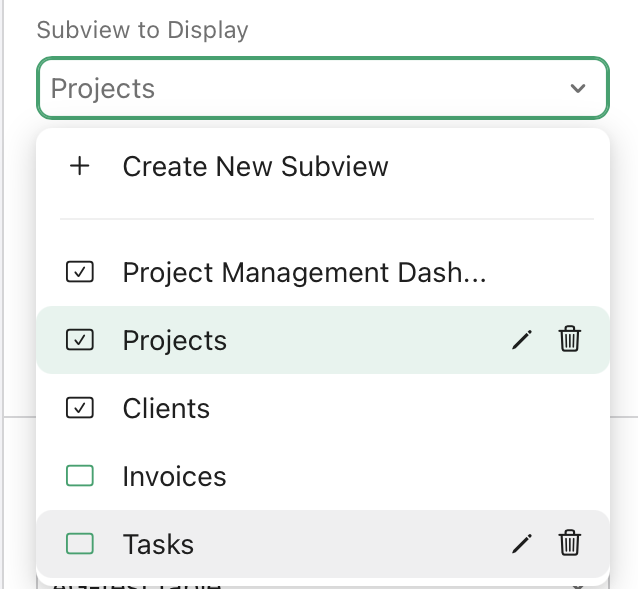
Subview to Display - Choose which subview to display in the selected frame.
You can also create a new subview in the selected frame by clicking the drop-down menu, then clicking + Create New Subview.
-
Options - Use the Initially closed checkbox to set whether the selected frame is closed when the view is first opened.
Note This option is only available when there is more than one frame in a view.
-
Object Positioning in Frame:
-
Click Tidy This Frame to automatically reduce space between objects.
-
Click Undo to reverse recent changes.
-
Data and Records
-
Table - Sets which table for the frame to pull data from.
-
Record data - Controls how record data is calculated.
By default, the initial frame uses the From Calculation option and a status toolbar to determine what record to show in the view. The calculation will look something like this:
'Custom subview'.statustoolbar.selectedItem.recordID
Configurations
Object Settings - Select whether to inherit object settings from view settings or use custom settings specific to the selected subview.
Automation tab
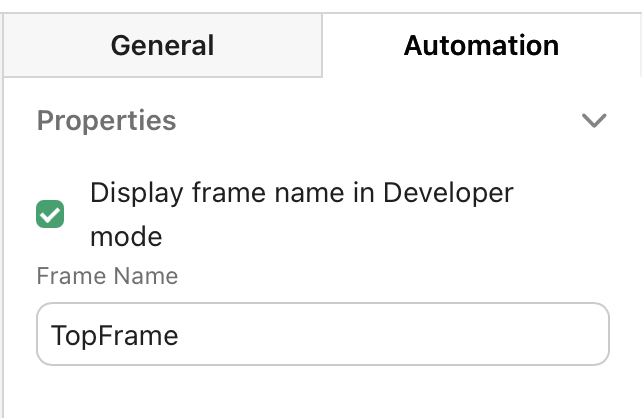
Properties
-
Display frame name in Developer mode - Sets whether the name specified in Frame Name is shown in addition to the subview name when working in developer mode.
Button actions
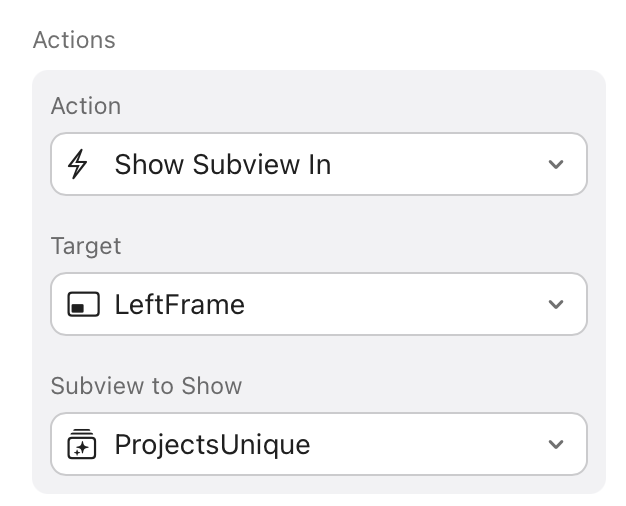
You can also use button actions to control which subview is shown in which frame with a single click. To do this:
-
From the
 Add Object menu, add a button to the view.
 -
Select the button, then go to the General tab of the properties pane.
-
In Configurations > Actions, click Add, then select Show Subview In in the Action menu.
-
Set the following parameters
-
Target - Determines which frame you want the button to target.
-
Subview to Show - Determines which subview to show in the target frame.
-
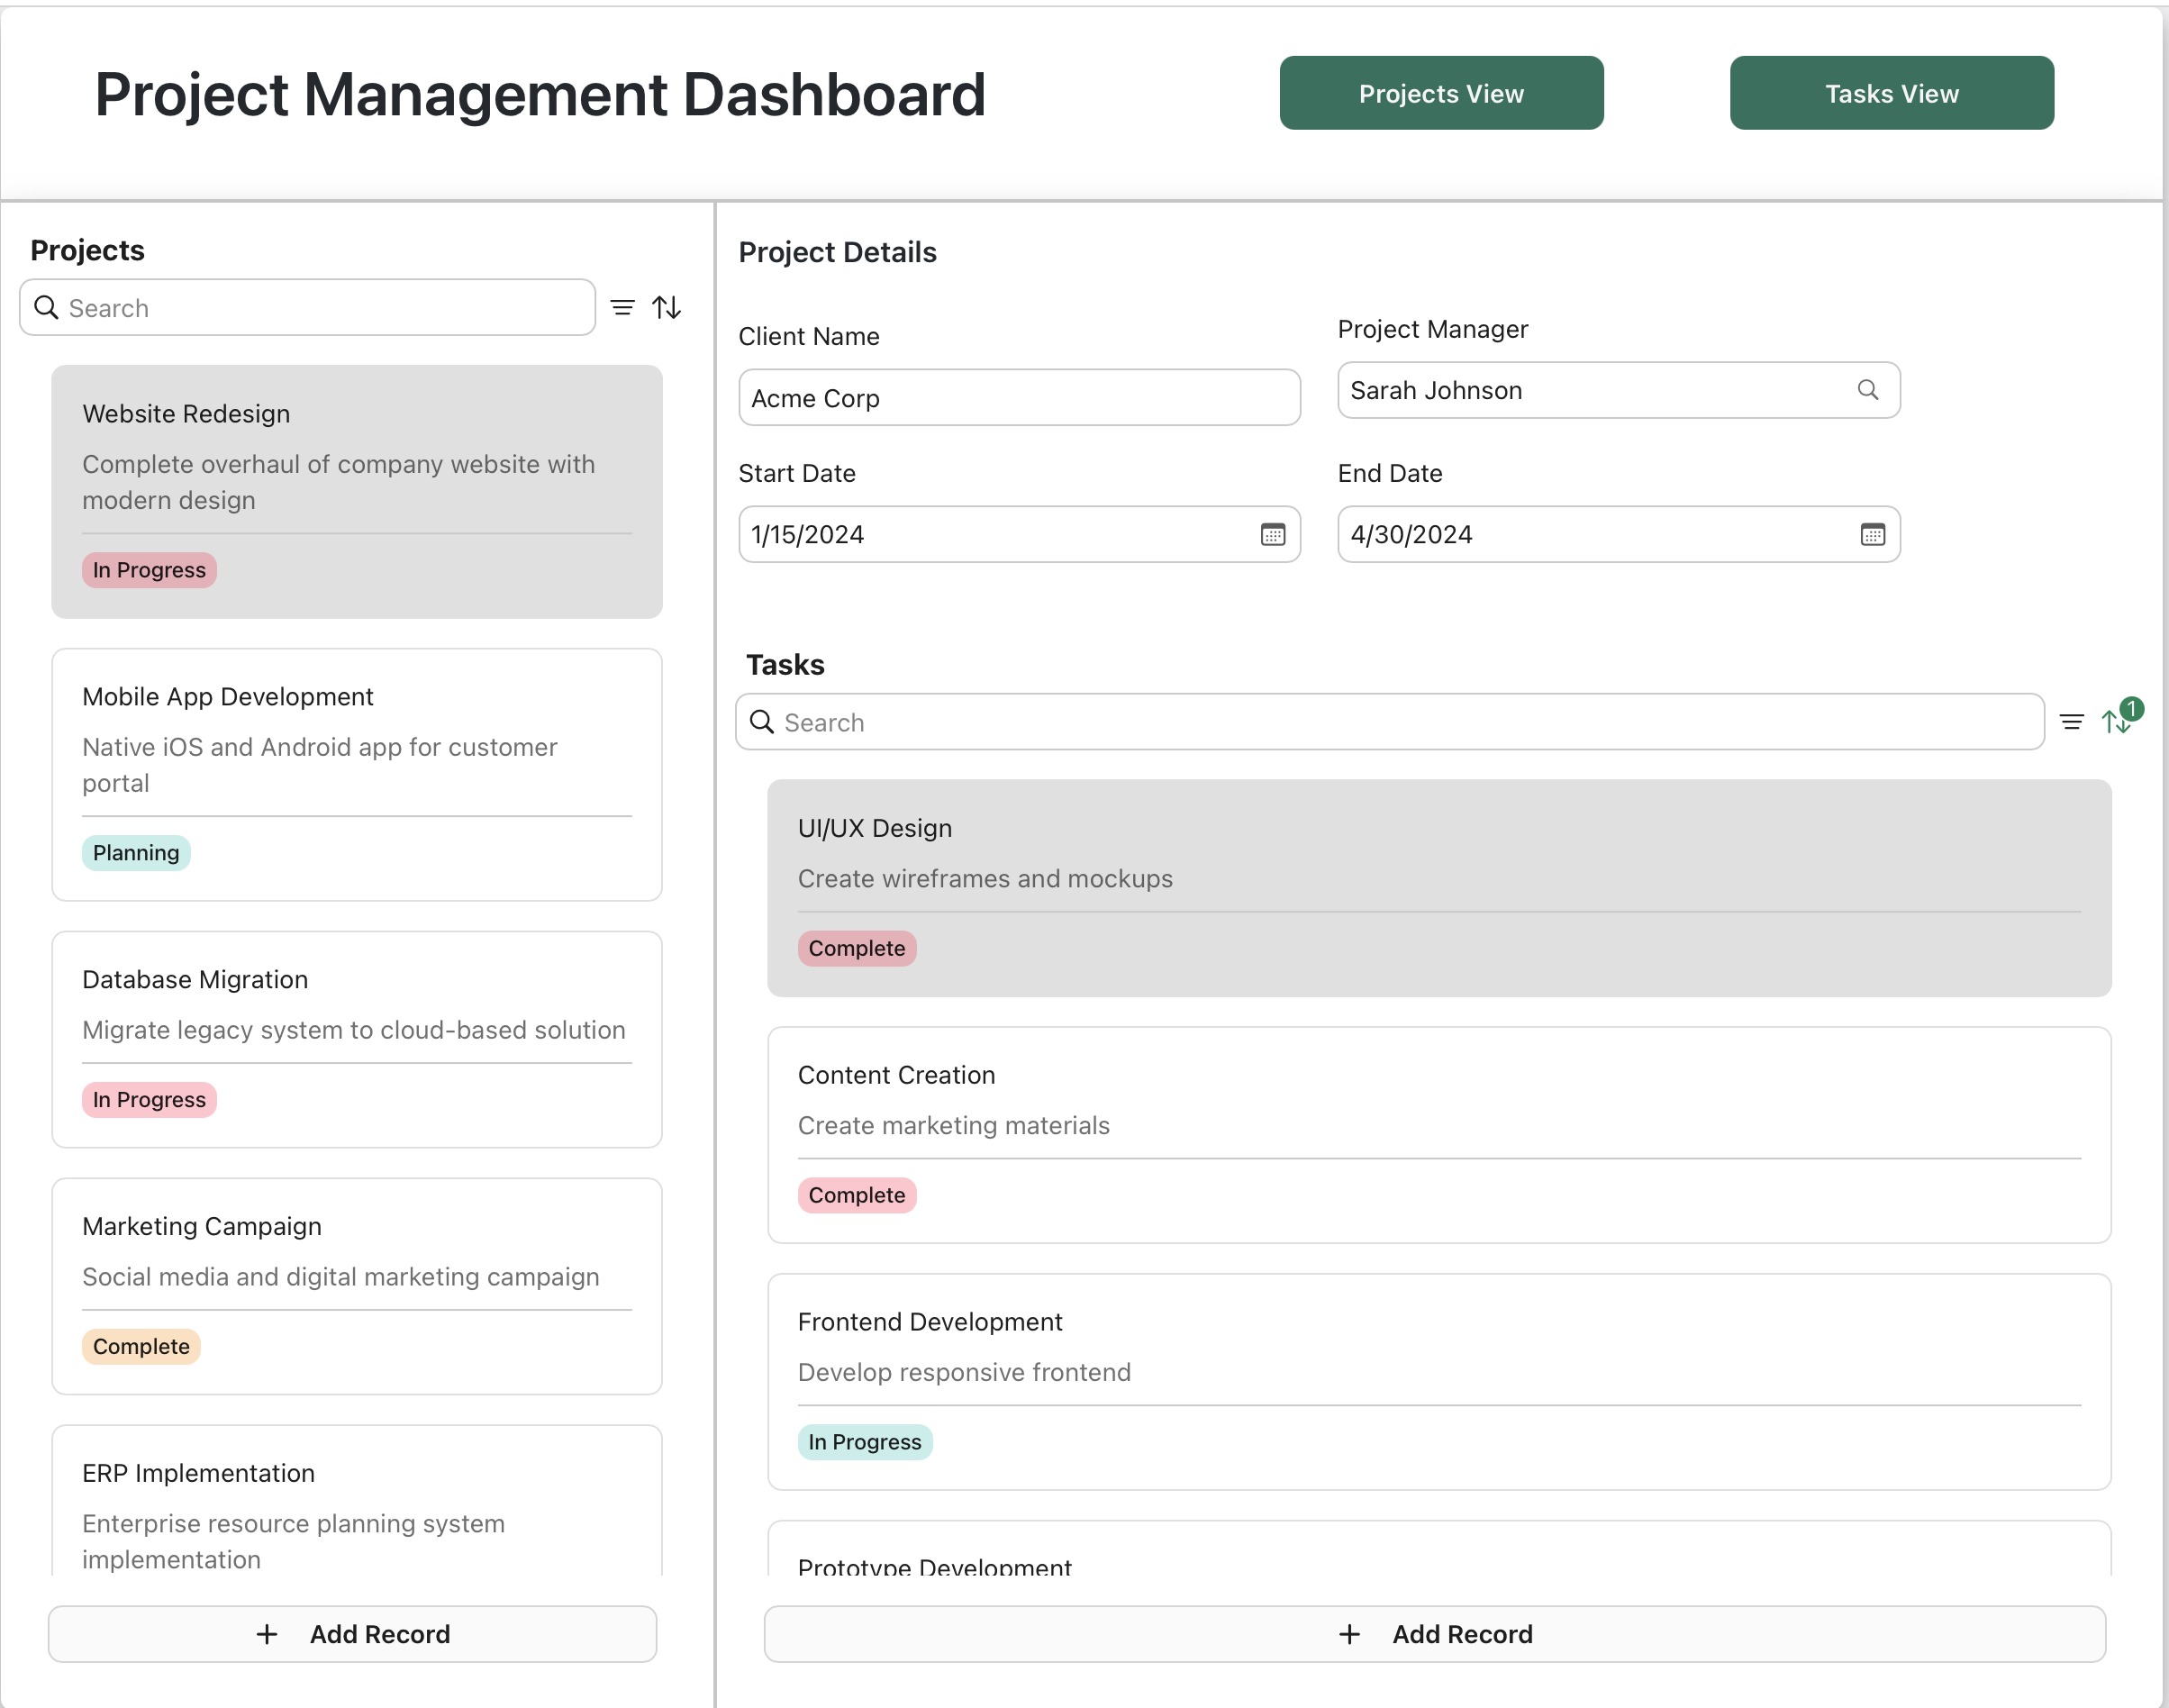
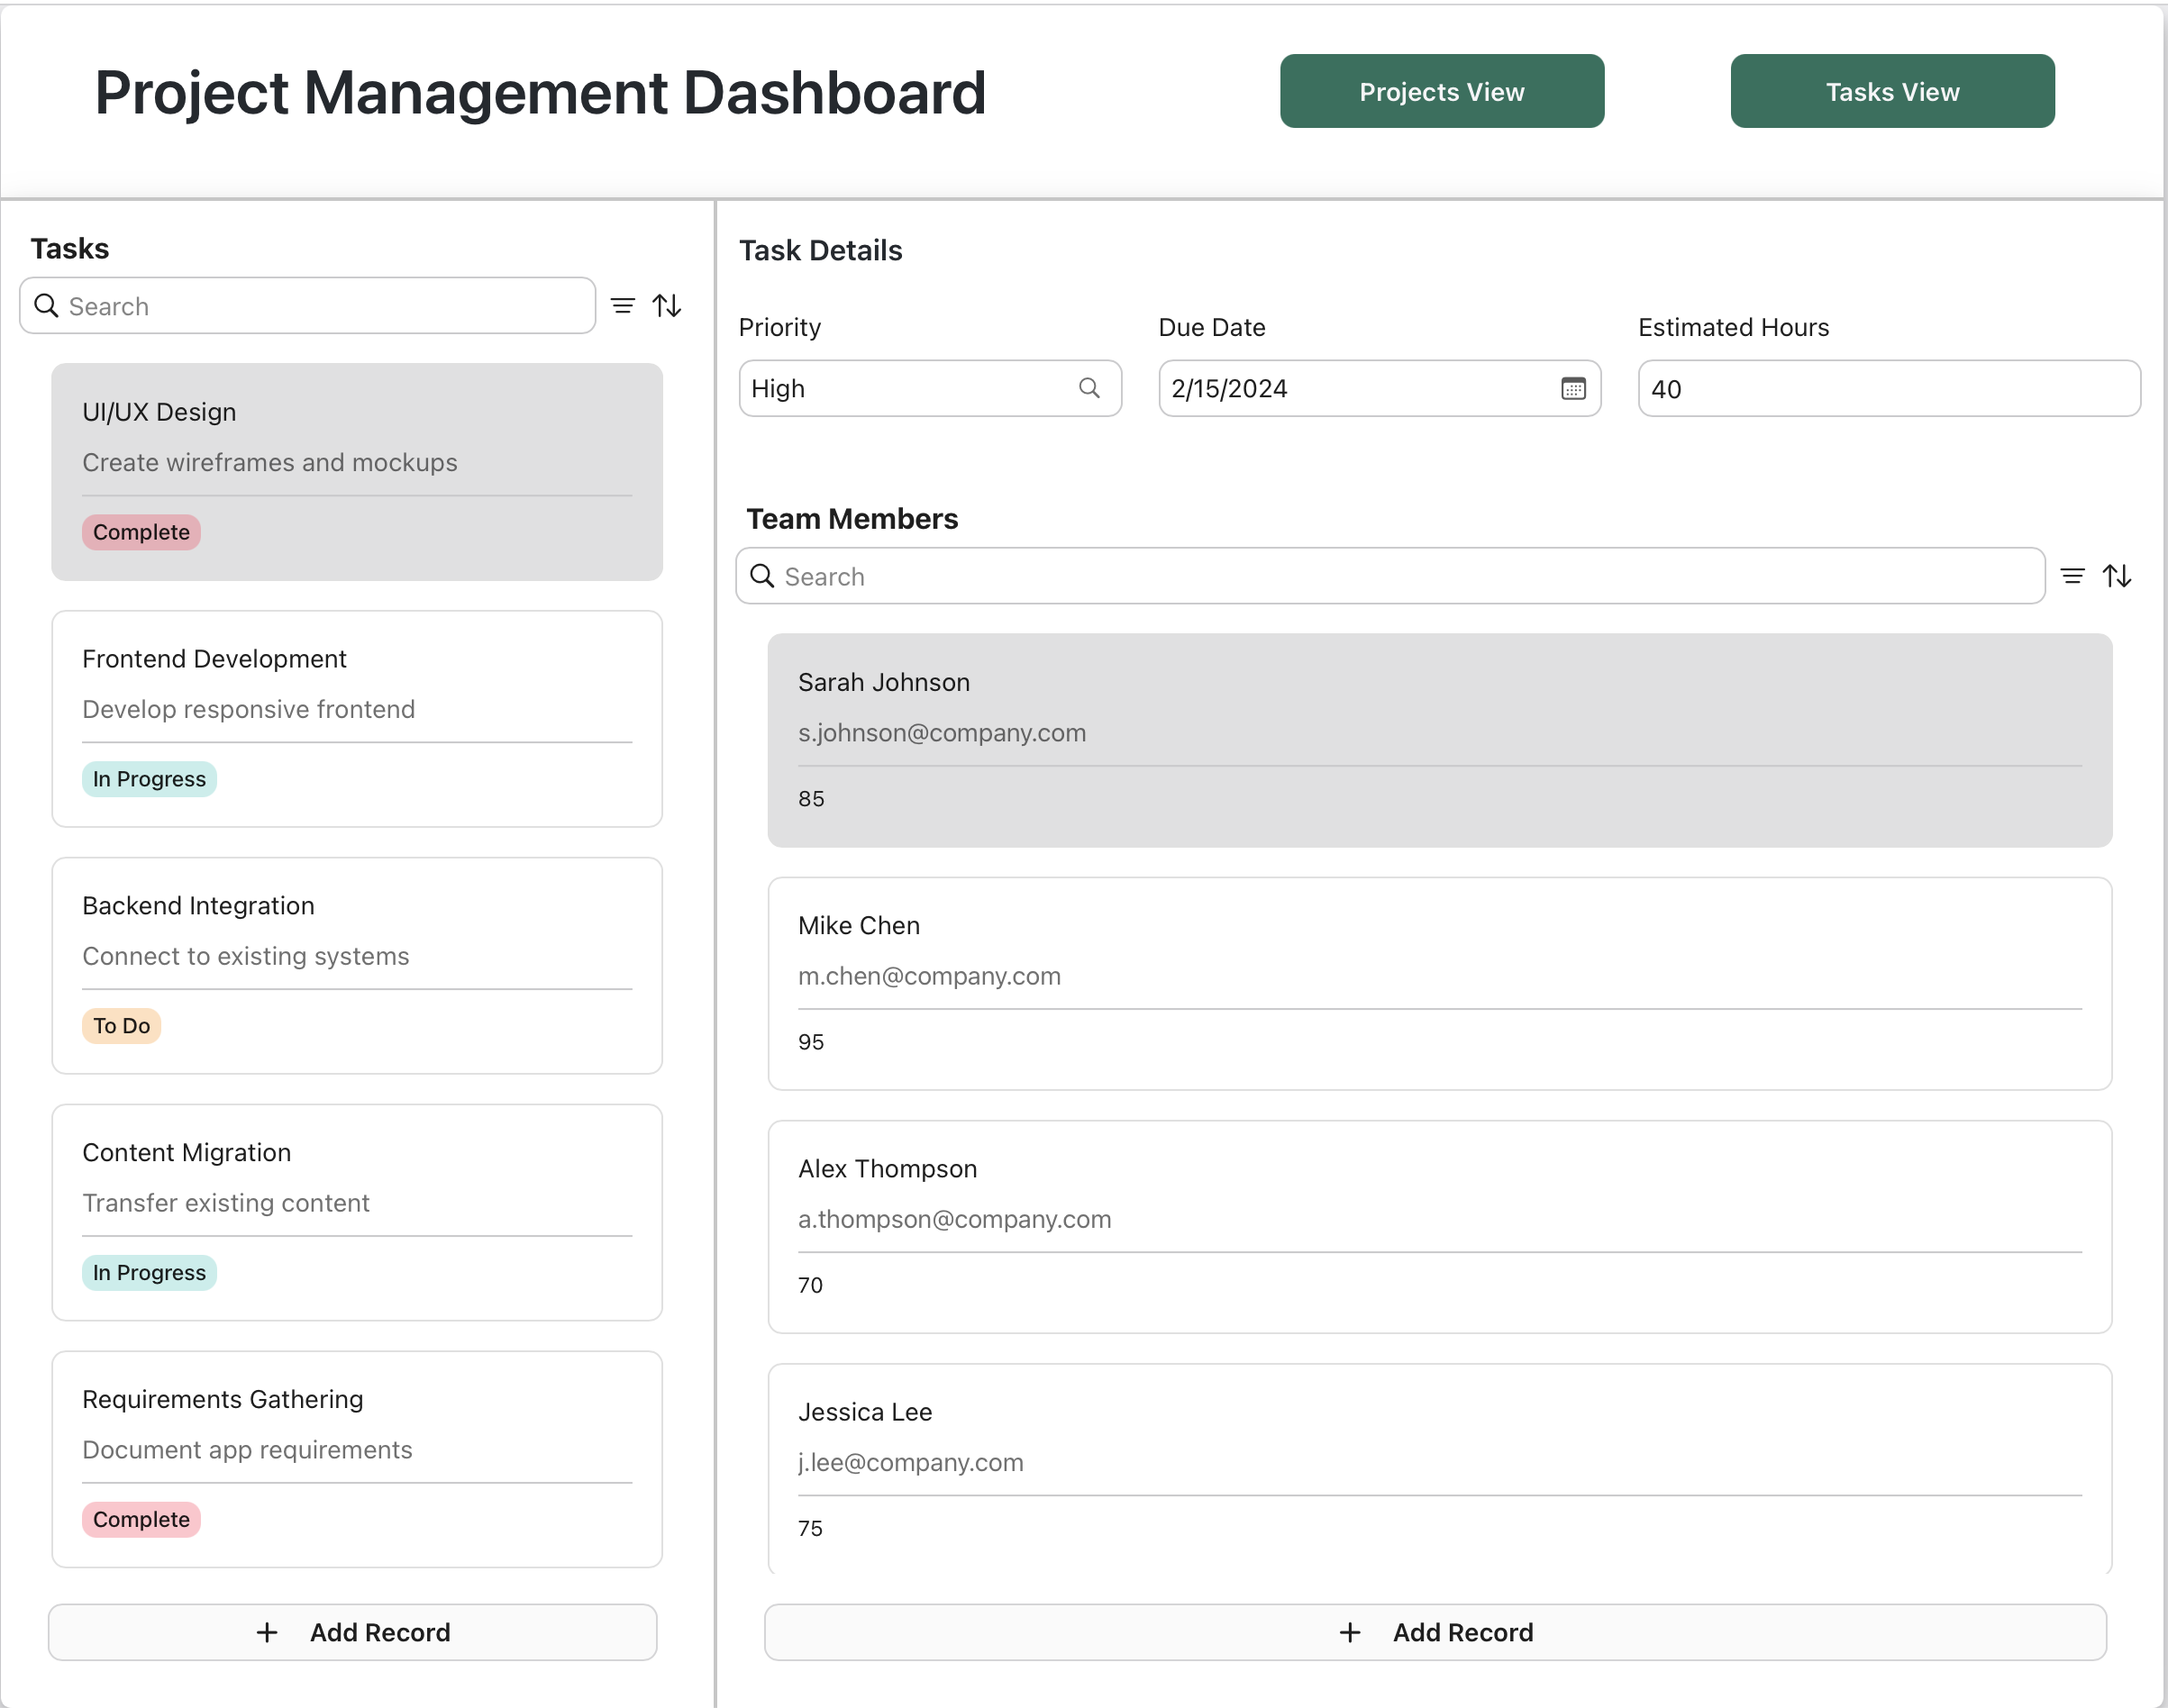
Example: Project management dashboard
This simple example demonstrates how frames can transform a single view into multiple perspectives of your data using a Header-Left-Right frame layout.
Data structure
In this example, we have three tables, one each for projects, tasks, and team members.
Dashboard structure
The header contains the dashboard title and two toggle buttons—Projects View and Tasks View—that change which subviews are shown in the left and right frames:
Projects View
When Projects View is selected:
Left frame - Projects card list (based on the projects table) showing all active projects with search, filter, and sort capabilities.
Right frame - Project detail fields and related tasks card list (based on the tasks table) that updates dynamically when a project is selected.
Tasks View
When Tasks View is selected:
Left frame - Tasks card list (based on the tasks table) displaying all tasks with full search and filtering functionality.
Right frame - Task detail fields and team members card list (based on team-members table) showing relevant team information for the selected task.
Key features
-
Dynamic data relationships - Selecting a project in Projects View automatically filters the tasks shown in the right frame. Similarly, selecting a task in Tasks View updates the team members display.
-
Flexible interaction - All card lists support sorting, filtering, searching, adding new records, and editing existing records by expanding them inline.
-
Multiple table integration - Each frame can connect to different FileMaker tables, allowing you to present related information from your projects, tasks, and team members tables in a cohesive interface.
-
Toggle perspectives - The header buttons let users switch between project-centric and task-centric views of the same underlying data, providing different workflows for different user roles—project managers might prefer Projects View while individual contributors might favor Tasks View.
-
(Optional, not shown) - You can use a combination of the User field with the default value set to "Current User" and filters to personalize which projects and tasks project managers and team members see respectively.
This approach eliminates the need to create separate views for different user perspectives, instead using frames to present multiple arrangements of your FileMaker data within a single, responsive interface.