Adding connections
Creating a database connection is a four-step process that walks you through connecting to your FileMaker database and configuring the available tools.
Step 1: Connection details
-
Click + Add Connection in the sidebar.
-
Enter the following information.
-
Connection Name - A descriptive name for this connection that will appear in your connection list
-
Domain - The FileMaker Server domain
-
For example:
example-server.comNote Do not include https:// or a trailing slash (/). Must also be a fully-qualified domain name (FQDN).
-
-
-
Database - The exact name of your FileMaker file
-
For example:
my-file
-
-
Username - Your file account username
-
Password - Your file account password
-
Click Next to continue to table selection.
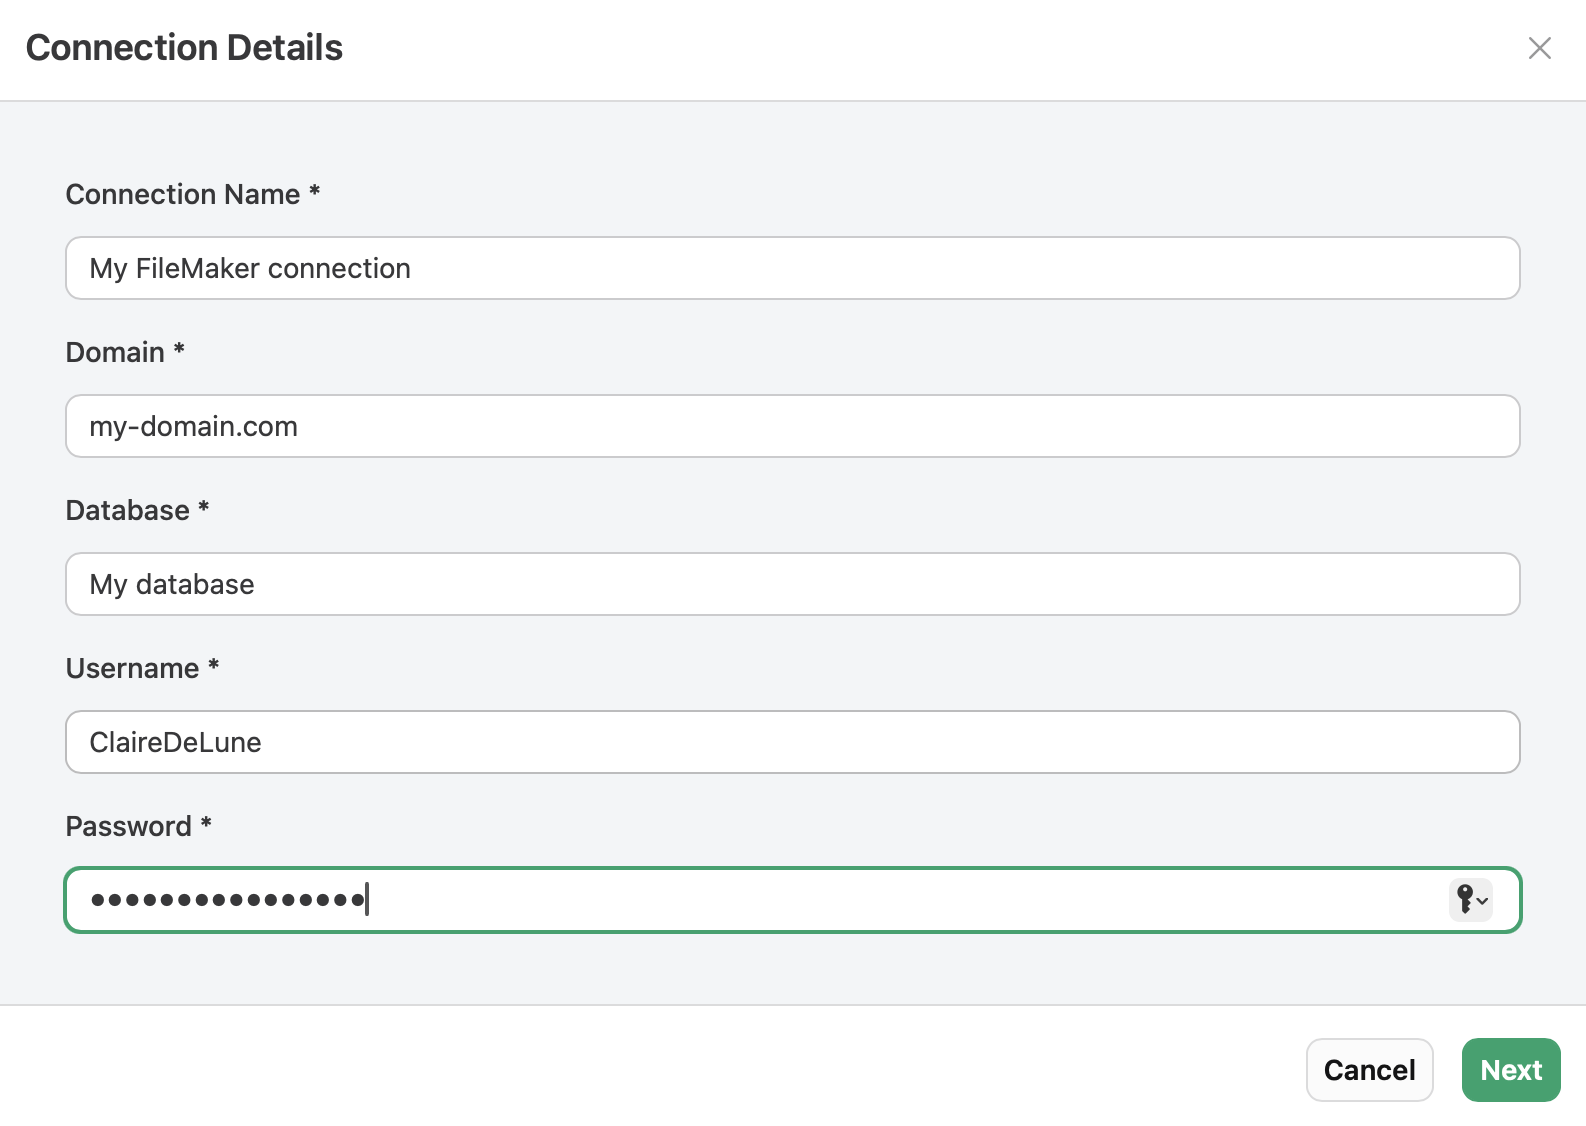
For connection requirements, see System requirements.
Step 2: Select tables
After you make the connection, you'll see all the available tables in your FileMaker file. Here, you can:
-
Search tables - Use the search box to filter tables by name
-
Select or deselect tables in bulk - Click Select All to include all available tables or Clear All to remove all selected tables
-
Select individual tables - Select or unselect specific tables
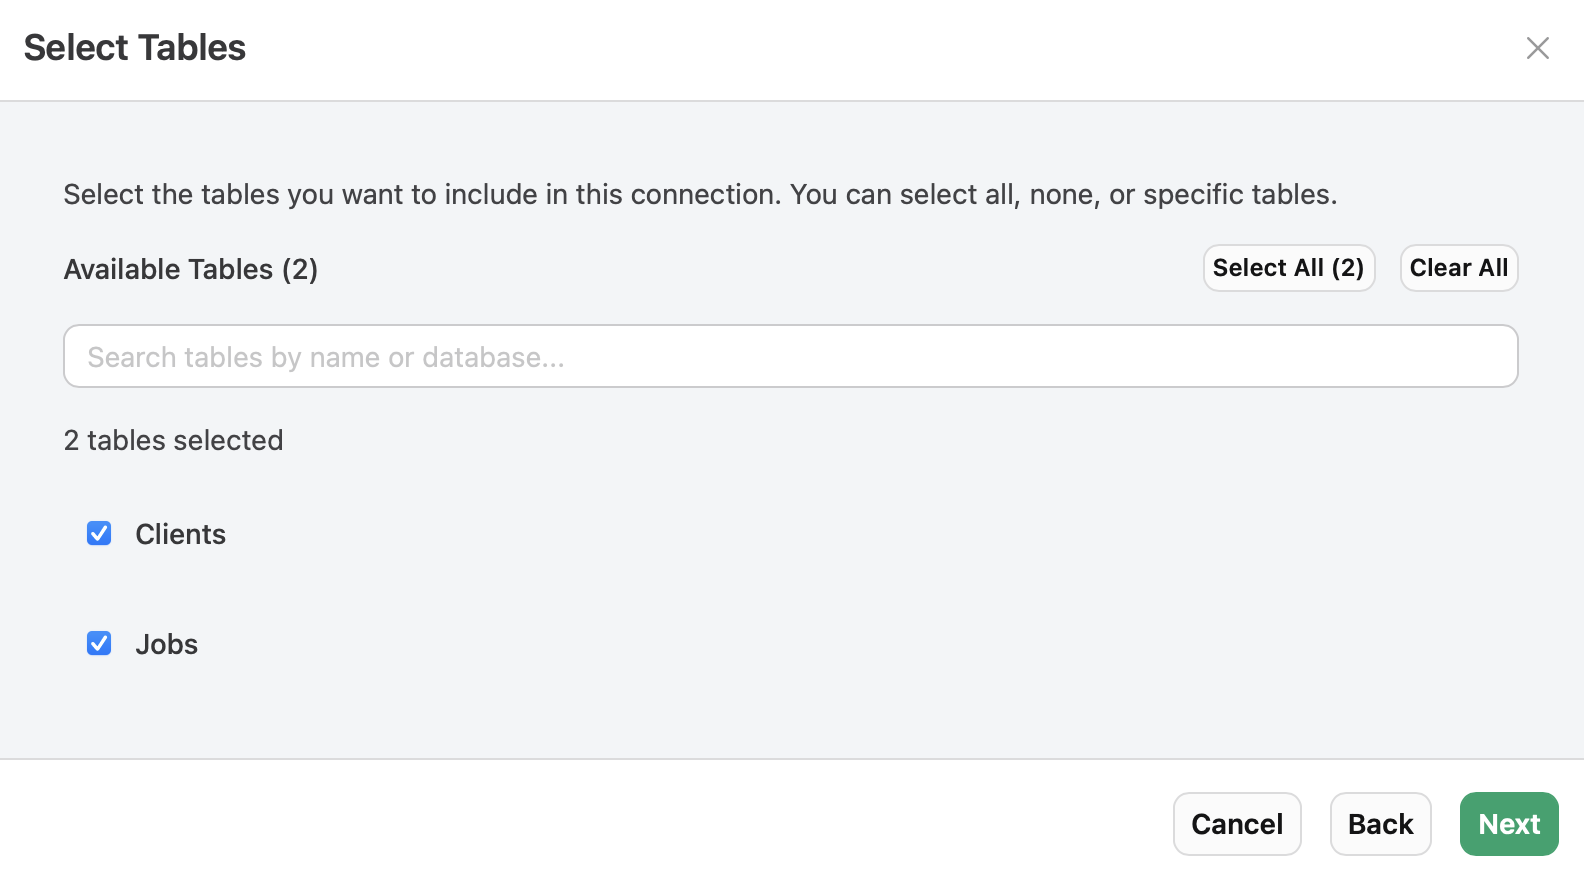
The tables you select will be accessible via the Claris MCP when connected to AI assistants and MCP clients.
Step 3: Select scripts
Similar to table selection, this step allows you to choose which FileMaker scripts to include. Here, you can:
-
Search scripts - Filter scripts by name using the search box
-
Select or deselect scripts in bulk - Click Select All to include all available scripts or Clear All to remove all selected scripts
-
Select individual scripts - Select or unselect specific tables
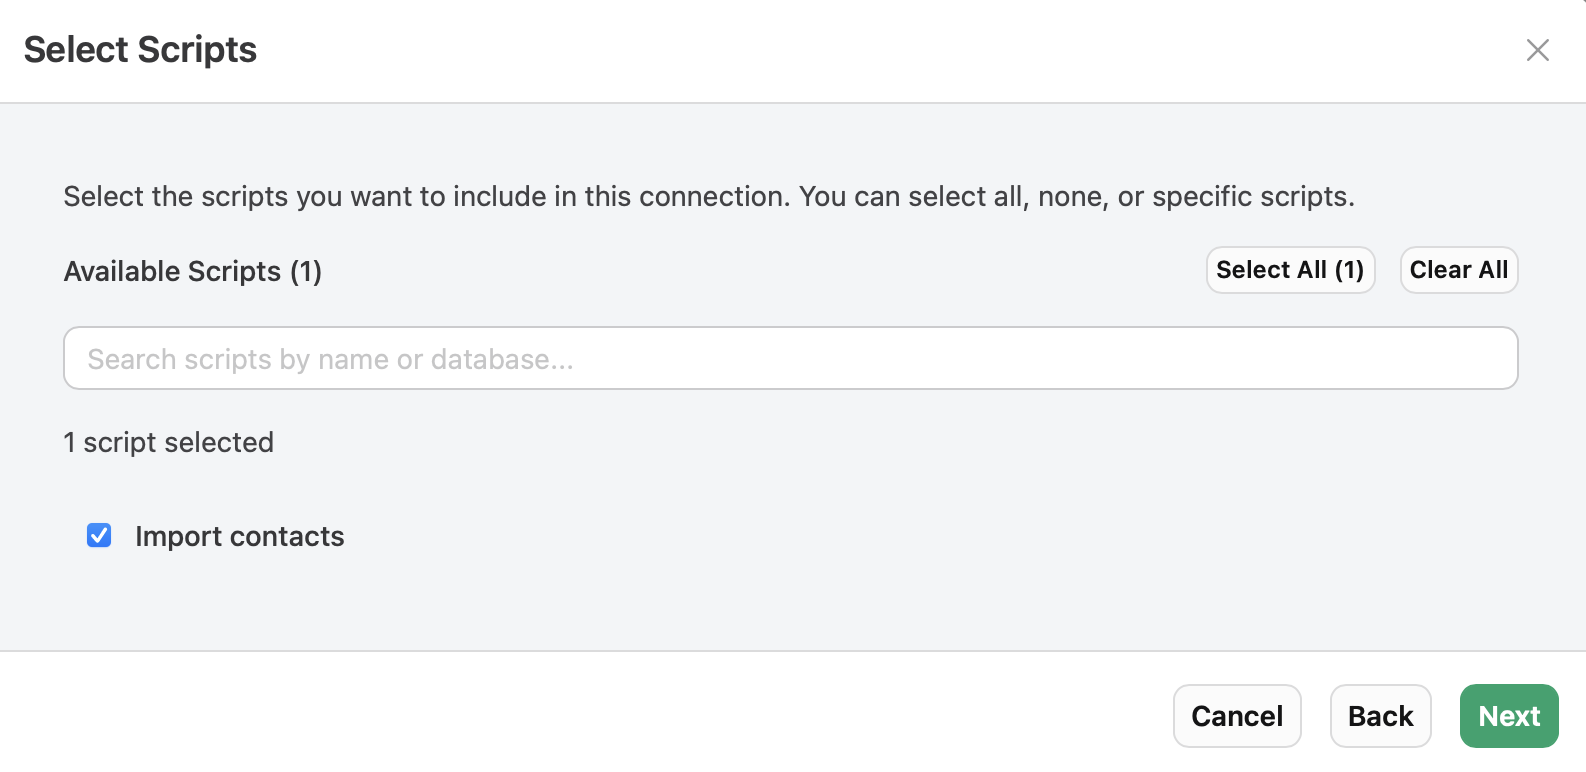
The scripts you select will be accessible via the Claris MCP when connected to AI assistants and MCP clients.
Best practices
-
Only include scripts that are safe to run via external API calls.
-
Avoid scripts that might cause data corruption or system issues.
-
Consider scripts that provide useful functionality for AI assistants.
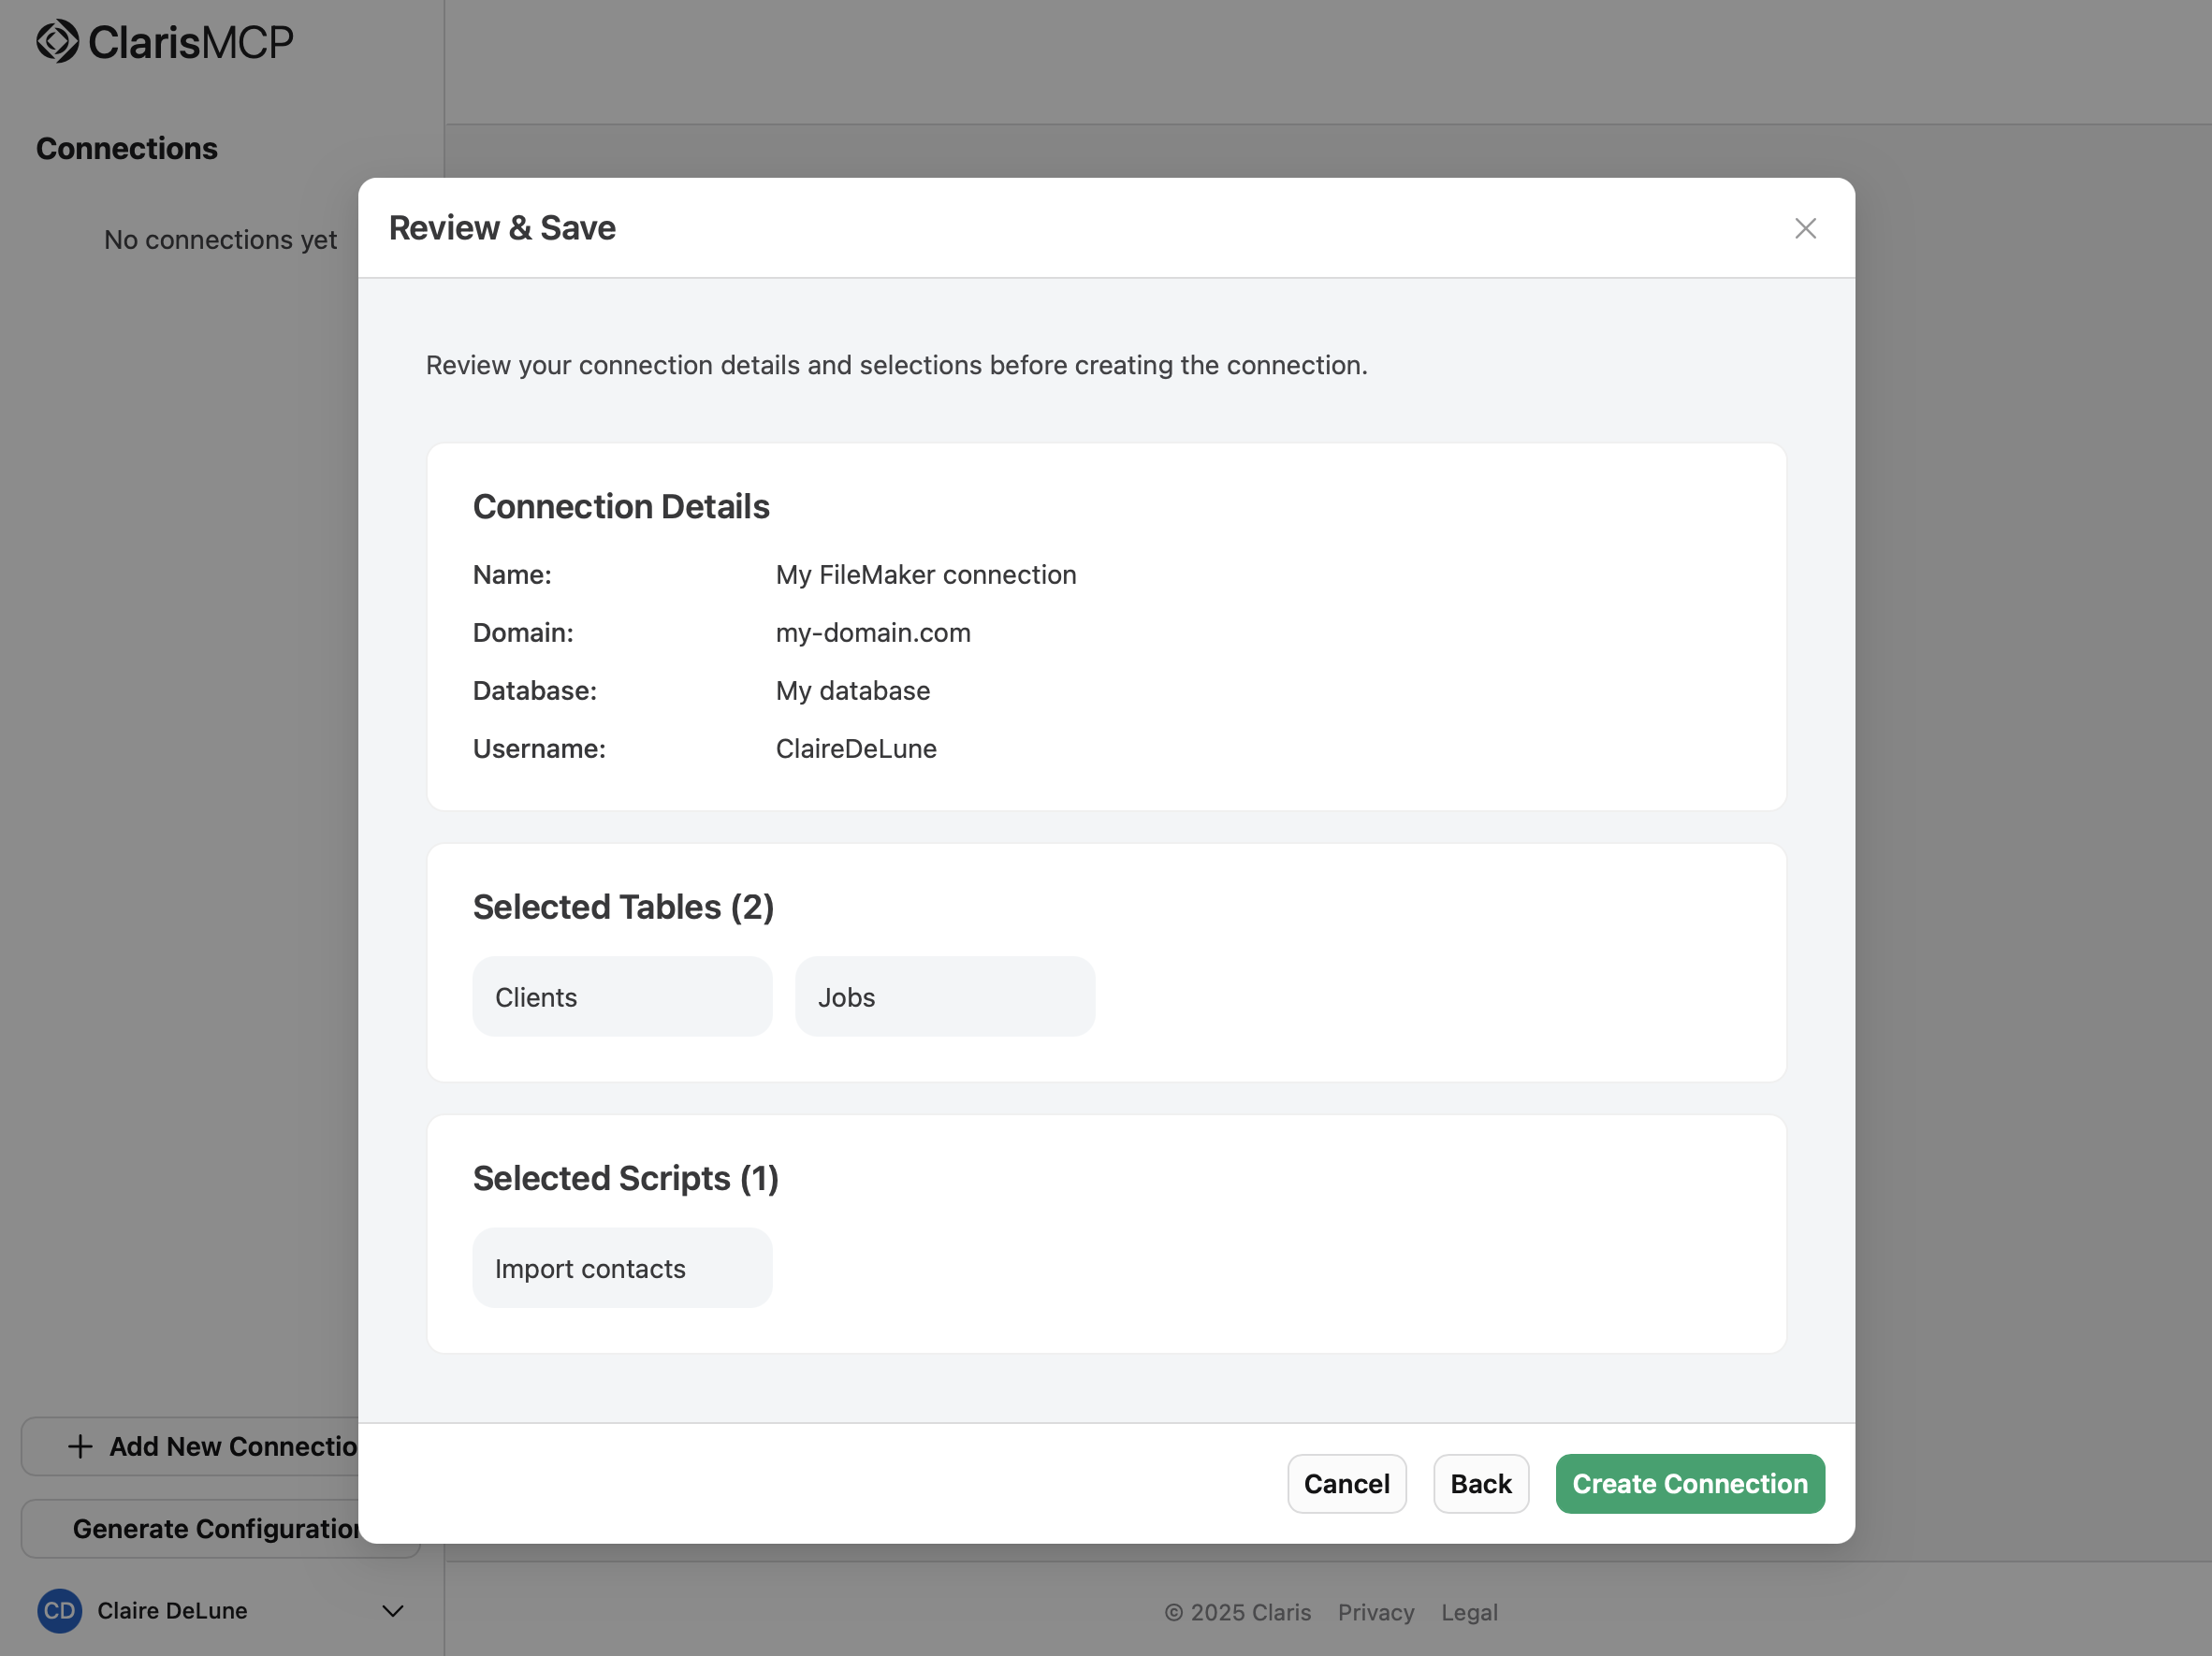
Step 4: Review selections and save
The final step provides a comprehensive review of your configuration:
Connection Details - Shows Name, Domain, Database, and User name of the connection are displayed for verification
-
Password is not shown for security reasons
Selected Tables - Shows all selected tables
Selected Scripts - Shows all selected scripts
Final steps
-
Review all information carefully.
-
Click Create Connection to create the connection, click Back to make more changes, or click Cancel to back out entirely.
After setup, the connection is tested. If the connection test is successful, a set of tools are generated that AI assistants and MCP clients can use to interact with your tables and scripts.
If the connection test fails, you'll receive an error message with details about what went wrong (for example, invalid credentials, database not found, network issues, etc.).
Next steps
Once your connection is created successfully, you can:
-
Click the connection name in the sidebar to view and manage its tools.
See Managing connections.
-
Click Generate Configuration to create a JSON snippet for connecting to AI clients.