GitHub workflow
If you've spent your career in FileMaker, Git can feel intimidating. The good news: you don't need to memorize commands or become a Git expert. Your coding agent can run the commands for you. What you do need is a mental model of where your code lives and how it moves around. That's what this guide is for.
Note Git is already set up in your project When you create a new Agentic Development Toolkit (ADT) project, Git is initialized for you and the finished setup is captured in the first commit — there's nothing to configure inside the project itself. Pass --no-git to adt init to skip it.
adt app add makes its own commit afterward, containing only the files it generated, so app creation is easy to review or undo.
If you're completely new to Git, ask your agent to help you configure Git on your machine. This sets things like your name and email address, which get automatically attached to every commit so the version history knows who made each change.
Note Two things that surprise people in diffs vendor/ is committed source — it's how the data layer stays pinned to the build you tested against, so it shows up in the initial app commit and in upgrade diffs. node_modules/ is generated by pnpm install and is ignored. See Project Folders and Generated Files.
The pattern you already know
In FileMaker, your file lives on a server. You and your teammates open it, make changes, and everyone sees those changes immediately. There's only ever one copy that matters: the hosted file.
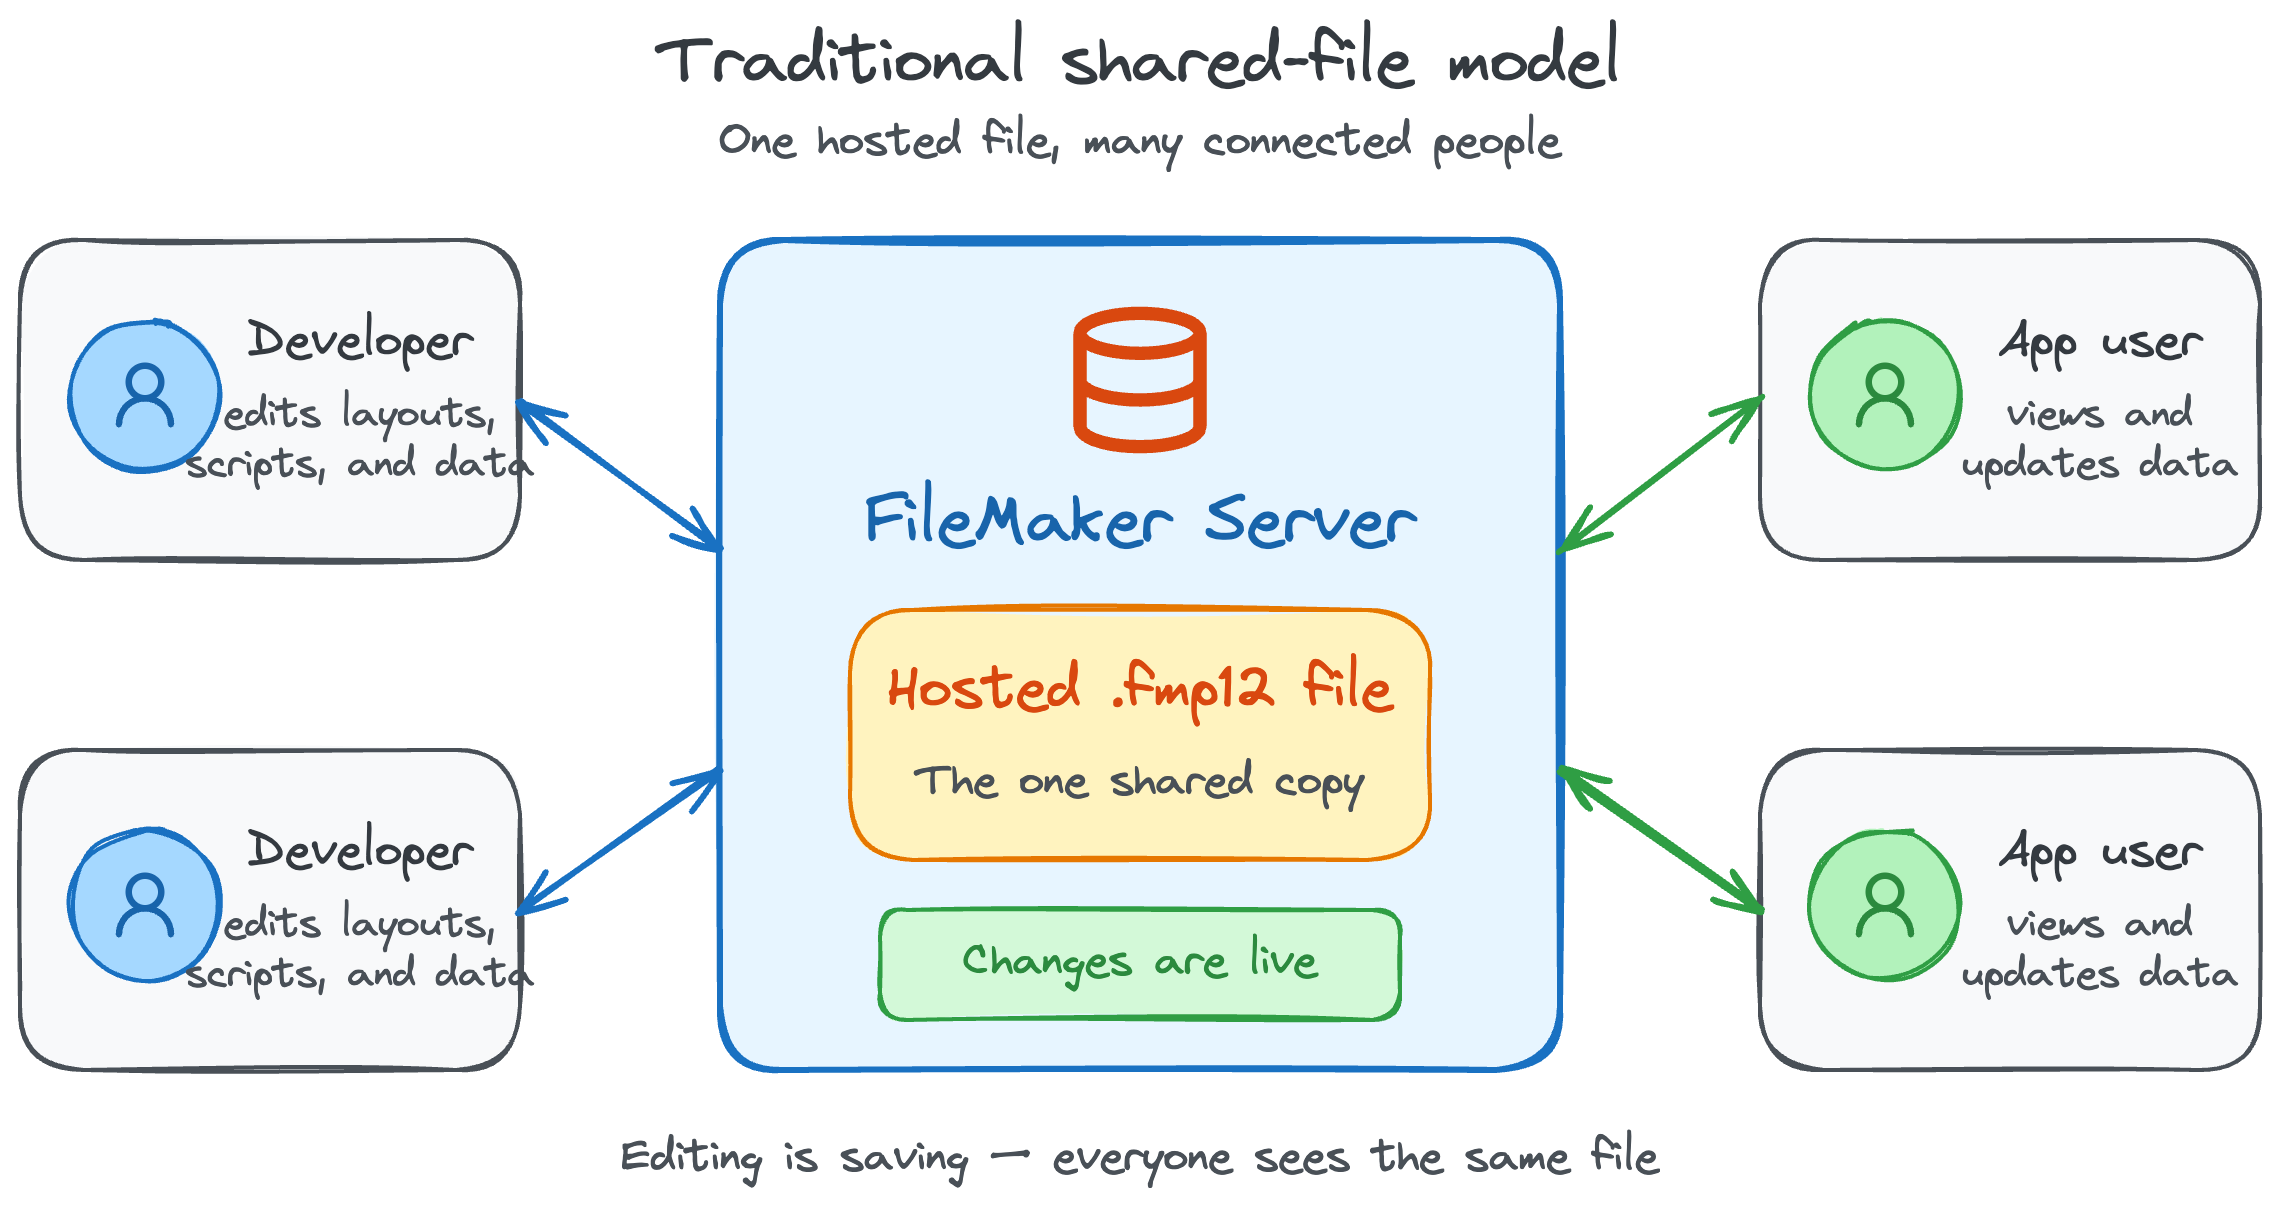
This model is simple because there's nothing to sync. The file is in one place, and editing is saving. There's also no real history — once a change is made, the previous version is gone unless someone happened to take a backup.
How code projects work
Web code projects work differently. Instead of one shared file on a server, every developer has their own complete copy of the project on their own machine. That copy is just a folder, but in Git terms it's called a repo (short for repository).
You make changes in your local repo, then push those changes up to a service like GitHub. GitHub holds the canonical copy that everyone else syncs with.
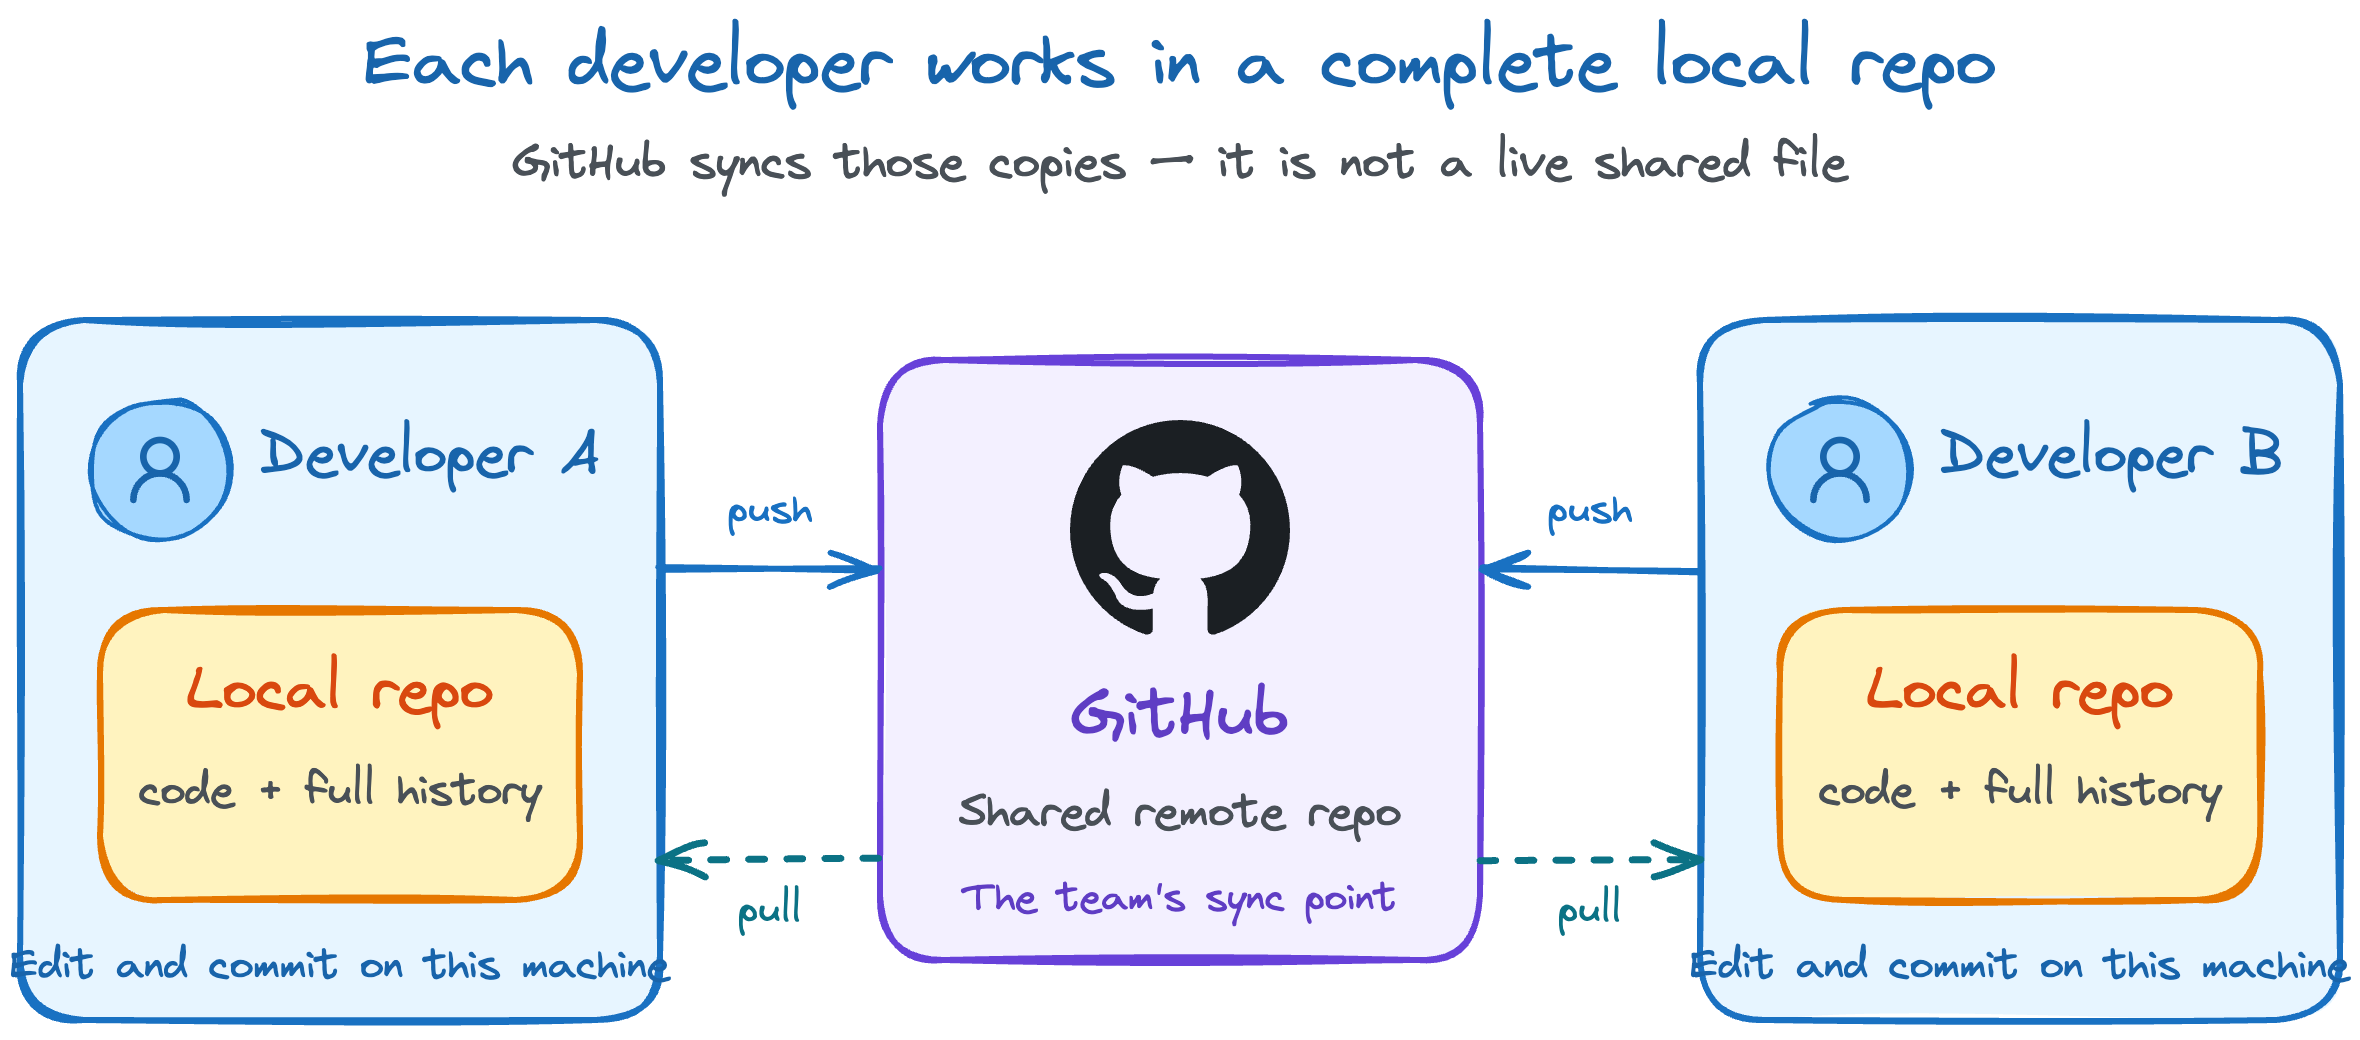
The big shift: there is no live shared file. Each developer works in their own copy, and Git is the tool that keeps those copies in sync.
Terms you'll run into
You don't need to learn these all at once, but it helps to recognize them when your agent (or a teammate) uses them:
-
Repo — the project folder, tracked by Git. You'll have a local one on your machine and a remote one on GitHub.
-
Clone — make a local copy of a remote repo on your machine.
-
Commit — a saved snapshot of your changes, with a short message describing what you did. Think of it as a deliberate "save point" you can return to.
-
Push — send your local commits up to GitHub so others can see them.
-
Pull — bring down commits that teammates have pushed, so your local copy is up to date.
-
Branch — a parallel line of work. You can experiment on a branch without affecting the main version of the project.
-
Merge — combine the changes from one branch into another, usually merging a finished branch back into the main one.
-
Pull request (PR) — a proposal on GitHub to merge one branch into another, usually with a teammate reviewing the changes first.
-
Conflict — what happens when two people change the same lines of the same file. Git asks you to decide which version wins.
If any of these come up, ask your agent for a deeper explanation in the context of your own project.
What this gives you
Once your project lives on GitHub, you get things FileMaker developers have long wished for:
-
Full history. Every change is recorded with who made it, when, and why.
-
Branches. Try out a risky change in a separate branch without touching the main version. Throw it away if it doesn't work, or merge it in if it does.
-
Pull requests. Have a teammate review your changes before they become part of the main project.
-
Safe collaboration. Two developers can work on the same project at the same time without overwriting each other.
Let your agent do the heavy lifting
You don't need to memorize Git commands. To do something in Git, ask your agent in plain language:
Commit my current changes with a clear message.Create a new branch called fix-customer-list and switch to it.Push my work to GitHub.What's the difference between my local copy and what's on GitHub?If a Git concept comes up and you need a clearer explanation — branches, merges, rebases, conflicts — ask the agent to explain it in the context of your project. That's a much faster way to learn than reading Git documentation cold.
Note Use the word 'commit' In FileMaker, saving and history don't really come up — your changes are just there. In a code project, the equivalent of "saving your work to history" is making a commit: a snapshot of the project at a moment in time that you can return to.
When you need your work recorded, ask the agent to commit your changes. That keyword tells the agent you're asking for a Git snapshot, not just an edit. Get in the habit of committing often — every commit is a safe point you can return to.
Publish your project to GitHub
When you create a new ADT project, the local repo on your machine is ready to go — but nothing is on GitHub yet. To get the benefits of remote backup, history you can browse online, and collaboration, publish it on GitHub.
-
Create a free GitHub account.
Go to github.com and sign up. The free tier is plenty for personal projects and small teams — there's no need to pay for anything to get started.
-
Install the GitHub CLI and sign in.
The GitHub CLI (
gh) is what your agent will use to talk to GitHub on your behalf. Install it from cli.github.com, then sign in by running this once in your terminal:Copygh auth loginFollow the prompts to authenticate with your GitHub account. You only need to do this once per machine.
-
Ask your agent to publish the project.
With the CLI installed and authenticated, your agent can create the GitHub repo and push your project up for you.
CopyPublish this project to a new GitHub repo on my account.The agent will confirm the details before creating anything on your account.
Next step
From here on, the workflow becomes a habit: edit, commit, push, repeat. Any time you're not sure what to do next, ask your agent — that's the fastest way to learn Git in the context of your own project.