Changing the background fill and borders of a layout part
You can change the fill or border of individual layout parts. You can also set up different colors for alternating rows of a body part.
Tip You can copy style attributes between parts. See Copying style attributes between objects or layout parts.
|
1.
|
|
2.
|
|
3.
|
In the Graphic area, for Fill, specify a color, a color gradient, or an image. You can apply a fill to a part similarly to how you apply a fill to an object. See Filling an object or a layout part with a color gradient, or Filling an object or a layout part with an image.
|
|
4.
|
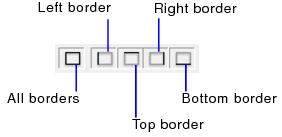
To add a border to the part, in the Inspector, for Line choose a style, width and color for the border, then select All borders, or choose any combination of borders.
|
You can set up an alternating background fill color for body parts to create a visual contrast when viewing lists of records. Even-numbered records use the alternating background fill specified for the body part. For example, to simulate the appearance of green bar paper (a once-common paper type used with dot-matrix printers), you can set up a layout part to display every other record with a light green background.
|
1.
|
|
3.
|
In the Part Definition dialog box, select Alternate background fill and choose a color from the color palette.
|
|
4.
|
|
•
|
|
•
|
When you fill a layout part with an image, the image is stored in the FileMaker Pro file. The image then appears in every record that uses the layout and “fills” the entire width of the FileMaker Pro window when it is resized. You can also insert an image as a static object on a layout, which lets you reference the image from another file. For more information, see Inserting graphics onto a layout.
|
|
•
|
You can also insert graphics as data into container fields. Do this when you have a different graphic for each record, such as employee photos in an employee directory database table. For more information, see Inserting graphics into fields.
|
