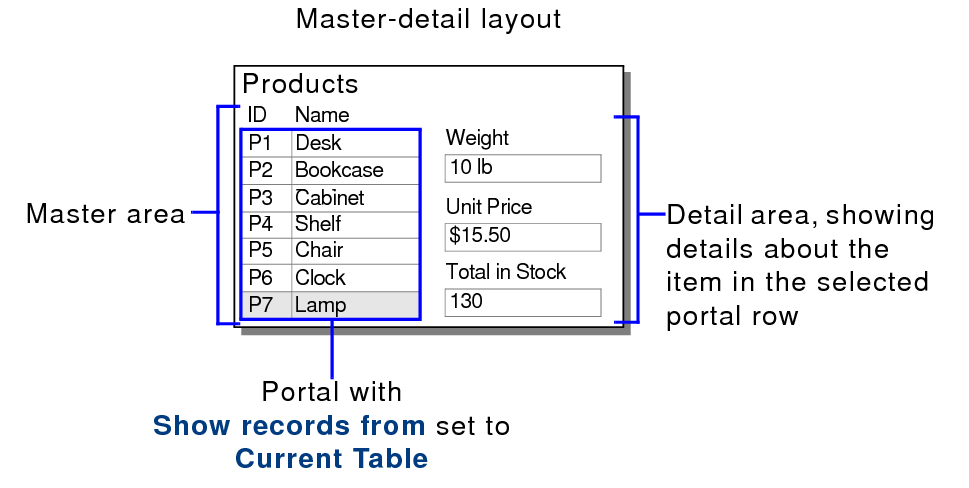
You can create master-detail layouts that work with records in the current found set. Users then choose from a list of items (in the master area of the layout) to view more information (in the detail area) about the item.
For example, in a master-detail layout for products, the product names are listed in the master area and the weight and price of the selected product are displayed in the detail area.
On a layout:
•The master area is a portal that shows records from the current table. To allow users to identify the record, add only the necessary fields to the portal—for example, Product ID and Name. See the steps below.
•The detail area is a set of fields that show more information about the selected row in the portal—for example, Weight and Unit Price. See Placing and removing fields on a layout.

1. On the layout where you want to add a portal, click the Portal tool  in the status toolbar.
2. Position the crosshair pointer on the layout where you want the portal to begin, then drag the pointer diagonally until the portal is the size you want.
3. In the Portal Setup dialog box, for Show records from, choose Current Table.
4. For Show scroll bar, choose an option.
5. Select format options for the portal.
You can specify the number of rows in the portal and the background color for portal rows. See Formatting portals.
6. Click OK.
7. In the Add Fields to Portal dialog box, choose the fields that you want to appear in the portal.
Tip You can drag objects, such as fields, onto the first row of an existing portal to add them to the portal.
For this action | Portals for the current table | Portals for a related table |
Sorting and filtering records | Display all records in the current found set and in the current sort order. | Allow you to filter or sort rows in the portal differently from the records in the found set. |
Clicking a row | Make the row active and navigate to the corresponding record, making it the current record. | Make the row active. To navigate to another record, you need to add a button action to an object in the portal. |
Adding or deleting rows | Add or delete a record in the current found set. | Add or delete a record in the related table. |
Displaying find requests | Display a row for each find request in the order they were created. | Always display one row for the current find request. |
Committing changes | Commit all changes in the current record when you choose a different portal row. | Don’t commit changes in the current portal row when you choose a different portal row. Changes in all portal rows are committed together when you commit the current record. |
Navigating between fields with the Tab key, finding and replacing data, checking spelling, copying records, saving data as an Excel file, and similar operations | Operate only on the current portal row before moving to other objects on the layout. | Operate on all portal rows, one after another, before moving to other objects on the layout. |