Creating portals to display related records
To create a portal that displays data from related fields in rows, first define a relationship between the table occurrence that the current layout is based on and another table occurrence. Use the Manage Database dialog box. See Defining database tables and Creating and changing relationships.
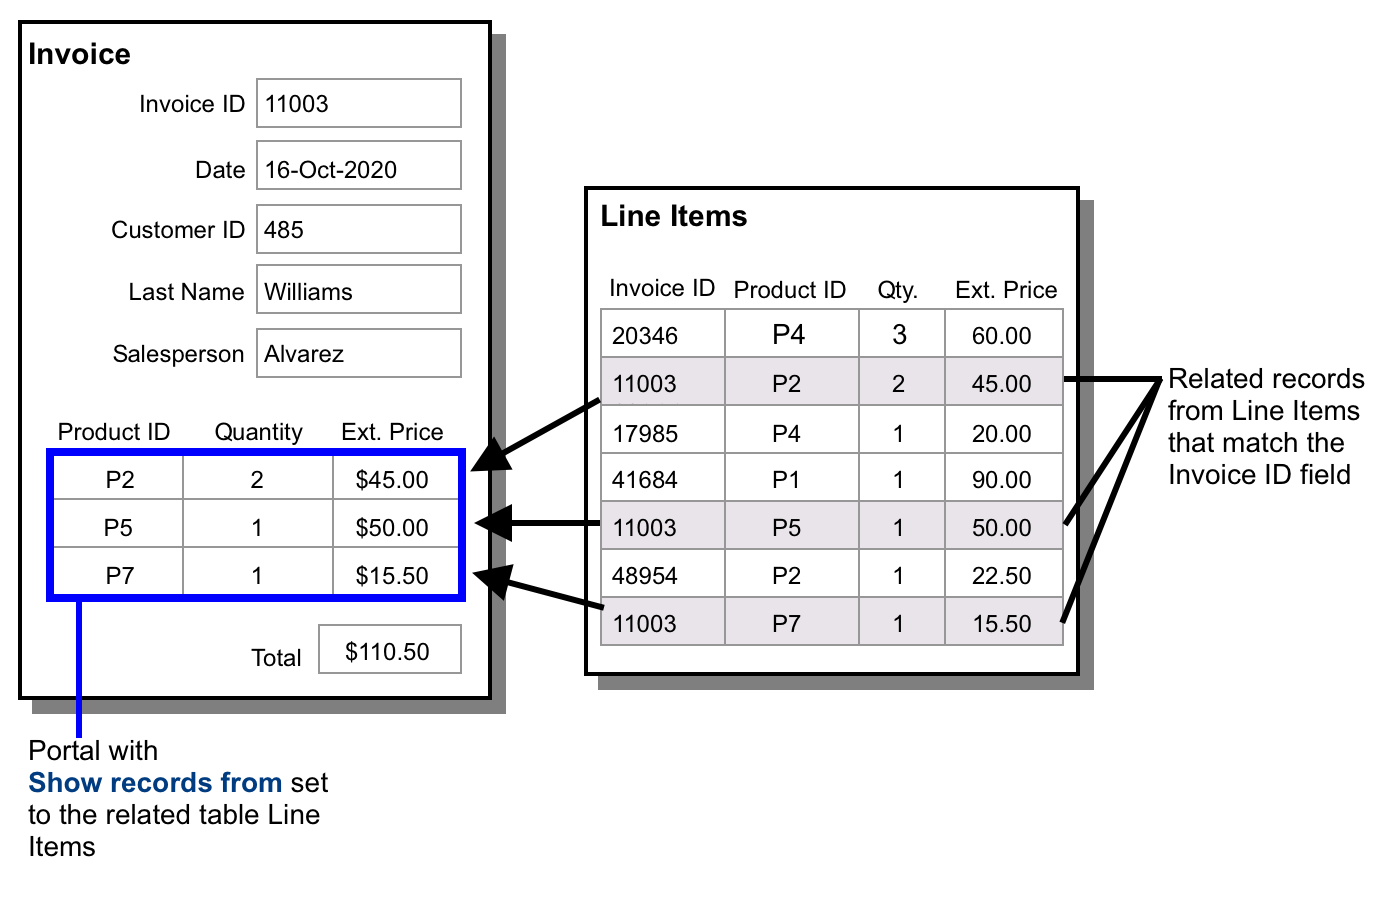
For example, in an invoice layout, you can add a list of line items by creating a portal that shows related records from the Line Items table.

To create a portal that displays related records:
- In Layout mode, click the Portal tool
 in the status toolbar.
 - Position the crosshair pointer on the layout where you want the portal to begin, then drag the pointer diagonally until the portal is the size you want.
- In the Portal Setup dialog box, for Show records from, choose the related table from which to display related records.
To create a new table or relationship, choose Manage Database.
- Select record options for the portal.
- Select format options for the portal.
You can specify the initial related record to display in the portal, the number of rows in the portal, and the background color for portal rows. See Formatting portals.
- Click OK.
- In the Add Fields to Portal dialog box, choose the fields that you want to appear in the portal.
Tip You can drag objects, such as a related field, onto the first row of an existing portal to add it to the portal.
|
To |
Select |
|
Sort the records in the portal |
Sort portal records (or click Specify). In the Sort dialog box, choose the fields by which to sort the portal records, and click OK. |
|
Filter the records in the portal |
Filter portal records (or click Specify). In the Specify Calculation dialog box, define a formula for a calculation to filter the portal records, and click OK. |
|
Allow related records to be deleted from the related table (in Browse mode) |
Allow deletion of portal records. This option does not need to be selected when you use the Delete Portal Row script step. |
|
Display a vertical scroll bar at the right side of the portal, with which users can see (and enter) more records than are visible in the portal at one time |
Allow vertical scrolling. Then, for Show scroll bar, choose Always (the default) to have the scroll bar display all the time, or When scrolling to have it display only while scrolling occurs. To have the scroll bar display the portal's first record when you exit the current record, select Reset scroll bar when exiting record (or, clear this option so the scroll bar does not reset). Note You can't change the style of scroll bars. |